
Bread is one of the most versatile kitchen staples, and these bread recipes prove it. From sweet bread desserts to savory bread meals, you can transform a simple loaf into delightful snacks, hearty dinners, or decadent treats.
Whether you’re looking to use up leftover bread or impress guests with a unique dish, this collection has you covered – including everything from quick 10-minute bites to comfort-food casseroles.
Key Takeaways
- Versatility of Bread: These recipes highlight bread’s ability to go sweet or savory – think gooey cinnamon pull-aparts, fresh berry desserts, cheesy appetizers, and even soups and salads with bread.
- Waste-No-More Ideas: Many dishes (like panzanella salad and bread pudding) cleverly use day-old or stale bread, turning leftovers into something extraordinary (Panzanella Recipe – Love and Lemons) (Chocolate Bread Pudding (Rich Breakfast or Dessert Recipe) – Olives + Thyme).
- Flavor Boosters: Common threads include bold flavors – garlic and herbs in savory dishes, spices and fruits in sweet ones. Ingredients like cinnamon, basil, or chocolate pair with bread to create memorable tastes.
- Ease & Convenience: There’s a mix of quick fixes (some ready in 10-15 minutes) and make-ahead meals (overnight casseroles for stress-free mornings). Busy cooks will appreciate options like 10-minute avocado toast and overnight French toast bake.
- Dietary Variety: The list includes something for everyone – indulgent treats for cheat days, vegan and vegetarian-friendly choices (avocado toast, panzanella, fatteh), and protein-rich combos (eggs, cheese, chickpeas, etc.).
- Crowd-Pleasers: Many of these are family-friendly or great for gatherings. From kids to adults, who can resist the “best garlic bread ever” or a dish that “tastes like the sticky center of a cinnamon roll” (Homemade Monkey Bread (Recipe + Video) – Sally’s Baking Addiction)? These recipes are designed to impress and satisfy.
Now, let’s explore each recipe in detail – with what makes it special, who it’s ideal for, plus handy tips and tweaks. Enjoy the journey through these bread-based delights!
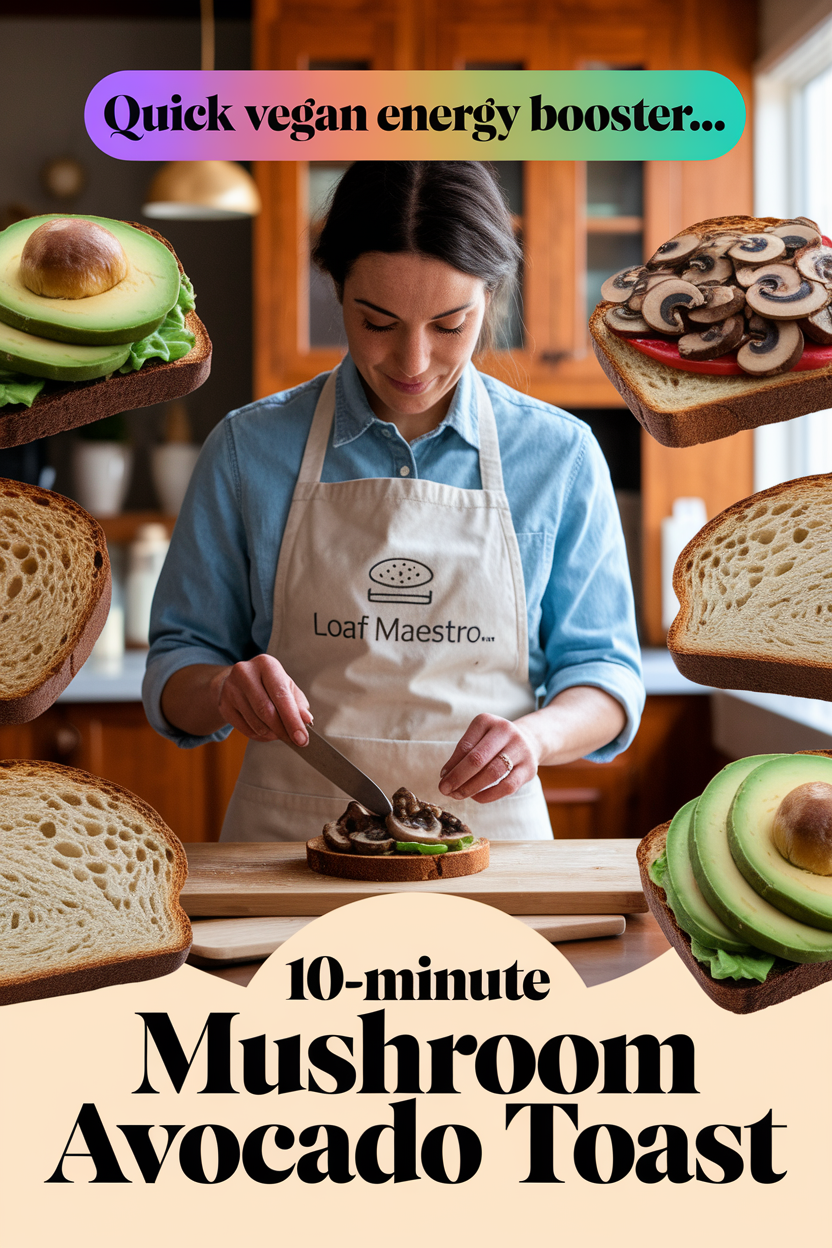
1. 10-Minute Mushroom Avocado Toast – Quick Vegan Energy Booster
Description: A speedy, savory toast that layers creamy avocado and subtly spicy sautéed mushrooms atop crusty bread.
This plant-based snack bursts with umami from garlicky shiitake mushrooms and richness from smashed avocado (10-Minute Mushroom Avocado Toast – Minimalist Baker Recipes).
Ready in just 10 minutes with one pan, it’s a nutrient-dense bite that’s perfect any time of day.
Why It’s Great:
- Lightning Fast & Easy – Just 10 minutes for a satisfying bite (10-Minute Mushroom Avocado Toast – Minimalist Baker Recipes).
- Flavor-Packed – Garlic, thyme, and red pepper flakes give a savory kick (10-Minute Mushroom Avocado Toast – Minimalist Baker Recipes).
- Healthy & Vegan – Loaded with fiber, healthy fats, and mushrooms for a plant-based boost.
- Minimal Cleanup – One-pan sauté means fewer dishes.
- Anytime Meal – Great for breakfast, a quick lunch, or an energizing snack.
Suitable For:
- Busy Schedules – Quick meal for students, professionals, or anyone in a hurry.
- Health-Conscious Eaters – Vegan, dairy-free, and full of whole foods.
- Meal Preppers – Easy to scale up mushroom mix for multiple portions.
- Brunch Lovers – A unique twist on the classic avocado toast to impress guests.
- Post-Workout Bites – Avocado provides healthy fats and mushrooms add some protein.
Tips & Tricks:
- Use thick whole-grain bread for extra texture and nutrients. Lightly toast it for sturdiness.
- Sauté mushrooms on high heat briefly to prevent sogginess and get a nice sear.
- Mash the avocado with a squeeze of lemon or lime to prevent browning and add zest.
- Season each layer – a pinch of salt on the avocado and mushrooms brings out their flavors.
- For extra protein, serve with a side of scrambled tofu or a fried egg (if not strictly vegan).
Possible Improvements:
- Swap Mushrooms: Try portobello or cremini mushrooms for a different texture, or even add wilted spinach.
- Spice Level: Drizzle sriracha or add jalapeños if you crave more heat, or omit pepper flakes for a milder taste.
- Herb Upgrade: Top with fresh herbs like cilantro or chives for color and freshness.
- Cheesy Twist: If not vegan, a sprinkle of nutritional yeast or crumbled feta can add a cheesy note.
- Gluten-Free Option: Use gluten-free bread – the toppings are naturally GF and just as delicious.
Source Link: 10-Minute Mushroom Avocado Toast – Minimalist Baker
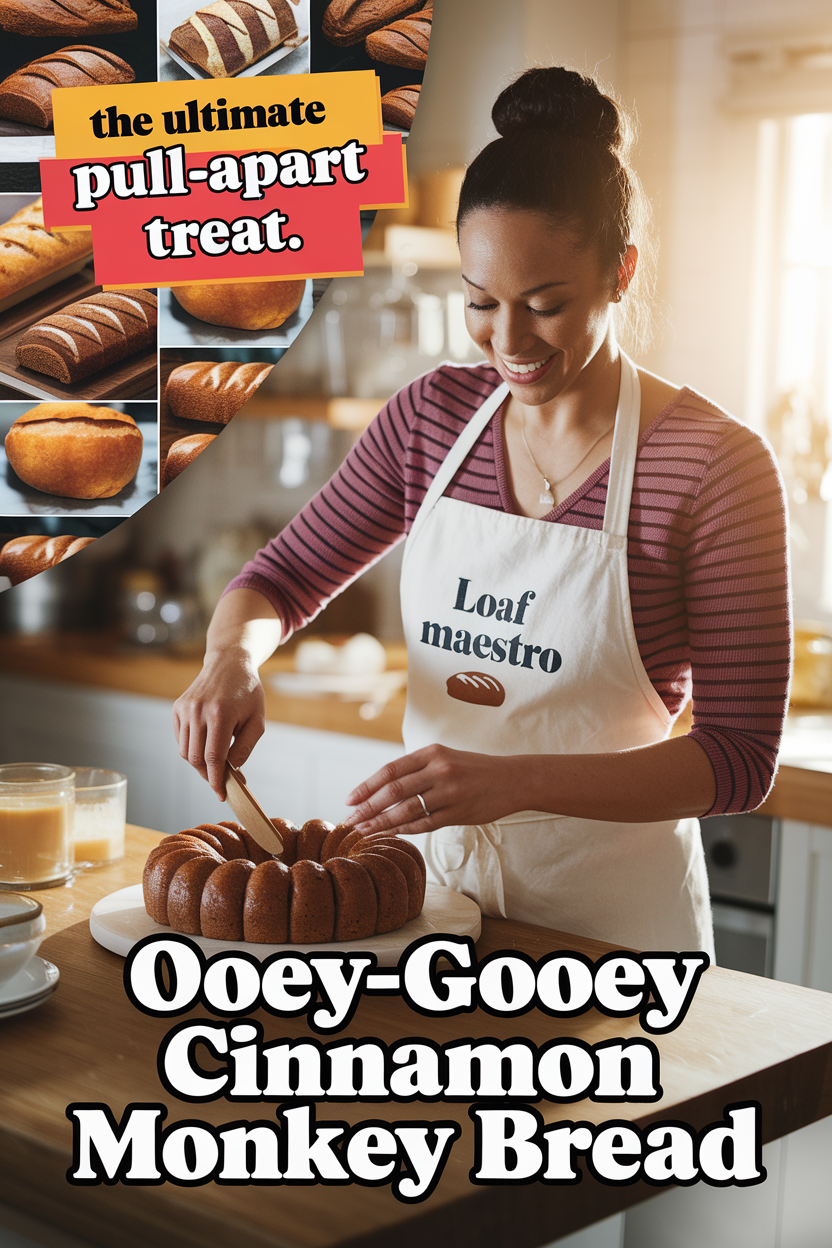
2. Ooey-Gooey Cinnamon Monkey Bread – The Ultimate Pull-Apart Treat
Description: An ooey-gooey pull-apart bread coated in cinnamon sugar and drizzled with vanilla icing.
This playful dish bakes up in a bundt pan, creating what is essentially a giant ring of bite-sized cinnamon rolls (Homemade Monkey Bread (Recipe + Video) – Sally’s Baking Addiction).
Each buttery, caramelized piece is finger-licking sweet – perfect for sharing at breakfast or as a fun dessert.
Why It’s Great:
- Irresistibly Delicious – Tastes like the sticky center of a cinnamon roll in every bite (Homemade Monkey Bread (Recipe + Video) – Sally’s Baking Addiction).
- Fun to Eat – Meant to be pulled apart piece by piece, making it interactive for families or guests.
- Make-Ahead Friendly – Can be prepped the night before; simply bake fresh in the morning (overnight rise instructions included (Homemade Monkey Bread (Recipe + Video) – Sally’s Baking Addiction)).
- Crowd-Pleaser – Kids and adults alike go nuts for this treat, as it’s both novel and nostalgic.
- Versatile Occasion – Great for holiday brunches (a Mother’s or Father’s Day favorite (Homemade Monkey Bread (Recipe + Video) – Sally’s Baking Addiction)) or even a potluck dessert.
Suitable For:
- Families with Kids – A hit for weekend breakfasts or birthday mornings – kids can help roll the dough balls too.
- Holiday & Special Occasions – Ideal for Christmas morning, Easter brunch, or any time you want a show-stopping breakfast centerpiece.
- Sweet Tooth Cravings – Satisfies dessert lovers; also excellent for those who can’t decide between cinnamon rolls or cake.
- Baking Beginners – Uses simple yeast dough (or even shortcut biscuit dough) – a forgiving recipe that looks impressive even with basic skills.
- Anyone Needing Comfort – Warm cinnamon-sugar goodness = instant comfort food, great for cozy weekend vibes.
Tips & Tricks:
- Grease the Pan Well: To ensure easy release, coat the Bundt pan thoroughly with butter or baking spray so all that sticky goodness doesn’t cling.
- Even Dough Balls: Try to make the dough pieces uniform in size for even baking. A small cookie scoop can help portion them.
- Coat Thoroughly: Shake the dough balls in cinnamon sugar liberally – this creates the caramel-like coating on baking.
- Cool Briefly Before Flipping: Let the bread rest ~5 minutes after baking, then invert onto a plate – this keeps the topping on the bread and not stuck in the pan.
- Icing Drizzle: Mix up a simple icing with powdered sugar, vanilla, and milk to drizzle on top once slightly cooled – it seeps into the crevices for extra decadence.
Possible Improvements:
- Add Nuts or Fruit: Toss chopped pecans or walnuts in with the cinnamon sugar for a praline crunch, or sprinkle raisins for a cinnamon-raisin vibe.
- Caramel Sauce: Pour a buttery brown sugar sauce over the dough before baking (as some recipes do) for an extra gooey, caramelized finish (Homemade Monkey Bread (Recipe + Video) – Sally’s Baking Addiction).
- Cream Cheese Glaze: Swap the vanilla icing for a tangy cream cheese glaze to mimic cinnamon roll frosting.
- Whole Wheat Flour: Substitute part of the flour with whole wheat for a slightly heartier bread (it will still be plenty indulgent!).
- Portion it Out: For easier serving, bake in large muffin tins to create mini monkey breads – great for individual portions at parties.
Source Link: Homemade Monkey Bread (Cinnamon Roll Bites) – Sally’s Baking Addiction
3. Make-Ahead Spinach & Cheese Strata – Overnight Brunch Casserole
Description: A savory bread pudding loaded with spinach, melty cheese, and a rich egg custard. This strata layers bread cubes with sautéed onion, garlicky spinach, and plenty of Gruyère and parmesan, all soaked overnight in a Dijon-spiked egg mixture.
Come morning, it bakes into a golden, decadent casserole that’s like a quiche and frittata combined (Best Vegetarian Strata Smitten Kitchen Recipe – How To Make Spinach Strata) – perfect for brunch without the morning hassle.

Why It’s Great:
- Overnight Convenience – It’s meant to be made ahead – you assemble it the night before and simply bake the next day (spinach and cheese strata – smitten kitchen). Wake up to an effortless gourmet breakfast!
- Luxuriously Cheesy – Loaded with Gruyère and parmesan, every bite is savory and satisfying, with a cheesy crust on top.
- Hearty & Comforting – Custard-soaked bread gives a creamy, fluffy texture (like a souffle) that fills you up and feels indulgent.
- Sneaks in Veggies – Packed with spinach (and you could add others), it’s a delicious way to eat your greens with all that flavor.
- Foolproof for Crowds – Dubbed a “go-to workhorse of a brunch dish” (corn, cheddar and scallion strata – smitten kitchen), it reliably impresses guests and feeds a crowd (one pan serves ~6–8).
Suitable For:
- Brunch Hosts – Ideal for holiday brunches or morning gatherings – no frantic cooking while guests wait.
- Busy Parents – Assemble after the kids go to bed; bake in the morning for a stress-free family breakfast.
- Meal Preppers – Great for enjoying leftovers; it reheats well for breakfasts all week or an easy dinner.
- Vegetarian Diets – It’s meat-free yet high in protein (eggs, dairy) and very satisfying.
- Comfort Food Seekers – Anyone craving a cozy, cheesy casserole (it’s terrific on a cold morning with coffee).
Tips & Tricks:
- Use Sturdy Bread: Day-old French or Italian bread works best. Slightly stale bread holds up when soaking and prevents a mushy strata (Best Vegetarian Strata Smitten Kitchen Recipe – How To Make Spinach Strata) (Best Vegetarian Strata Smitten Kitchen Recipe – How To Make Spinach Strata).
- Thaw and Drain Spinach: If using frozen spinach, squeeze it very dry. Excess moisture can prevent the custard from setting.
- Even Soaking: Make sure to pour the egg mixture over evenly and press down the bread a bit so every cube absorbs the custard.
- Bring to Room Temp: In the morning, let the strata sit out ~30 minutes while preheating the oven (spinach and cheese strata – smitten kitchen). Baking from room temp ensures it cooks through uniformly.
- Rest After Baking: Allow the baked strata to rest 5-10 minutes before cutting. This helps it set and makes serving clean squares easier.
Possible Improvements:
- Mix-in Variations: Swap spinach for sautéed mushrooms, blanched broccoli, or roasted peppers. You can also add cooked bacon or ham for meat-eaters.
- Different Cheeses: Try sharp cheddar and feta, or Swiss and fontina – any good melting cheeses will work. (One blogger calls it “all the cheese your heart desires.” (This is my go-to foolproof workhorse of a brunch dish … – Instagram))
- Spice & Herb Kick: Add a pinch of nutmeg to the custard (classic with greens), or fresh herbs like thyme/rosemary for extra aroma.
- Gluten-Free Bread: Use your favorite GF bread to make this celiac-friendly – the custard technique remains the same.
- Mini Stratas: Bake in greased muffin tins for individual portions – cute for a brunch buffet and they cook faster (check around 25-30 minutes).
Source Link: Spinach and Cheese Strata – Smitten Kitchen
4. Summery Panzanella Salad – Juicy Tomato & Bread Delight
Description: A classic Tuscan bread salad that tosses crispy toasted bread with ripe tomatoes, cucumber, red onion, and fresh basil.
The beauty of panzanella is how the crusty bread soaks up the tomatoes’ juices and tangy vinaigrette (Panzanella Recipe – Love and Lemons), turning slightly soft yet still chewy.
Bursting with fresh summer flavors, it’s a light yet hearty salad with delightful textures in every bite.

Why It’s Great:
- Seasonal Star – Showcases peak summer produce – juicy tomatoes and fragrant basil – at their best (Panzanella Recipe – Love and Lemons). It’s basically summer in a bowl.
- No Waste, All Taste – Born as a way to use up stale bread (Panzanella Recipe – Love and Lemons), it transforms day-old bread into something truly delicious (and budget-friendly!).
- Refreshing Yet Satisfying – Lighter than a bread-heavy dish but more filling than a leafy salad, thanks to those rustic bread chunks absorbing flavorful juices.
- Texture Heaven – The contrast of crusty-edged bread, crisp cucumbers, and soft tomatoes makes each forkful interesting.
- Quick & Easy – Minimal cooking (just toasting bread) and a simple dressing – perfect for when it’s too hot to spend long in the kitchen.
Suitable For:
- Vegetarians/Vegans – Completely plant-based (just omit or replace the optional fresh mozzarella if vegan).
- Picnics & Potlucks – Sturdy salad that travels well and tastes great even after sitting (it actually gets better as flavors meld).
- Meal Prep Lunches – Make a batch and enjoy over a couple of days; the flavors deepen, and it won’t wilt like lettuce salads.
- Light Meal Seekers – Those looking for a meatless lunch or dinner that’s still satisfying. Add beans or cheese to make it a full meal.
- Mediterranean Diet Fans – It’s full of olive oil, veggies, and whole-grain bread – fits right into a heart-healthy diet.
Tips & Tricks:
- Choose the Right Bread: Use a crusty loaf like ciabatta or sourdough. Avoid soft sandwich bread – it can turn to mush (Panzanella Recipe – Love and Lemons). Toast or grill the bread cubes for extra crunch and flavor.
- High-Quality Tomatoes: Since tomatoes are key, use the ripest, tastiest ones you can find (heirloom varieties if available). In off-season, cherry tomatoes are a good flavorful substitute.
- Let it Sit: After tossing with dressing, let the salad sit for at least 15-30 minutes. This allows the bread to soak up the vinaigrette and tomato juices, marrying everything together.
- Dress Liberally: Don’t be shy with the vinaigrette (typically olive oil and red wine vinegar) – the bread will drink it up. Season generously with salt and pepper to make the flavors pop.
- Add at the End: Stir in delicate ingredients (basil leaves, any cheese) just before serving to keep them fresh. Basil particularly should be added last-minute so it doesn’t blacken.
Possible Improvements:
- Protein Boost: Add chickpeas or white beans for protein, turning it into a more substantial entrée salad. Grilled chicken or tuna can work for non-vegetarians.
- Cheese or Not: Traditional panzanella often doesn’t have cheese, but fresh mozzarella or burrata make it extra luscious (or use olives/capers for a salty punch if skipping cheese).
- Different Veggies: Throw in whatever summer veggies you have – bell peppers, radishes, or even grilled zucchini chunks. Panzanella is a “template for whatever produce on hand” (Panzanella Recipe – Love and Lemons), so feel free to experiment.
- Herb Twist: While basil is classic, you can mix in other herbs like parsley or mint for a unique flavor twist.
- Grainy Mustard Vinaigrette: Whisk a bit of Dijon or whole-grain mustard into the dressing for extra zing and to help emulsify the oil and vinegar.
Source Link: Panzanella (Tomato & Bread Salad) – Love and Lemons
5. Tuscan Tomato-Bread Soup (Pappa al Pomodoro) – Rustic Comfort in a Bowl
Description: A cozy Italian soup where stale bread, tomatoes, garlic, and olive oil come together to create something magical.
Pappa al Pomodoro (meaning “tomato mush”) simmers chunks of day-old bread in a garlicky tomato-basil broth until it thickens into a rich, stew-like soup (Italian Tomato and Bread Soup (Pappa Al Pomodoro) Recipe – Pinch of Yum).
Finished with a drizzle of olive oil and fresh basil, this one-pot meal is deeply comforting – like the Italian grandmother of tomato soup.

Why It’s Great:
- Deep Flavor, Simple Ingredients – Just tomatoes, bread, olive oil, garlic, and basil yield an incredibly rich, sweet tomato flavor and hearty texture (Italian Tomato and Bread Soup (Pappa Al Pomodoro) Recipe – Pinch of Yum) (Italian Tomato and Bread Soup (Pappa Al Pomodoro) Recipe – Pinch of Yum). It’s proof that humble ingredients can shine.
- Hearty & Filling – The bread essentially turns the soup into a meal, giving it body and making it satisfyingly thick (no need for noodles or heavy cream).
- One-Pot Ease – Everything cooks in one pot, and you don’t even need a blender – the bread breaks down to thicken the soup naturally. Less fuss, more rustic character.
- Year-Round Appeal – Great warm in winter and just as enjoyable at room temperature in warmer months (pappa al pomodoro is sometimes served lukewarm in Italy).
- Healthy Comfort Food – It’s vegan and packed with lycopene-rich tomatoes and whole-grain bread (if you use whole-grain). You get the comfort of a carb-y dish with the nutrients of a veggie soup.
Suitable For:
- Vegetarians/Vegans – 100% plant-based goodness that feels hearty (no dairy needed, unless you garnish with cheese).
- Budget Cooks – Uses inexpensive pantry staples and day-old bread; perfect for stretching a budget without sacrificing taste.
- Beginner Chefs – Very easy technique and forgiving recipe – if it’s too thick, add broth; too thin, add more bread. Hard to mess up!
- Soups & Stews Lovers – A must-try twist on tomato soup for those who adore warming soups. Especially great for soup-and-sandwich fans (here the bread is in the soup).
- Meal Preppers – Makes fantastic leftovers. The flavor only gets better the next day, and it freezes well for future quick meals.
Tips & Tricks:
- Use Quality Tomatoes: Since tomato is the star, use the best you can. Canned San Marzano tomatoes are excellent for their sweetness and low acidity (Italian Tomato and Bread Soup (Pappa Al Pomodoro) Recipe – Pinch of Yum). In summer, ripe fresh tomatoes (peeled and chopped) can be used too.
- Stale Bread is Key: Day-old or even slightly dried bread works best as it will absorb the liquid without disintegrating. Dry the bread – some recipes even toast it – for optimal texture in the soup (Best Vegetarian Strata Smitten Kitchen Recipe – How To Make Spinach Strata).
- Garlic Infusion: Gently sauté sliced garlic in plenty of olive oil to start, but don’t brown it too much (bitter garlic can spoil the flavor). This infuses the oil which then flavors the whole soup.
- Consistency Control: “Pappa” should be thick – somewhere between a soup and porridge. If it’s too thick for your liking, thin it with a bit more broth or water. Too thin? Simmer a bit longer or add extra bread.
- Finish with Flair: Always finish with a generous drizzle of good extra-virgin olive oil for silky richness, and torn fresh basil. A sprinkle of cracked black pepper or red pepper flakes gives a nice gentle kick.
Possible Improvements:
- Top with Cheese: Although optional, a few curls of Parmesan or a dollop of pesto on top can add umami. Some even serve it with a poached egg or a swirl of garlic-parmesan oil for extra indulgence.
- Roast Your Tomatoes: For an even deeper flavor, roast fresh tomatoes and garlic in the oven first, then add them to the soup. This caramelizes their sugars and adds complexity.
- Bread Choice: Traditionally made with Italian bread or baguette. If you use a seeded whole-grain loaf, you’ll add a nuttiness to the soup. A sourdough can contribute a tangy background note.
- Garnish Ideas: Fried basil leaves, a spoon of basil pesto, or even crispy pancetta bits (if not vegan) on top can elevate the presentation and flavor.
- Serve in Style: For fun, serve it in edible bread bowls (small crusty rolls hollowed out) – double the bread comfort! Or simply serve with grilled bread on the side if you really love bread.
Source Link: Italian Tomato & Bread Soup (Pappa al Pomodoro) – Pinch of Yum
6. Overnight Brioche French Toast Bake – Effortless Morning Indulgence
Description: A luxurious French toast casserole that soaks rich brioche bread in a cinnamon-vanilla custard overnight, then bakes under a buttery brown sugar crumble topping (Overnight French Toast Casserole – i am baker).
The result is a casserole with a soft, custardy center (like bread pudding) and a crisp streusel top, perfumed with warm spices.
Served with a dusting of powdered sugar and maple syrup, it delivers all the joy of French toast without standing at the stove flipping slices.

Why It’s Great:
- Make-Ahead Magic – Mix it up the night before; in the morning just pop it in the oven. Perfect for holidays or busy brunches when you want a no-fuss, stress-free breakfast (Overnight French Toast Casserole – i am baker).
- Incredible Texture – Custard-soaked brioche (or challah) yields a fluffy, soufflé-like interior, while the oven baking gives it a lightly crisp, caramelized top – the best of both worlds.
- Cinnamon Spice & Everything Nice – Flavored with cinnamon, vanilla, and brown sugar, it has that cozy, aromatic sweetness that fills the house as it bakes.
- Feeds a Crowd – One baking dish can serve a whole family or group, so everyone enjoys hot French toast together (no single portions getting cold on the sideline).
- Dessert for Breakfast – Let’s face it, this dish is as delightful as a dessert – it’s like waking up to bread pudding or cinnamon roll flavors in breakfast form. A real treat to start the day!
Suitable For:
- Holiday Mornings – Ideal for Thanksgiving or Christmas breakfast/brunch, Mother’s Day, etc. Assemble it after dinner the night before and relax in the morning.
- Overnight Guests – Impress visiting friends or in-laws without morning stress – you’ll spend time with them instead of in the kitchen.
- Busy Parents – Kids love it, and parents love the convenience. It’s also easy to reheat leftovers for quick school-day breakfasts.
- Beginner Cooks & Non-Bakers – It’s very simple to make (just mixing and layering). If you can make regular French toast, you can make this – but it looks fancy.
- Large Families or Brunch Potlucks – Great for serving multiple people at once; transport it in the baking dish and rewarm if needed at the venue.
Tips & Tricks:
- Bread Matters: Use eggy, buttery breads like brioche or challah for best results (Overnight French Toast Casserole – i am baker). Their firm texture holds up and their flavor makes the dish extra special. Cut bread into 1-inch cubes for easy serving and even soaking.
- Stale is Great: Slightly stale bread works better as it soaks up more custard without disintegrating. If your bread is fresh, you can dry the cubes in a low oven (~300°F for 10 minutes) beforehand.
- Custard Check: Ensure every bread piece gets coated in the egg mixture. Press down the bread gently in the dish to help it absorb. The next morning, you can give it a gentle stir before adding the crumble, if the top pieces look dry.
- Crumble Topping: When mixing the streusel, use cold butter and work it into the flour-sugar until pea-sized crumbs form. Sprinkle evenly right before baking for a lovely “crisp, caramelized layer” (Overnight French Toast Casserole – i am baker).
- Don’t Overbake: Bake until golden brown and set (usually about 45-55 minutes). The center should be set but still soft – insert a knife to check for wet egg. If the top is browning too fast, tent with foil toward the end.
Possible Improvements:
- Add Fruit: Scatter fresh berries (blueberries, raspberries) or sliced bananas between the bread cubes for bursts of fruit flavor. You can also caramelize apple slices and layer them in for a french toast-apple pie hybrid.
- Flavor Twists: Mix some orange zest into the custard for a bright citrus note, or a splash of rum or bourbon for an extra depth (almost like a holiday eggnog vibe).
- Nuts or Streusel Variations: Add chopped pecans or almonds to the crumble for crunch. Or, for a praline effect, drizzle some maple syrup or cream cheese icing on top after baking.
- Lighter Version: Substitute half the cream with milk (or use all milk) and use a bit less sugar if you want to lighten it up – it will still be deliciously indulgent.
- Savory Option: Feeling adventurous? Omit the sugar and vanilla, add cheese and herbs, and turn it into a savory strata-like casserole (with bacon or veggies) – using the same overnight principle.
Source Link: Overnight French Toast Casserole – i am baker
7. Mexican Capirotada (Spiced Bread Pudding) – A Tradition with a Twist
Description: Capirotada is a traditional Mexican bread pudding that’s unlike any other – it layers toasted bread with cinnamon syrup, fruits, nuts, and cheese, then bakes until warm and bubbly.
Yes, cheese! Don’t be surprised – melting cheese is sprinkled among sweet raisins, nuts, and spiced bread, a true sweet-and-savory mix (Capirotada (Mexican Bread Pudding) – Muy Bueno).
Baked in a fragrant piloncillo (unrefined cane sugar) syrup infused with cinnamon and cloves, capirotada comes out soft, caramelly, and lightly crunchy on top. It’s an old family favorite especially around Lent and Easter, bringing comfort and celebration in each bite.

Why It’s Great:
- Complex Flavor Harmony – The mix of cinnamon, cloves, sweet syrup, and cheddar or Colby cheese creates a uniquely delicious flavor profile – think of salted caramel vibes or the appeal of cheesecake with a slightly salty crust. It “awakens your taste buds” with its blend of spices and unexpected cheese (Capirotada (Mexican Bread Pudding) – Muy Bueno).
- Rich Cultural Tradition – This dish comes with history and love. Making it connects you to a Mexican tradition, often prepared during holidays. Serving it can spark conversations about food heritage.
- Sweet Comfort – At its core, it’s a comforting warm dessert with familiar elements of raisins, nuts, and caramelized sugar – similar in feel to an American bread pudding but with a fun twist.
- Make-Ahead & Freezer-Friendly – You can assemble it ahead and bake when needed, and leftovers store well (even freezer-friendly as the blog notes (Capirotada (Mexican Bread Pudding) – Muy Bueno)). It reheats beautifully, so you can enjoy it over days.
- Flexible Serving – Great as a dessert (with perhaps a scoop of ice cream) or even a special brunch item. It’s quite filling and satisfying, thanks to the bread and nuts.
Suitable For:
- Cultural Food Explorers – Foodies who love trying traditional dishes from around the world. This will intrigue anyone who enjoys churros, tres leches, or bread puddings but wants something new.
- Sweet Tooth with a Savory Palate – If you appreciate desserts that aren’t one-note sweet, you’ll love the hints of cheese and spice here.
- Family Gatherings – A wonderful family-style dessert. Kids often find the idea of cheese in dessert interesting, and they’ll love the sweet syrup and raisins.
- Vegetarian Diets – It’s meat-free (in fact often served on meatless Lent Fridays). Just ensure the cheese is a vegetarian rennet variety if that’s a concern.
- Make-Ahead Hosts – Hosts who like to prep in advance. You can have it ready to bake for a dinner party dessert, giving you time to focus on other courses.
Tips & Tricks:
- Use Piloncillo if Possible: Piloncillo is a raw cane sugar sold in cones, which gives an authentic deep molasses flavor to the syrup. If unavailable, dark brown sugar is a good substitute. Melt it in water with cinnamon sticks and whole cloves to create the syrup base (GRANDMA’S CAPIROTADA RECIPE – Simple and Classic –).
- Toast or Fry Bread: Many traditional recipes fry the bread in butter or oil until crisp, or you can toast it. This creates a sturdier base that won’t turn to total mush and adds a toasty flavor.
- Layer Thoughtfully: Layer the ingredients in your baking dish – typically bread, then sprinkle raisins, nuts (like pecans or peanuts), perhaps sliced bananas or other dried fruit, and cheese, then repeat. End with a top layer of bread for a nice crust.
- Pour Syrup Evenly: Slowly pour the spiced syrup over the layers, giving the bread time to soak. The bread should be saturated but not drowning – save a bit of syrup aside if it seems too much, you can always add more if needed.
- Let it Rest: After baking until the cheese is golden and everything’s bubbly, let the capirotada rest for 10–15 minutes. It’s extremely hot (like “culinary equivalent of napalm” right out of the oven (Capirotada (Mexican Bread Pudding) – Muy Bueno)!) and also this resting time helps it set so servings hold together better.
Possible Improvements:
- Topping Options: Get creative with toppings – common additions include shredded coconut, candied cactus (acitrón), or sprinkles (yes, some families even top with rainbow sprinkles for color and crunch (Capirotada (Mexican Bread Pudding) – Muy Bueno)!). A scoop of vanilla ice cream or a dollop of whipped cream on warm capirotada is heavenly.
- Cheese Choices: While cheddar is traditional (for its slight saltiness), you can try others. Monterey Jack or queso fresco are sometimes used. If you’re skeptical about cheese, you can reduce the amount or leave it on half the dish to compare.
- Bread Swap: Typically made with bolillo (Mexican baguette) or French bread. You could try brioche or challah for an even richer version. For a healthier take, whole-grain bread works too, though flavor will differ slightly.
- Add Chocolate: Some modern recipes add chocolate chips or drizzles of cajeta (goat’s milk caramel) for extra indulgence. Not traditional, but chocolate lovers might appreciate the addition.
- Dietary Tweaks: For dairy-free, you can omit cheese (or use a vegan cheese) and use a plant-based butter for toasting the bread. It will become more purely sweet – still delicious, just a different character.
Source Link: Capirotada (Mexican Bread Pudding) – Muy Bueno
8. Classic Herb Bread Stuffing – Savory Holiday Side Made Simple
Description: A traditional bread stuffing (or dressing) that hits all the notes of a perfect holiday side dish.
Cubes of bread are tossed with sautéed onions, celery, plenty of butter, and classic herbs like sage, thyme, and parsley, then baked until moist inside with a crispy golden top (Best Ever Bread Stuffing! (Thanksgiving dressing) – Kitchen Girl).
This recipe keeps it simple and old-fashioned – just like Grandma’s – yielding a stuffing that’s delicate, savory, and melts in your mouth.

Why It’s Great:
- Ultimate Comfort Flavor – Buttery bread flavored with savory herbs and aromatics evokes that holiday nostalgia. It’s the taste of Thanksgiving in one bite – warm, seasoned just right, and not overly complicated.
- Perfect Texture – Achieves the ideal balance: “perfectly moist bread cubes… under a buttery-crisp golden topping.” (Best Ever Bread Stuffing! (Thanksgiving dressing) – Kitchen Girl) No dry croutons here and no soggy mess either – just soft, flavorful stuffing with crispy edges.
- Beginner-Friendly – A straightforward, foolproof recipe that even first-timers can nail. With simple ingredients and clear steps, any cooking level can make this with confidence (Best Ever Bread Stuffing! (Thanksgiving dressing) – Kitchen Girl).
- Make or Bake Anywhere – You can bake it on its own (dressing) or use it to stuff a turkey. Either way, it’s adaptable. Plus, you can prepare components ahead (dry out bread, chop veg) to save time.
- Crowd Size or Small Batch – Works for different gatherings: double it for a big group or halve it for a weeknight roast chicken dinner. It’s a versatile side that goes beyond just Thanksgiving.
Suitable For:
- Holiday Feasts – Thanksgiving, Christmas, you name it. It’s the quintessential side dish that everyone expects and loves.
- Sunday Dinners – Great alongside roast chicken, pork, or beef for a comforting family dinner any time of year.
- Meal Prep Enthusiasts – Surprisingly, stuffing freezes well. You can freeze unbaked stuffing, then thaw and bake when needed. Leftovers also reheat nicely, so you can enjoy that holiday flavor later on.
- Vegetarian Menu – This stuffing is vegetarian as written (uses vegetable broth instead of chicken broth if desired) and still provides that hearty, savory element to a plant-based feast.
- Nostalgic Cooks – Anyone who wants a taste of classic American home cooking. This recipe sticks to tradition, which is wonderful for those who crave that familiar flavor.
Tips & Tricks:
- Choose the Bread: Go for a hearty, crusty bread – French bread, Italian loaf, or sourdough. Slice and let it dry out for at least a day (or bake cubes in a low oven) so it soaks up broth without turning mushy (Traditional Bread Stuffing – Season & Serve Blog). Avoid very soft bread or sweet breads unless that’s your preference.
- Season Generously: Bread is a blank canvas, so salt your stuffing mix appropriately and don’t skimp on the herbs. Poultry seasoning (a premix of sage, thyme, rosemary, etc.) can be a convenient one-scoop seasoning.
- Broth Control: Add broth gradually and toss – the bread should be moist but not soggy. Different breads absorb differently; you want to see a little liquid pooling at the bottom of the bowl, but the bread should hold its shape. Typically, you’ll use about 1 cup of broth per 4-5 cups of bread, but adjust by feel.
- Egg for Binding: Many stuffings include a beaten egg or two to help bind the ingredients and add richness. This recipe is very simple (bread, broth, butter, herbs), but you can whisk an egg into the broth before mixing for a slightly custardy binding.
- Bake Covered Then Uncovered: For a soft interior and crispy top, cover the dish with foil for the first 20-30 minutes to trap steam, then uncover for the remaining bake time to let that top brown up. If you like a very moist stuffing, keep it covered longer; for extra crispy, uncover earlier (or even give a quick broil at the end, watching closely).
Possible Improvements:
- Add-Ins: Personalize it! Some popular additions: sautéed mushrooms, cooked sage sausage (for non-vegetarians), dried cranberries or apple bits for a hint of sweetness, or chopped toasted nuts (walnuts or pecans) for crunch.
- Cornbread Base: Swap some or all of the bread for cornbread to make a cornbread stuffing – you’ll get a slightly sweeter, crumbly texture that’s a Southern twist (just handle gently as cornbread is delicate).
- Aromatics Upgrade: In addition to onion and celery, you could add minced garlic or shallots for extra depth. A pinch of nutmeg can also enhance the aroma (very little – like 1/8 tsp – it complements the sage).
- Moisture Variation: If you prefer a very soft, spoonable stuffing, add more broth or even a bit of cream. For a drier stuffing, use a bit less liquid and bake longer uncovered.
- Gluten-Free Option: Use gluten-free bread – the technique and flavors remain the same. Just be sure to dry out the GF bread well, as its texture can be different. A mix of GF bread and GF cornbread can yield nice results.
Source Link: Best Ever Bread Stuffing (Traditional Dressing) – The Kitchen Girl
9. Epic Cheesy Pull-Apart Garlic Bread – Crowd-Pleasing Appetizer
Description: A show-stopping pull-apart bread that turns a simple loaf into a cheesy, garlicky masterpiece.
A crusty round or oval loaf (like sourdough) is cut in a crosshatch pattern, then drenched in garlic butter and stuffed with mozzarella cheese in every crack.
Baked until the bread is golden and the cheese is ultra-melty, it’s a fun, shareable appetizer where guests can literally pull out chunks of gooey, buttery garlic bread.
No wonder it’s fondly nicknamed “crack bread” – it’s that addictive (Cheese and Garlic Crack Bread (Pull Apart Bread) – RecipeTin Eats)!

Why It’s Great:
- Insanely Delicious – It’s basically garlic bread taken to the next level: every bite is garlicky, buttery, and oh-so-cheesy (Cheese and Garlic Crack Bread (Pull Apart Bread) – RecipeTin Eats). If you love pizza or fondue or just cheese, this will blow your mind.
- Interactive & Fun – People love the novelty of pulling bread apart and seeing those mozzarella cheese stretches. It brings a festive, communal vibe to the table (kids and adults alike become giddy pulling at it (Cheese and Garlic Crack Bread (Pull Apart Bread) – RecipeTin Eats)!).
- Guaranteed Hit at Gatherings – As the author says, “You can’t go wrong. Guaranteed to be the most popular thing at any gathering you take it to!” (Cheese and Garlic Crack Bread (Pull Apart Bread) – RecipeTin Eats) This appetizer disappears in seconds at parties.
- Easy Prep, Big Impact – Despite its impressive look, it’s quite simple: slice loaf, spread garlic butter, stuff cheese, and bake. No complex doughs or batters – just assembling.
- Customizable Flavors – The concept is endlessly adaptable (think pepperoni pizza bread, pesto cheese bread, etc.), so it’s not just delicious – it’s versatile and creative.
Suitable For:
- Party Appetizers – Ideal for game nights, potlucks, Super Bowl parties, holiday gatherings – anytime you need a snack that feeds a crowd and makes them smile.
- Family Movie Nights – Serve this as a fun alternative to popcorn or pizza for a movie or sports game at home. It’s a great snack the whole family can dig into.
- Kids’ Sleepovers or Playdates – This will make you the cool parent/aunt/uncle – it’s like a pizza-grilled cheese hybrid that kids can pull apart with their hands (minimal mess if you provide napkins!).
- Carb Indulgence – Let’s face it, this is for those unafraid to indulge in carbs and cheese. Perfect for cheat days or comforting pick-me-ups.
- Beginner Cooks – Even if you’re new to cooking, you can pull this off. It’s mostly assembly. And the result is very forgiving – melty cheese and garlic cover any imperfections!
Tips & Tricks:
- Proper Cutting: Use a sharp bread knife to slice the loaf in a grid. Cut almost to the bottom but not all the way through – you want the loaf to stay intact at the base. Aim for 1-inch squares on top of the loaf.
- Bread Choice: A dense, crusty bread (like sourdough or artisan boule) works best (Cheese and Garlic Crack Bread (Pull Apart Bread) – RecipeTin Eats). Soft breads may fall apart when pulling. Sourdough’s density holds together and its tang complements the richness.
- Garlic Butter Everywhere: Melt butter and mix in minced fresh garlic (and a little parsley for color). Spoon or brush it generously into all the cuts of the bread. Ensure every piece gets some love – this ensures flavor in each bite and helps the bread crisp up.
- Cheese Stuffing: Use mozzarella or another melty cheese (mozzarella gives that great stretch (Cheese and Garlic Crack Bread (Pull Apart Bread) – RecipeTin Eats)). Preferably low-moisture mozzarella if you don’t want it too wet. Stuff shards or slices of cheese deeply into the bread cuts. It might seem like a lot, but more cheese = more joy.
- Wrap and Bake: To prevent burning, you can wrap the loaf in foil for the first part of baking (around 15 minutes) to heat through and melt cheese, then unwrap for another 5-10 minutes to crisp the top. Serve it hot from the oven for maximum gooeyness.
Possible Improvements:
- Flavored Butters: While garlic-butter is classic, you can add herbs like rosemary, oregano, or Italian seasoning to it. Or a sprinkle of ranch seasoning or chili flakes for an extra kick (Cheese and Garlic Crack Bread (Pull Apart Bread) – RecipeTin Eats). Even a touch of truffle oil at the end for fancy vibes.
- Different Cheeses: Mix cheeses – e.g., mozzarella + cheddar for flavor and melt, or pepper jack for a spicy twist. Just ensure at least one is a good melting cheese.
- Stuff it Further: Tuck in extras: small bits of pepperoni or cooked bacon, sun-dried tomatoes, jalapeños, or olive slices in the cuts along with the cheese for bonus flavor (turning it into a pizza pull-apart, etc.).
- Dipping Sauce: Although it’s great on its own, you can serve it with a side of marinara or pizza sauce for dipping, or a cool ranch or blue cheese dip if you added spicy elements.
- Individual Servings: If you prefer, you can make pull-apart rolls: take soft dinner rolls, make cuts, and prepare similarly in a casserole dish. Not as dramatic as one big loaf, but easier to portion – everyone grabs a pre-cut roll.
Source Link: Cheese and Garlic Crack Bread (Pull-Apart Bread) – RecipeTin Eats
10. Apple Brown Betty – Cozy Apple & Bread Crumble (A “Warm Hug” in a Bowl)
Description: An old-fashioned American dessert made of layers of sweetened apples and buttery bread crumbs, baked until bubbly and golden.
Think of Apple Brown Betty as the rustic grandmother of apple crisp: instead of oats, day-old bread is used to create a spiced crumb topping that soaks up the apple juices and caramelizes on top.
The result is a dish that’s soft and cinnamon-y in the middle with a crisp, buttery crumble on top – “like a warm hug in a bowl,” as one baker put it (The Best Warm and Cozy Apple Brown Betty – Grandbaby Cakes).
It’s simple, homely, and absolutely delightful, especially with a scoop of vanilla ice cream melting over it.

Why It’s Great:
- Heartwarming Flavor – Combines the timeless comfort of baked apples, cinnamon, and brown sugar. The apples become tender and lightly caramelized, while the bread crumb topping provides a toasty, buttery note (The Best Warm and Cozy Apple Brown Betty – Grandbaby Cakes). It’s autumn coziness personified (though wonderful year-round).
- Bread Reborn as Dessert – Cleverly uses bread instead of flour/oats. This means you can use those extra bread slices to make an economical yet “powerfully good” dessert (Apple Brown Betty – Unwritten Recipes). The bread gives a slightly pudding-like consistency under the crisp top, which is very satisfying.
- Easy & Fuss-Free – No pastry dough, no complex techniques. It’s arguably easier than pie or cobbler – you basically toss ingredients together and bake. Great for when you want homemade dessert with minimal effort.
- Quick Assembly – You can have it oven-ready in 15 minutes or so. No need to precook apples; the Betty practically makes itself while baking (usually within an hour).
- Versatile Serving – Lovely as a dessert (with ice cream or whipped cream), it’s also been enjoyed as a decadent breakfast or brunch item (similar to French toast casserole, it has bread and fruit!). It can be served warm, room temp, or even cold, and still tastes “powerfully good” (Apple Brown Betty – Unwritten Recipes).
Suitable For:
- Beginner Bakers – If pies scare you, start with a Brown Betty. It offers that homemade fruit dessert experience without any pastry skills needed.
- Family Dessert – Perfect for a family dinner or potluck. It’s unpretentious and nostalgic, likely to please both kids (hello, it’s basically soft apple cake) and grandparents alike.
- Fall & Holiday Menus – An excellent choice during apple season, Thanksgiving, or any fall gathering. It makes the house smell heavenly with cinnamon and baked apples.
- Frugal Cooks – Uses simple, inexpensive ingredients (bread, apples, sugar, butter). You likely have everything on hand. Great for using up apples that are slightly past their crunch prime or bread that’s a bit dry.
- Dietary Flexibility – It’s naturally egg-free. Can be made dairy-free by using vegan butter. And you can adapt to be refined-sugar-free by using alternatives like coconut sugar or maple syrup if needed.
Tips & Tricks:
- Best Bread for Betty: Slightly stale bread works best. White bread or lightly sweet breads (brioche, challah) yield a delicious crumb. If it’s not stale, you can blitz fresh bread into crumbs and lightly toast them in the oven or skillet with butter to dry them out (some recipes call for buttered bread crumbs tossed with spices, which you then layer with apples).
- Apple Choices: Use baking apples that hold shape (Granny Smith, Honeycrisp, Braeburn). Or mix varieties for depth. Peel and slice evenly so they cook uniformly. Some tartness (from Granny Smith, for example) helps balance the sweetness.
- Spice It Up: Cinnamon is standard; a pinch of nutmeg and/or allspice adds warmth. A bit of lemon juice or zest can brighten the filling if you like a hint of citrus. Toss the apple slices with spices, sugar, and a little melted butter so they’re well coated and flavorful.
- Layering: Traditionally, you layer bread crumbs and apples: e.g., a layer of buttered crumbs, then apples, then more crumbs on top. Ensure the top layer is bread so it crisps up. Drizzle any remaining butter over the top.
- Baking Dish on a Tray: Place your baking dish on a foil-lined tray in the oven; Brown Betty can bubble over as the apples cook down. This saves you a sticky oven cleanup.
Possible Improvements:
- Bread to Crumble: If you prefer a more uniform crumb topping, you can pulse the bread into coarse crumbs. Some modern recipes even use bread cubes tossed in butter as a “crouton” topping for a chunkier texture. Or combine bread crumbs with a bit of oats for a hybrid crumble.
- Add Berries or Other Fruits: Though apple is classic, people have made “Bettys” with pears, peaches, or berries. You could toss a handful of cranberries or raspberries in with the apples for a pop of color and tartness.
- Sweetness Level: Adjust sugar to taste. Traditional recipes can be sweet – you can cut back if your apples are particularly sweet or if you prefer a more fruit-forward flavor. Brown sugar gives a richer taste than white, so consider using part or all brown sugar (many say the “brown” in Brown Betty refers to brown sugar (The Best Warm and Cozy Apple Brown Betty – Grandbaby Cakes)).
- Sauce it Up: Serve with a caramel sauce or custard sauce to pour over each serving for extra decadence. However, many argue just vanilla ice cream melting into the warm Betty is perfection.
- Presentation: This dessert isn’t meant to be fancy-looking – it’s more of a spoon-and-serve dessert. But you can bake it in individual ramekins for dinner party flair (reduce baking time), or in a cast iron skillet for rustic charm. A sprinkle of powdered sugar on top can also prettify it when serving.
Source Link: Apple Brown Betty – Grandbaby Cakes
11. 15-Minute French Bread Pizza – Fast Weeknight Favorite (No Soggy Crust!)
Description: A quick and kid-friendly pizza hack where a loaf of French bread becomes the crust. Split a baguette or French bread loaf, slather with garlic butter and marinara, top with cheese and your favorite toppings, then bake until the cheese is bubbly.
The result: pizzas with a crispy-edged, tender center crust that’s oh-so-satisfying – and on the table in minutes.
This “perfected” method addresses the usual pitfall (soggy bread) by cleverly toasting and prepping the bread for optimal texture (French Bread Pizza Perfected | Mel’s Kitchen Cafe) (French Bread Pizza Perfected | Mel’s Kitchen Cafe).
It’s weeknight dinner salvation when you need a homemade meal super fast.

Why It’s Great:
- Super Quick & Easy – From start to finish about 15-20 minutes. No dough making or rising – using bread cuts prep time drastically. It’s “so easy and delicious…screaming ‘make me!’ for busy nights.” (French Bread Pizza Perfected | Mel’s Kitchen Cafe)
- Crisp, Not Soggy – This recipe has smart tips (like pressing the bread and adding a layer of Parmesan as a moisture barrier (French Bread Pizza Perfected | Mel’s Kitchen Cafe)) to ensure you get a pleasing crunch rather than a wet, soupy bread – solving a common french bread pizza problem (French Bread Pizza Perfected | Mel’s Kitchen Cafe).
- Customizable – Just like regular pizza, you can personalize each half with toppings: pepperoni, veggies, Hawaiian, you name it. Everyone can have their favorite without extra work.
- Crowd-Pleaser – Honestly, who doesn’t like pizza? This is a hit with kids, teens, and adults. Great for casual dinners, gameday snacks, or even a fun DIY pizza party where everyone decorates their own.
- Budget-Friendly Meal – Baguettes are cheap, and you can use whatever bits of veggies, sauce, and leftover meats you have as toppings. It’s a terrific way to use up items in your fridge (half a bell pepper here, a few olives there).
Suitable For:
- Busy Weeknight Dinners – When you’re tired or short on time but don’t want to resort to frozen pizza or takeout, this comes to the rescue. Also clutch for unexpected company or playdates.
- Cooking with Kids – A perfect recipe to get kids involved in the kitchen. They can spread sauce and sprinkle cheese/toppings on their “pizza,” and it’s ready so fast, their attention won’t wander.
- College Students/Beginners – Requires only an oven (or toaster oven). No advanced skills. And it yields several servings, great for roommates or next-day leftovers.
- Game Day or Parties – Slice the baked french bread pizzas into smaller “finger food” pieces for a crowd-pleasing appetizer or snack during sports events or casual parties.
- Those Avoiding Yeast Doughs – If yeast or dough-making intimidates you, this gives you the pizza experience without that. Also, if you’re in a place without good pizza delivery (or on a tight budget), this is a lifesaver.
Tips & Tricks:
- Bread Selection: Use a good French bread or baguette that’s not too soft and flimsy. It should be substantial enough to hold toppings. If the bread is very thick, you can scoop out a little of the inner crumb to create a boat for the toppings (and save those crumbs for bread crumbs).
- Prevent Soggy Bread: Two key tricks:
- Lightly compress the bread halves – pressing down on the bread flattens it a bit and makes the crumb tighter, so it soaks up less sauce (French Bread Pizza Perfected | Mel’s Kitchen Cafe).
- Toast or broil the bread for a couple of minutes after brushing with garlic butter or olive oil. Also, as this recipe suggests, sprinkle a little grated Parmesan directly on the bread after toasting before saucing – it acts as a barrier to keep the sauce from soaking in (French Bread Pizza Perfected | Mel’s Kitchen Cafe).
- Go Easy on Sauce: Spread a thin layer of sauce; too much will make the bread wet. You can always serve extra sauce on the side for dipping if someone likes it saucy.
- Cheese: Use low-moisture mozzarella (the firmer kind, pre-shredded or block) for best results; fresh mozzarella is wetter and can make things soggy. A mix of mozzarella and cheddar or Monterey Jack can add nice flavor and browning.
- High Heat Bake: Bake in a hot oven (around 425°F/220°C). The high heat will crisp the edges of the bread while melting the cheese quickly. It usually takes about 8-10 minutes. Keep an eye – you want bubbly and slightly browned cheese.
Possible Improvements:
- Garlic Bread Base: Turn it into garlic bread pizza by brushing the bread with garlic-herb butter (as mentioned) before adding sauce. A pinch of garlic powder on the bread can also suffice. This adds extra flavor to every bite.
- White or Pesto Pizzas: Change up the sauce – use pesto, Alfredo sauce, or just olive oil and garlic for a white pizza version. For example, pesto, mozzarella, and cherry tomatoes make a great combo.
- Healthier Tweaks: Use whole-grain baguette for more fiber. Load up with veggie toppings (mushrooms, bell peppers, onions, spinach) to increase nutrients. You can also use part-skim cheese if watching fat.
- Grilled Bread Pizza: In summer, try making these on the grill. Lightly grill the bread first, then top and place back on indirect heat until cheese melts. It adds a smoky flavor.
- Freezer Meal: You can assemble french bread pizzas and freeze them (before baking). Wrap individually. Then bake from frozen at 425°F, adding a few extra minutes. Homemade frozen pizzas ready to go!
Source Link: French Bread Pizza Perfected – Mel’s Kitchen Cafe
12. Spicy Indian Bread Pakora – Fried Sandwich Fritters with a Kick
Description: A popular Indian street snack, Bread Pakoras are savory bread fritters – basically, spiced sandwiches dipped in a chickpea flour batter and fried to golden perfection.
The most beloved version has a mashed potato filling (flavored with green chilies, cilantro, and spices) sandwiched between slices of bread (Bread Pakora Recipe (Bread Pakoda) – Swasthi’s Recipes).
The entire sandwich is then dipped in a seasoned gram flour (besan) batter and deep-fried until crisp.
The result: a piping hot snack that’s crispy on the outside, soft and fluffy inside, with a spicy, tangy potato center. It’s often served with green chutney or ketchup, making it a truly satisfying teatime or rainy-day treat.

Why It’s Great:
- Bold Flavors & Textures – It’s an explosion of taste: earthy chickpea batter, aromatic spices (like cumin, chili, and garam masala in the potato), plus the comforting potato filling. The contrast of crispy batter and soft bread/potato is addictive.
- Ultimate Comfort Street Food – In India, bread pakora is beloved as a breakfast or teatime snack, especially during monsoons. It’s indulgent, carby, and comforting, much like having a samosa or bhaji. If you love savory fried foods like tempura or falafel, this will hit the spot in a new way.
- Versatile Filling – While potato is popular, you can also make bread pakora without stuffing (just bread in batter (Bread Pakora Recipe (Bread Pakoda) – Swasthi’s Recipes)) or with other fillings like spiced paneer (Indian cheese) or even a slice of cheese and chutney for a Desi “grilled cheese” vibe. It’s a concept you can adapt.
- Naturally Vegan & Gluten-Free (without bread) – The batter is made from gram flour, which is gluten-free, and there’s no egg or dairy in the traditional recipe (unless you stuff with paneer or cheese). Using gluten-free bread could make the entire snack GF-friendly.
- Snack or Meal – One or two bread pakoras can be quite filling, making it a great on-the-go breakfast or a quick lunch with tea. Yet, cut into smaller triangles, they can be served as party appetizers.
Suitable For:
- Spice Lovers – It’s meant to be a bit spicy (though you can control the heat). Those who enjoy Indian snacks like samosas, pakoras, or chaat will love this.
- Vegetarians/Vegans – A hearty vegetarian snack that doesn’t miss meat at all. Vegans just need to ensure the bread has no dairy (and avoid stuffing like paneer).
- Outdoor Gatherings/Potlucks – If you’re looking to showcase an international dish, these will intrigue guests. Best served fresh, but they stay crisp fairly well and can be kept warm in an oven.
- Kids (Mild Version) – Surprising but true, kids often love bread pakora (it’s essentially fried potato sandwich). Just dial down the chilies for them. It’s also not messy to eat if given in smaller pieces.
- Comfort Cravings – On a cold or rainy day, or when you want a carb-loaded pick-me-up, bread pakoras with a cup of masala chai are a match made in heaven.
Tips & Tricks:
- Batter Consistency: Make a thick yet flowing batter with chickpea flour, water, a pinch of baking soda (for lightness), and spices (like red chili powder, turmeric, ajwain/carom seeds). It should coat the bread well without dripping off too much – aim for a consistency like pancake batter or a tad thicker.
- Potato Filling: Boil potatoes and mash them with spices (common additions: cumin seeds, coriander powder, garam masala, minced chili, ginger, salt, a squeeze of lime, and fresh cilantro). Let the filling cool slightly and make a fairly thick layer between two bread slices. Press the sandwich well so it holds together.
- Prep Station: Cut the filled sandwich into halves or triangles for easier frying and serving. Keep batter in one bowl, sandwiches on a plate, and oil heating up. Use medium-high heat – oil should be hot enough that a drop of batter sizzles immediately (around 350°F/180°C).
- Frying Technique: Dip the sandwich in batter so all sides are coated, then gently lower into oil. Fry in batches – don’t overcrowd – until pakoras are golden brown, turning once. Drain on paper towels to remove excess oil. Maintain oil temperature; too low temp can make them greasy.
- Serving: These are best served immediately while hot and crispy. Serve with green chutney (cilantro-mint chutney) and/or tamarind chutney for an authentic touch, or simply ketchup which is also common. Sprinkle chaat masala on top after frying for extra tang if you have it.
Possible Improvements:
- Cheese Twist: Some like to add a thin slice of cheese (like Amul cheese in India or processed cheese) along with the potato filling, giving a slight gooeyness – kind of an Indian grilled cheese/potato sandwich hybrid.
- Onion or Paneer Filling: Instead of potato, you could stuff with spiced paneer (crumbled Indian cottage cheese with spices) or even a mix of chopped veggies (peas, corn, etc.) bound with a little potato.
- No Stuffing Simplified Version: As noted, you can simply dip plain bread triangles in the spiced besan batter (maybe with a layer of chutney on the bread for flavor) and fry – quicker and still tasty, known as “bread bajji” especially in South India (Bread Pakora Recipe (Bread Pakoda) – Swasthi’s Recipes).
- Baked Version: For a lighter take, you can try brushing the batter-coated bread with oil and baking in a very hot oven or air-fryer until crisp. It won’t be quite the same as deep-fried, but it can satisfy the craving with much less oil.
- Addictive Chutneys: Elevate the experience by serving with homemade chutneys. A mint-cilantro chutney brings freshness, and a sweet tamarind-date chutney adds a lovely sweet-sour contrast to the spicy pakora. Even a dash of yogurt with chaat masala can be a nice cooling dip for it.
Source Link: Bread Pakora (Spiced Fried Bread Fritters) – Swasthi’s Recipes
13. Middle Eastern Chickpea Fatteh – “Loaded Pita Nachos” with Yogurt & Herbs
Description: Fatteh is a layered Middle Eastern dish that could be described as “loaded pita nachos” – but with a healthy twist.
At its base are crispy pita chips or toasted bread, topped with warm spiced chickpeas, and blanketed in a garlicky tahini-yogurt sauce, then finished with fresh herbs, nuts, and often pomegranate seeds or chili oil.
The word fatteh means “to crumble,” referring to the crumbled bread base. This recipe comes together in about 20 minutes and delivers layers of creamy, crunchy, and savory goodness (Fatteh (Pita, Chickpeas and Yogurt) | The Mediterranean Dish) (Fatteh (Pita, Chickpeas and Yogurt) | The Mediterranean Dish).
It’s commonly served as breakfast or brunch in places like Lebanon, Syria, and Egypt, but can be enjoyed anytime as a hearty appetizer or light meal.

Why It’s Great:
- Layered Textures & Flavors – Every bite has contrast: crisp pita, velvety yogurt sauce, tender spiced chickpeas, and nutty crunch from toppings like toasted pine nuts (Fatteh (Pita, Chickpeas and Yogurt) | The Mediterranean Dish). The flavor is savory with a hint of tang (from yogurt) and warmth (from cumin/garlic).
- Quick One-Bowl Meal – You get protein (chickpeas), carbs (pita), and dairy all in one dish – and it’s ready in minutes. It’s a satisfying meatless meal that doesn’t require hours of cooking.
- Great Use of Stale Bread – Like many bread dishes, it originated to use up day-old pita. So it’s practical and no-waste: transform leftover flatbread into something exciting (and much more interesting than plain croutons).
- High Protein & Nutritious – With chickpeas and yogurt, fatteh is packed with protein and fiber while still feeling light. If you use Greek yogurt, it’s even higher in protein. It’s also rich in calcium (yogurt) and has healthy fats (olive oil, tahini).
- Shares Well – Fatteh is meant to be shared and is “meant to share” as a symbol of Middle Eastern hospitality (Fatteh (Pita, Chickpeas and Yogurt) | The Mediterranean Dish). It’s perfect for serving on a platter for guests to scoop into, similar to a layered dip, but far more unique and flavorful.
Suitable For:
- Vegetarian Diets – It’s completely vegetarian and can be made vegan by using a dairy-free yogurt. It’s satisfying enough to stand as a main course for vegetarians.
- Mezze Lovers – If you enjoy dishes like hummus, baba ganoush, tzatziki, or chana chaat, this will be right up your alley – it’s like a deconstructed combo of those elements.
- Brunch & Lunch – Great alternative to the usual brunch fare. It’s lighter than a casserole but more filling than a salad. Also excellent as a “mezze” appetizer alongside other dips and flatbreads.
- Meal Preppers – You can prep components (roast chickpeas, mix yogurt sauce) ahead of time and assemble when ready to eat. Though best when pita is freshly toasted, you can even toast pita ahead and re-crisp in oven.
- Cultural Foodies – Those wanting to explore global cuisines will appreciate this lesser-known dish. It’s a chance to taste authentic Levantine flavors in a simple preparation.
Tips & Tricks:
- Toast the Pita: Either fry or bake pieces of pita bread until crispy (Fatteh (Pita, Chickpeas and Yogurt) | The Mediterranean Dish). Breaking pita into bite-size chips works well. If frying, drain excess oil; if baking, brush with olive oil and bake at 375°F until golden (10-15 min). You can also use store-bought pita chips for convenience (choose unflavored ones).
- Season the Chickpeas: Don’t just dump plain chickpeas – simmer them in a skillet with a bit of olive oil, minced garlic, cumin, salt, and maybe a touch of paprika or chili for a few minutes to warm them and infuse flavor. In some recipes, chickpeas are cooked in broth with spices for extra flavor.
- Yogurt-Tahini Sauce: Use plain yogurt (Greek or regular). Whisk in tahini (sesame paste), minced garlic (you can temper the raw garlic by stirring it into a little lemon juice first), lemon juice, and salt. It should be a pourable consistency – thin with water if needed. The sauce should be “garlicky, nutty” and tangy (Fatteh (Pita, Chickpeas and Yogurt) | The Mediterranean Dish). Taste and adjust to your liking.
- Layering: Assemble just before serving to keep textures distinct. Spread pita chips on a platter, scatter warm chickpeas over, then generously drizzle the yogurt-tahini sauce on top. Finally, garnish with toppings.
- Toppings: Toasted pine nuts or almonds add crunch; a drizzle of melted butter or olive oil infused with Aleppo pepper or paprika adds a traditional finishing touch (Fatteh (Pita, Chickpeas and Yogurt) | The Mediterranean Dish). Chopped parsley or mint adds freshness. Some add pomegranate arils for a pop of sweet-tart and color. You can also sprinkle sumac or chili flakes for extra zing.
Possible Improvements:
- Add Meat (Fatteh Kebab): For a non-vegetarian version, some add shredded rotisserie chicken or spiced ground lamb/beef on top of the chickpeas. It becomes a much heartier dish (commonly known as Fattet Djaj with chicken).
- Eggplant Fatteh: A popular variant adds fried or roasted eggplant cubes to the layers, which is absolutely delicious (called Fattet Makdous). You could incorporate eggplant with the chickpeas or as a separate layer.
- Yogurt Variations: If you don’t have tahini, you can make the sauce without it (just a lemon-garlic yogurt) or even use labneh (thick strained yogurt) thinned with a bit of milk or water. For vegans, use a coconut or almond yogurt with a spoon of peanut or almond butter for body instead of tahini (or use tahini alone with lemon, garlic, and water for a dairy-free “yogurt”).
- Chickpea Alternatives: Try it with other legumes – black chickpeas (desi chana) or small fava beans can work. Even lentils could be interesting, though chickpeas are traditional.
- Presentation: In individual bowls: If serving as a personal meal, assemble in individual wide bowls so each person gets a neat portion with layers. For party style, the big platter for communal serving is fun. Just note it can get soggy if it sits long, so encourage digging in soon after assembly.
Source Link: Chickpea Fatteh (Spiced Chickpeas with Yogurt & Pita) – The Mediterranean Dish
14. Summer Berry Pudding – No-Bake Bread & Berry Cake (Vibrant and Vegan-Friendly)
Description: A stunning no-bake dessert that’s a traditional British favorite.
Summer Berry Pudding, or simply Summer Pudding, consists of an assortment of fresh berries (think strawberries, raspberries, blackberries, currants) cooked briefly with sugar to release their juices, then layered in a bowl lined with slices of bread.
After chilling, the bread soaks up the vivid berry juices and turns into a cake-like shell encasing the mixed berries (Summer Berry Pudding Recipe – Just a Mum’s Kitchen).
When unmolded, you get a dome of beautiful purple-red berry-filled “cake” that slices like a torte. It’s light, refreshing, and bursting with real fruit flavor – a gorgeous finale for a summer meal.

Why It’s Great:
- Pure Berry Goodness – This dessert is all about the fruit. There’s no added heavy cream or custard inside (unless you serve with it) – just sweet-tart berries at peak season, slightly set by the bread. It’s juicy, fresh, and not overly sweet.
- Super Simple Ingredients – Literally bread, berries, and a bit of sugar are the main components (Summer Berry Pudding Recipe – Just a Mum’s Kitchen). It’s hard to find a dessert with a shorter ingredient list. Plus it’s a clever way to use bread in a dessert (and a gluten-free hack is possible by using GF bread).
- No Baking Required – Great for hot weather when you don’t want to turn on the oven. The stovetop step is minimal (just to macerate berries), and the rest is assembly and chilling. Perfect project for when you want a make-ahead dessert too.
- Showstopper Look, Easy Effort – When you turn it out, it has a “wow” factor with its rich magenta color and berry-studded interior – yet it took hardly any technical skill (just layering). As one site noted, it “looks wonderful yet is so easy to make.” (Summer Berry Pudding Recipe – Just a Mum’s Kitchen)
- Naturally Dairy-Free & Low-Fat – Aside from some sugar and the bread, it’s basically fruit. That makes it relatively light (depending on your serving accompaniments) and suitable for those who might not handle creamy or rich desserts.
Suitable For:
- Summer Entertaining – Ideal for BBQs, garden parties, or any summer dinner. Make it a day ahead and have a chilled, elegant dessert ready to go.
- Dietary Needs – It’s vegetarian and can be vegan if you use sugar (or a sweetener) that’s vegan and bread without dairy. It’s also low in fat and can be made refined-sugar-free using alternatives (honey, agave, etc.).
- Fruitarians (almost!) – Kidding aside, this is a dessert for fruit lovers. If pies have too much crust and crumbles too much topping for your taste, this maximizes the fruit content.
- Kids & Beginners – A fun recipe to make with kids (they can help line the bowl with bread and pour in fruit). Also, no worries about rising or baking – very forgiving. Even if it doesn’t hold shape perfectly, it will still taste great spooned into dishes.
- Patriotic Themes – With berries, it can fit red-white-blue themes (e.g., add blueberries and maybe a dollop of whipped cream) for occasions like 4th of July in the US, or simply any time you want a colorful dessert.
Tips & Tricks:
- Bread Matters: Traditionally, soft white bread is used (crusts removed) because it readily absorbs juice and turns meltingly soft (Summer Pudding with Scottish Berries – Farmersgirl Kitchen). Brioche or challah can add more flavor richness. Day-old bread is easier to handle (holds shape when dipped in juice). You can also use slices of pound cake for a more decadent version, but then it’s more of a trifle.
- Berry Mix: Use a mix of berries for depth of flavor – raspberries, blackberries, blueberries, cherries, red/black currants, etc. Strawberries are great but since they’re larger, slice them so they layer nicely. Frozen berries can be used if fresh aren’t available (thaw them first, and expect a slightly more jammy texture).
- Cook Gently: Cook the berries with sugar just until they release juices and the sugar dissolves (a few minutes). You want them to maintain some shape. Add a little water or lemon juice if needed to get it going. Some recipes don’t cook at all, simply macerating berries with sugar – that can work if berries are very ripe/juicy, but cooking extracts more juice to soak the bread.
- Line the Bowl: Use a pudding basin or medium bowl. Line with plastic wrap if you’re worried about sticking (though bread usually comes out fine). Dip each bread piece in the berry juice (from the cooked fruit) before lining, so it’s saturated. Fit bread slices tightly with no big gaps – patchwork is fine. Fill with fruit (save some juice). Top with a final layer of bread.
- Weigh It Down: After assembling, cover the top with wrap or a plate and set a weight (like canned goods) on it in the fridge (Summer Berry Pudding Recipe – Just a Mum’s Kitchen). This presses everything together and helps the bread soak thoroughly. Chill at least 4-6 hours, ideally overnight, for best melding. The weight is key for a firm pudding that slices well.
Possible Improvements:
- Extra Flavor: Add a splash of liqueur (like cassis, framboise, or Chambord) to the berry mix for an adult twist. Or a bit of vanilla bean or cinnamon can subtly warm the flavor, though purists keep it just berry.
- Sweetness & Tartness: Adjust sugar to your taste and the berries’ sweetness. Summer pudding is often a bit tart – serve with something sweet (cream/ice cream) to balance. You can also incorporate a layer of sweetened whipped cream or mascarpone inside for a spin (though it will alter the classic structure).
- Individual Servings: Make mini summer puddings in ramekins or a muffin tin. Line and assemble the same way. Each person gets their own little berry cake – adorable and sets faster (might only need 2-4 hours to chill).
- Serving Suggestions: It’s typically served with pouring cream, whipped cream, or ice cream. In British fashion, a drizzle of single cream over a slice is common. For a vegan serve, coconut whipped cream pairs nicely. Even a dollop of Greek yogurt can complement the sweet berries for a breakfast take.
- Other Fruits: While mixed berry is classic, you can make variations like peach & raspberry pudding, or even an autumn version with apples/pears and cranberries (though that veers from the original summer theme). The method of fruit + bread can be applied creatively.
Source Link: Summer Berry Pudding (No-Bake Bread Dessert) – Just a Mum’s Kitchen
15. Monte Cristo Sandwich – Sweet & Savory Brunch Bliss
Description: The Monte Cristo is the ultimate fried ham & cheese sandwich – a decadent mashup of a sandwich and French toast.
Layers of ham, turkey, and Swiss (or Gruyère) are assembled between soft bread, the whole sandwich is dipped in egg batter (like making French toast), then pan-fried until golden.
The twist? It’s often dusted with powdered sugar and served with a side of raspberry or currant jam for dipping.
This creates that irresistible sweet-and-salty combo (The Best Monte Cristo Sandwich Recipe – Taste and Tell) that has made the Monte Cristo a legend (famously served at Disneyland’s café).
Imagine gooey melted cheese and savory meats in a warm french-toasted package, with a touch of sweet jam – it’s an unforgettable treat for breakfast, lunch, or brunch.

Why It’s Great:
- Sweet & Savory Genius – The contrast of flavors is amazing: the slight sweetness of the egg batter and powdered sugar with the savory ham and cheese is a “will convert even a skeptic” experience (The Best Monte Cristo Sandwich Recipe – Taste and Tell). If you like chicken & waffles or maple syrup on bacon, this is right up your alley.
- Crispy and Melty – You get a lovely crispy outer layer from frying the egg-dipped bread, while inside the cheese melts and the meats warm, giving soft, melty, and meaty satisfaction.
- Hearty and Filling – This is a substantial sandwich (often double or triple decker with three bread slices in some versions). Loaded with protein from meat and eggs, it’s a meal that keeps you full. Great for brunch when you might be skipping lunch – it can stand in as two meals in one.
- Nostalgic Diner Classic – It has that retro appeal; Monte Cristos were big on 1960s and 70s American menus. Making it at home gives a fun diner-vibe without going out. Plus, it’s a hit for those who remember it from youth, and a discovery for those who haven’t tried it.
- Simple to Make – Essentially, you make a ham & cheese, then treat it like French toast. It’s not much more difficult than a grilled cheese, yet the payoff in flavor is enormous. No special equipment needed either.
Suitable For:
- Brunch & Breakfast Lovers – When ordinary French toast or pancakes won’t do, the Monte Cristo steps in. Perfect for a indulgent Sunday brunch or a holiday morning (New Year’s treat, etc.).
- Sandwich Fans – Anyone who loves a good sandwich, especially grilled or pressed ones like a croque-monsieur or Cuban sandwich, will appreciate this amped-up version.
- Hungry Teens/Adults – This really satisfies big appetites. It’s a great weekend dish for a family – served hot and cut in halves or quarters, it often disappears fast.
- Sweet-Salty Cravings – If you can never decide between something sweet or savory for breakfast, the Monte Cristo lets you have both. It’s also great for that breakfast-for-dinner craving.
- Leftover Makeover – Got leftover ham or turkey (like post-Thanksgiving)? Monte Cristo is a delicious way to use them up. It turns plain leftovers into a special treat.
Tips & Tricks:
- Assemble Securely: Layer bread with mustard (optional) and mayo (optional) if you like on the inside, then cheese, then meats (typically ham + turkey), then cheese again before the top bread. The cheese acts as glue when melted. You can use toothpicks to hold the sandwich together when dipping and frying, removing them before serving. Some Monte Cristos are double-deckers (3 slices of bread with 2 layers of filling). Those can be large, so you might prefer a single layer for ease.
- Thick Bread Slices: Use a good white or brioche bread, somewhat on the thicker side (but not super thick Texas toast – around 1/2 to 3/4 inch). Slightly stale or day-old bread also helps it hold together when soaked. Too soft fresh bread might tear.
- Egg Batter: Similar to French toast batter. Beat eggs with a bit of milk (and a pinch of salt and sugar). Some recipes also add a touch of vanilla or nutmeg, but since this is a savory sandwich, you can keep it plain or perhaps a tiny pinch of sugar for caramelization. Dip the entire sandwich in the batter, coating all sides. Let excess drip off – you don’t want it soggy to the core, just coated.
- Frying: Use butter or oil (or a mix) in the pan/griddle. Fry on medium heat – not too hot, or the outside will burn before the inside warms and cheese melts. Cook a few minutes per side until nicely browned and the cheese is melty (you can cover the pan briefly to help melt the cheese if needed). Don’t forget to cook the edges – you can hold the sandwich with tongs and press the edges to the pan for a few seconds to cook the sides if the sandwich is very thick.
- Serving: Traditionally cut in half diagonally, sprinkled with powdered sugar. Serve with a small dish of jam (raspberry or blackberry is classic). Dip each bite in jam to get that sweet contrast. If jam dipping isn’t your thing, you can drizzle a bit on top. Some even serve with maple syrup instead – it’s a similar idea.
Possible Improvements:
- Cheese Choices: Swiss or Gruyère is standard for that nutty flavor. You can also use cheddar for more sharpness or even brie for a luxe twist. Just make sure it’s a good melter.
- Alternate Fillings: Turkey and ham are classic, but you can do just one or the other. For a vegetarian Monte Cristo, use something like a slice of cheese and a slice of tomato or a meatless “ham”, though it’s really the combo of meats that defines it. You could also experiment with a slice of sweet cooked ham and a slice of roast pork for a Cubano-Monte Cristo hybrid.
- Baking Option: If making a bunch for a crowd, you can assemble and pan-fry them just enough to brown, then finish warming them through on a baking sheet in the oven. This way, you serve everyone hot at once.
- Health Consideration: It’s an indulgence, but you can lighten a tad by grilling instead of deep frying (some diner versions actually deep fry the sandwich – we’re pan frying, which is lighter). You could also use whole grain bread, but honestly the treat is in the traditional ingredients. Maybe serve with fresh fruit on the side to balance it out.
- Mustard Kick: Spread a thin layer of Dijon mustard inside the sandwich for an extra zing that complements the meats. Some recipes call for mustard and mayo inside to add moisture and flavor.
- Mini Monte Cristos: Make them with mini slider buns or cut bread into quarters before dipping to create bite-size Monte Cristo appetizers on toothpicks (great for parties, served with a raspberry sauce for dipping). In such cases, you might bake them instead of pan-frying to handle quantity.
Source Link: Monte Cristo Sandwich – Taste and Tell
16. Spanish Migas – Rustic Garlic & Chorizo Fried Bread Scramble
Description: A hearty dish from the Spanish countryside, Migas literally means “crumbs” – referring to day-old bread crumbs revivified into a flavorful meal.
To make Spanish migas, stale bread is torn into small pieces, softened with a bit of water, then fried in olive oil with garlic, paprika, and often chorizo and peppers until crispy-brown.
The result is like savory bread croutons or stuffing, but served as a dish on its own, often topped with a fried egg or grapes. It’s the definition of rustic comfort food, born out of using simple ingredients.
Every region does it slightly differently (Extremadura migas might have bacon and paprika, while in La Mancha they add grapes for sweetness), but the core idea is the same: transform stale bread into a garlicky, golden skillet feast (Spanish Migas – bites out of life).

Why It’s Great:
- Incredible Transformation – It takes the most basic ingredients – stale bread, garlic, olive oil – and turns “food scraps into an easy weeknight dinner.” (Spanish-Style Migas With Chorizo, Peppers, and Kale Recipe) It’s satisfying to cook something so humble yet end up with rich flavor (thank the garlic, pork fat, and smoked paprika for that!).
- Toasty & Savory – Imagine crunchy-edged bread bits saturated with the essence of garlic and pork. It’s like the best part of stuffing or croutons, but all over. With chorizo and bacon in the mix, it’s smoky, salty, and deeply savory.
- One-Pan Simplicity – Everything happens in one skillet: cook your meats/veggies, fry the bread in the rendered fat and olive oil. Minimal cleanup, maximal flavor.
- Hangover Cure Reputation – In Spain, a plate of reheated migas with a fried egg is famed as “possibly the best hangover-killing breakfast” – even better than a bacon-egg-cheese sandwich (Spanish Migas – bites out of life). Greasy in a good way and substantial, it indeed feels reviving.
- Cultural Authenticity – This dish is a taste of Spanish tradition, often tracing back to shepherds’ cooking over fires (Spanish Migas – bites out of life). Serving it can be a conversation starter about Spanish cuisine beyond tapas – it’s like bringing a little old-world Spanish comfort to your table.
Suitable For:
- Savory Breakfast Lovers – Sick of sweet breakfasts? Migas (with an egg on top) is a fantastic savory start to the day, akin to breakfast hash or skillet home fries – but with bread.
- Tapas or Brunch Spread – Serve it as part of a brunch or tapas spread alongside other dishes like tortilla española, it will hold its own and intrigue guests who haven’t had it.
- Budget Cooking – Tight budget? This dish is essentially bread and bits of whatever – truly cheap yet filling. You can omit meat and still have a tasty garlic-paprika bread dish.
- Bread Aficionados – If you love bread in all forms (and aren’t afraid of carbs), this showcases bread as the star. It’s also naturally vegetarian if you skip chorizo/bacon (just use more olive oil and maybe some smoked paprika for the missing smokiness).
- Camping or Cast-Iron Cooking – Migas were traditionally cooked outdoors. If you have a cast iron pan and a fire (or grill), you can make an awesome rustic version al fresco.
Tips & Tricks:
- Bread Prep: Use a crusty bread (baguette, country loaf). Cut or tear into small chunks (about 1/2 inch). Let it go stale or dry it out in a low oven. Then slightly moisten the bread – sprinkle with water or even better, with a little water mixed with minced garlic and salt – and let it sit covered for 30 minutes. This softens the interior slightly so the migas won’t be rock hard inside.
- Use Pork Fat: If using chorizo or bacon, fry those first and use their rendered fat along with olive oil for frying the bread – it infuses huge flavor. Spanish chorizo (the cured kind) diced up works great; so does fresh Mexican chorizo (though that’s a different cuisine, it will still be tasty). Remove meats once crisp to add back later (so they don’t burn).
- Garlic & Pimentón: Garlic is key – slice several cloves. Fry them gently in the oil until golden and remove before they burn. Use smoked paprika (pimentón) to season – it gives that authentic smoky depth. Add paprika to the oil just before the bread so it toasts its flavor but doesn’t burn.
- Patience in Frying: Fry the damp bread bits on medium heat, stirring frequently, for quite a while – around 10-15 minutes – until they shrink, crisp up and turn uniformly golden-brown. At first, they’ll steam and soften, then they’ll start to crisp. This slow approach ensures crunchy outside, a bit tender inside. Season with salt and pepper (and maybe a pinch of chili).
- Mix-Ins: Once bread crumbs are crispy, add back in the fried chorizo/bacon, along with any sautéed veggies like diced peppers (many recipes include green/red peppers fried in the oil) (Spanish Migas – bites out of life). Toss to combine and warm through. Traditionally served with a fried egg on top or with grapes on the side for bursts of sweetness.
Possible Improvements:
- Add Veggies: While rustic migas might just have garlic and meat, you can easily add diced bell peppers, onions, or tomatoes to the fry for a bit of veg. Kale or spinach even could be thrown in towards the end for a greener twist, though that’s not traditional.
- Herbs or Cheese: Not typical in Spanish migas, but a sprinkle of fresh parsley at the end can brighten it. Or grate a little Manchego cheese over hot migas to melt for a Spanish twist on cheesy bread.
- Spice it Up: Add a chopped dry chili or chili flakes with the garlic for some heat. Some regions add a type of dried pepper. A bit of cumin could also add an earthy note.
- Alternate Meats: If you don’t have Spanish chorizo, bacon or pancetta is fine. Even sausage crumbles can work. For a seafood variant, some Extremadura recipes add salted sardines or cod bits.
- Serving Styles: Instead of one big scramble, sometimes migas is served with components on top: for example, plate the fried bread crumbs then top with fried eggs, or with seared veggies, or serve alongside seared pork or roasted peppers. You can be creative – the base is versatile. Also, consider a squeeze of lemon on top if it feels heavy; acidity can enliven the dish.
Source Link: Spanish Migas (Fried Bread Crumbs with Garlic & Chorizo) – bites out of life
17. Hong Kong-Style French Toast – Deep-Fried Peanut Butter Heaven
Description: A beloved Hong Kong café (cha chaan teng) treat, this French toast is a decadent, dessert-like spin on the classic.
Instead of the usual American method, Hong Kong French toast uses thick milk bread (often with a layer of peanut butter or sweet jam sandwiched between two slices), dipped in egg, then deep-fried until golden.
It’s served with a slab of butter on top and a drizzle of sweetened condensed milk or syrup (10-min. Easy Hong Kong Style French Toast – Christie at Home) (10-min. Easy Hong Kong Style French Toast – Christie at Home).
The result is a crispy-outside, pillowy-inside creation that’s rich and satisfying – often described as “French toast on steroids.” It’s an indulgent snack or breakfast that perfectly balances salty peanut butter with sweet toppings.

Why It’s Great:
- Ultra-Indulgent Texture – Deep frying gives an even crispier crust than regular pan-fried French toast. Inside, the bread is fluffy and almost custardy. When you cut in, you might see a bit of molten peanut butter – it’s pure bliss.
- Sweet-Salty Perfection – The combo of peanut butter (or kaya/coconut jam in some versions) with butter and condensed milk on top hits all the taste pleasure points. It’s “delicious served with butter and condensed milk.” (10-min. Easy Hong Kong Style French Toast – Christie at Home) Each bite is rich, creamy, sweet, and slightly savory.
- Quick to Make – Surprisingly fast: just assemble the sandwich, dip, and fry for about 2 minutes per side. No overnight soaking needed. Great for when you want a café-style treat at home.
- Cafe Culture at Home – It’s a signature dish of Hong Kong’s bustling diner culture. Making it at home can transport you to a Hong Kong café booth, enjoying milk tea and this toast. A great conversation piece if serving guests who haven’t tried it.
- Versatile Filling – While peanut butter is classic (and yields a delicious almost Reese’s-like thing when combined with the sweet milk drizzle), you can use other spreads: almond butter, Nutella, fruit jam – or the traditional Cantonese filling of sweetened condensed milk with peanut butter for extra decadence.
Suitable For:
- Dessert for Breakfast Crowd – This is definitely for those who enjoy treats like pancakes with lots of syrup or churros in the morning. It’s very rich – almost a dessert – making it great for brunch or a special weekend breakfast.
- Tea Time Snack – In Hong Kong, it’s often an afternoon snack. It pairs perfectly with a cup of hot Hong Kong milk tea (black tea with evaporated/condensed milk). Try that pairing for an authentic experience.
- Vegetarian (but not light!) – It’s meat-free, though certainly not light. Still, it’s a nice option in place of something like bacon and eggs for a vegetarian who wants a hearty, flavorful breakfast.
- Comfort Cravers – This is comfort food, through and through. If you’re in need of an emotional uplift or reward, a plate of Hong Kong French toast dripping with condensed milk will surely bring some joy.
- Explorers of Global Cuisine – Anyone curious about international breakfast/snack dishes will love this iconic Hong Kong recipe. It’s easy to love, being based on familiar elements but taken to another level.
Tips & Tricks:
- Use Milk Bread or Brioche: The authentic version uses thick-cut Asian milk bread (which is soft, white, and slightly sweet). Brioche or soft white sandwich bread are good substitutes. Cut it about 1 to 1.5 inches thick. Some use two slices sandwiched; others use one slice cut with a pocket – sandwich style is easier.
- Spread the Filling: Peanut butter is traditional (smooth or chunky). Spread a generous layer on one bread slice and top with another (like making a PB sandwich). You can also do peanut butter on one side and jam on the other for PB&J inside. Press them together firmly so it adheres.
- Egg Batter: Beat 1-2 eggs with a dash of milk. Some HK recipes add a little sugar or salt, but it’s usually just egg to let the topping provide sweetness. Dip the sandwich in the egg batter, coat well on both sides. Let it sit a few seconds to absorb – but don’t soak too long or it might fall apart.
- Deep Fry Right: Heat about 1-2 inches of oil in a pan (or use a deep fryer) to ~350°F (180°C). Gently place the egg-coated sandwich in. Fry until golden brown (about 1-2 minutes each side). Remove and drain on paper towels. The toast should be crisp and medium-brown, not too dark.
- Serving: Top immediately with a slice of butter (so it melts over the hot toast) and a good drizzle of sweetened condensed milk. Alternatively, serve with syrup or honey. Condensed milk is the classic in HK cafes, sometimes along with a side of extra syrup. Dusting with powdered sugar is optional but common when adapted in Western presentations.
Possible Improvements:
- Kaya or Other Fillings: Try the kaya French toast variation – kaya is a coconut-egg jam popular in Southeast Asia. A layer of kaya inside gives a fragrant coconutty sweetness. Another filling used is dulce de leche or even lemon curd for a different twist (though peanut butter is king).
- Air-fry or Pan-fry: For a slightly lighter version, you can pan-fry the sandwich in butter on medium heat, like typical French toast (it’ll just be less crispy all around but still yummy). Some have had success air-frying it – spray with oil and air fry until golden, flipping once. Not exactly the same, but a bit less oily and still crisp.
- Cut into Fingers: If serving a crowd or for a party, consider making a few, then cutting into thick “fingers” or triangles, so people can sample. You could even offer a variety of dipping sauces (condensed milk, chocolate sauce, fruit syrup).
- Toppings: Besides butter and condensed milk, you can top with fresh fruit (sliced banana is great with peanut butter), a scoop of ice cream for a full dessert, or a dusting of cinnamon.
- Vegan Adaptation: Use vegan butter and a plant-based condensed milk (coconut condensed milk is available). For the egg batter, try a chickpea flour batter or a flaxseed “egg” with a bit of plant milk – the texture won’t be identical to egg, but you might get a decent coating to fry. It won’t be truly the same without egg’s richness, but it can still be a tasty fried sandwich treat for someone who doesn’t eat eggs.
Source Link: Hong Kong Style French Toast (Peanut Butter Stuffed) – Christie at Home
18. Caprese Garlic Bread – Fresh & Cheesy Upgrade to a Classic
Description: Take everything you love about Caprese salad (tomatoes, basil, mozzarella) and pile it onto garlicky bread – that’s Caprese Garlic Bread.
It starts with a loaf of baguette or Italian bread slathered in garlic butter and blanketed with fresh mozzarella, baked until melty.
Then it’s topped with slices of ripe tomatoes, a drizzle of balsamic reduction, and plenty of fresh basil.
The result is the “best garlic bread you will ever eat” – crusty, cheesy, garlicky, and refreshed by the juicy tomatoes and basil on top (Caprese Garlic Bread Recipe).
It’s the perfect summer appetizer or side, combining two favorites into one irresistible dish.

Why It’s Great:
- Ultimate Flavor Fusion – It merges two beloved foods: cheesy garlic bread + Caprese salad. You get the indulgent, buttery, garlicky satisfaction of garlic bread plus the bright, fresh notes of tomato and basil and the sweet tang of balsamic. Each bite is rich yet refreshing.
- Texture Delight – Crunchy toasted bread, gooey cheese, and the cool burst of fresh tomato – a delightful mix of textures: “crusty, cheesy, garlicky, buttery, tomatoey, basily, and a tad bit vinegary” (Caprese Garlic Bread Recipe). It hits every note.
- Crowd-Pleaser – This is a surefire hit at gatherings. It’s familiar enough (who doesn’t like garlic bread or Caprese?) but with a wow-factor twist. Great for BBQs, potlucks, or even as a starter for an Italian dinner.
- Summertime Star – Perfect use for summer tomatoes and basil. When gardens and markets overflow with tomatoes, this recipe showcases them beautifully, making it a go-to during tomato season.
- Quick and Easy – It’s remarkably simple to prepare yet looks and tastes gourmet. Just a few steps: bake garlic bread with cheese, then top. Even balsamic reduction is easy (or you can buy a glaze). It’s an easy way to elevate a meal without much effort.
Suitable For:
- Appetizer or Side Dish – Pairs well with pastas, grilled meats, or a glass of wine. Also ideal as a party appetizer (cut into smaller pieces). It’s vegetarian-friendly and loved by all ages.
- Family Dinners – Kids love cheesy bread; this one just sneaks in some tomato and basil (which many kids will tolerate or even enjoy in this format). It can entice picky eaters to try the “green stuff” because it’s on yummy cheese bread.
- Meal Preppers – You can prep most components (garlic butter the bread, have cheese sliced, balsamic reduced) ahead of time, then assemble and bake quickly when needed.
- Game Day or Casual Entertaining – It’s like fancy pizza bread. Great for watching sports or any casual hangout where finger-food is welcome.
- Low-Stress Cooks – If you’re not super confident in the kitchen, this recipe is almost foolproof yet yields spectacular results. Hard to mess up, and the presentation is lovely with minimal finesse required.
Tips & Tricks:
- Bread Choice: Use a crusty loaf like a French baguette or Italian loaf. You can also use ciabatta. Cut it lengthwise. If the bread is very soft, toast it lightly first to give it structure. The goal is sturdy bread that can hold toppings without getting too soggy.
- Garlic Butter Spread: Mix softened butter with minced garlic (and a pinch of salt, pepper, maybe Italian seasoning or a little fresh parsley). Spread generously on the cut sides of the bread (Caprese Garlic Bread Recipe). That butter will soak in as it bakes, making the bread ultra-flavorful.
- Melting the Mozzarella: Layer slices of fresh mozzarella (or you can use low-moisture mozz for a stronger cheese pull) on the bread after the garlic butter. Bake in a hot oven (~400°F) for about 10-15 minutes until the cheese is melted and starting to brown at edges (Caprese Garlic Bread Recipe). Tip: pressing the bread halves slightly (smoosh it) can help the toppings not roll off, as one blogger discovered for pizza (French Bread Pizza Perfected | Mel’s Kitchen Cafe); for this, just ensure your bread is stable.
- Tomato Topping: As soon as it’s out of the oven, immediately top with slices of ripe tomato. Season tomatoes with a bit of salt & pepper on the bread (Caprese Garlic Bread Recipe) to bring out their flavor. Use the best tomatoes you can (heirloom or vine-ripened) since they’re a star ingredient.
- Basil and Balsamic: Sprinkle fresh basil leaves (tear them for more flavor release). Then drizzle a balsamic reduction over it (Caprese Garlic Bread Recipe). To make balsamic reduction: simmer balsamic vinegar with a bit of honey or sugar until it thickens into a syrup (it will coat a spoon). Or cheat and use ready balsamic glaze. That touch of sweet acidity ties it together.
Possible Improvements:
- Add Protein: For a more filling bite, you could add a thin layer of prosciutto or salami on the bread before the cheese (making it less “Caprese” but certainly delicious). Or after baking, add thin slices of Parma ham on top of the tomatoes (the heat of bread will warm them slightly).
- Different Cheese: Fresh mozz is mild. For more flavor, you could spread a thin layer of pesto on the bread under the cheese or mix some grated parmesan with the garlic butter (the blog calls it “glorious combination” (Caprese Garlic Bread Recipe)). Or even dot some goat cheese or burrata on top of the tomatoes for extra creaminess.
- Grill It: In summer, you can grill the garlic-buttered bread (open side down to toast, then flip and add cheese until melted). This adds a smoky char. Then top with tomatoes/basil as usual. Great BBQ side.
- Make it a Meal: Top the finished Caprese bread with a handful of lightly dressed arugula or a fried egg or two, and you have a knife-and-fork open-faced sandwich meal.
- Herb Oil Drizzle: Instead of or in addition to balsamic, a drizzle of good extra virgin olive oil (maybe infused with a little garlic) can be lovely. The original uses balsamic reduction for that sweet tangy note that “takes it over the top”, so I’d keep that and maybe just finish with a touch of olive oil too if desired.
- Gluten-Free Option: Use a gluten-free baguette – all the other ingredients are naturally GF. You’ll still get the same flavors.
Source Link: Caprese Garlic Bread – Two Peas & Their Pod
19. Chocolate Bread Pudding – Decadent Make-Ahead Chocolate Fix
Description: This chocolate bread pudding is like a cross between a brownie and a custard – a chocoholic’s dream breakfast or dessert.
Cubes of day-old bread are soaked in a rich chocolate custard (made with cocoa, chocolate chips, milk, eggs, sugar) (Chocolate Bread Pudding (Rich Breakfast or Dessert Recipe) – Olives + Thyme), then baked until the pudding is set but still soft.
The result is a pudding with a moist, almost molten interior studded with melted chocolate chips, and a slightly crisp top.
It’s intensely chocolatey, especially if you pour warm chocolate ganache or sauce on top to serve, or simply dollop with whipped cream and berries.
Best part: you can assemble it ahead and bake when ready, making it an easy yet show-stopping treat for brunch or dessert.

Why It’s Great:
- Total Chocolate Indulgence – This takes humble bread pudding and makes it a “decadent breakfast or dessert dish” (Chocolate Bread Pudding (Rich Breakfast or Dessert Recipe) – Olives + Thyme). It’s like eating warm chocolate cake that you can justify for breakfast because, hey, it’s bread pudding! Deep cocoa flavor in every bite.
- Soft, Custardy Comfort – The texture is wonderfully comforting – the bread soaked in custard becomes silky and soft (not dry), almost like a french toast casserole but even moister. And those chocolate chips throughout become pockets of fudginess (Chocolate Bread Pudding (Rich Breakfast or Dessert Recipe) – Olives + Thyme). It’s the definition of cozy, especially when warm.
- Easy & Make-Ahead – You basically mix, dump, and bake. It’s a “quick and easy recipe” that comes together in about 15 minutes of prep (Chocolate Bread Pudding (Rich Breakfast or Dessert Recipe) – Olives + Thyme). Perfect for entertaining – you can assemble the night before and refrigerate, then bake fresh. Or freeze it unbaked (or baked) and reheat. Very forgiving.
- Versatile Serving Options – Serve for a special brunch (imagine this on Christmas or Valentine’s morning!) or as a dessert with ice cream. You can dress it up with fancy sauces or keep it simple. Leftovers double as an indulgent snack (maybe even cold from the fridge, yum!).
- Crowd-Friendly – A pan of this serves several people, and it’s rich so a small portion satisfies. It’s easier than making individual chocolate soufflés or cakes for a group, but just as gratifying.
Suitable For:
- Brunch Spread – Elevate a brunch with this on the menu, especially for holidays or showers where you want something a little extra. Pairs well with coffee or even a brunch cocktail.
- Dessert Lovers – Serve it as dessert with vanilla ice cream or crème anglaise. It’ll please any chocolate lover (and maybe convert bread pudding skeptics who can’t resist chocolate).
- Kids & Families – What kid would refuse chocolate pudding-cake for breakfast? It’s a fun occasional treat. Families can also enjoy making it together since it’s easy (kids can help whisk and pour).
- Budget Dessert – Uses up bread and basic pantry ingredients instead of pricier specialty desserts. You get a big volume of dessert for little cost.
- Potlucks & Parties – Transportable and can be warmed up at the venue. It’s unique enough to stand out among typical potluck fare and you likely won’t have duplicates.
Tips & Tricks:
- Bread Choice: Brioche, challah, or a soft French bread works great (even better if slightly stale). The rich custard will moisten any bread, but avoid very strongly flavored breads (like sourdough) that might clash with chocolate. Cut into cubes ~1 inch. Dry them out in the oven if they’re fresh (10 minutes at 300°F) so they absorb more custard.
- Custard Mix: Heat milk (and/or cream) and dissolve cocoa powder and sugar in it for depth. Some recipes add melted chocolate into the custard too for extra richness. Whisk in eggs (tempering if milk was hot). Add vanilla and a pinch of salt to enhance flavor. The custard should taste like chocolate milk – because that’s basically what it is, just egg-enriched.
- Chocolate Chips: Stir in a generous amount of chocolate chips or chunks into the mix (semisweet or dark for intense flavor). As the pudding bakes, they’ll melt into gooey pockets (Chocolate Bread Pudding (Rich Breakfast or Dessert Recipe) – Olives + Thyme). You can also toss in some that are a different type (white or peanut butter chips) for contrast, but pure chocolate keeps it classic.
- Soak & Bake: Combine bread cubes and custard in your baking dish, gently fold so all bread gets saturated. Let it soak 15-30 minutes (or even overnight in fridge) so custard really penetrates (Chocolate Bread Pudding (Rich Breakfast or Dessert Recipe) – Olives + Thyme). Bake at ~350°F for 30-40 minutes until set – edges will be firmer, center slightly jiggly but not liquid. Don’t overbake or you lose the custardy texture – you want it “just set.”
- Serving Sauces: For over-the-top presentation, make a quick chocolate ganache (warm cream + chocolate) or a simple chocolate sauce to pour on top (Chocolate Bread Pudding (Rich Breakfast or Dessert Recipe) – Olives + Thyme). Freshly whipped cream or vanilla ice cream also complements the richness and adds a temperature contrast.
Possible Improvements:
- Flavor Twists: Add a teaspoon of instant espresso powder to the custard to deepen the chocolate flavor (espresso highlights chocolate). A dash of cinnamon or chili powder can give a Mexican chocolate vibe. Or a splash of bourbon or Kahlua can provide an adult nuance.
- Fruits & Nuts: Fold in some raspberries or cherries with the bread for a Black Forest feel, or top the finished pudding with macerated berries. Chopped toasted hazelnuts or almonds can add crunch and go great with chocolate.
- Individual Servings: Bake the mixture in buttered ramekins for individual bread puddings – reduce baking time accordingly. This can fancy it up for dinner parties (each person gets their own mini pudding).
- Gluten-Free Option: Use a sturdy gluten-free bread – the custard will mask some of the textural differences, though GF bread can be very soft so maybe toast it a bit more to avoid mush.
- Overnight French Toast Style: Assemble in the evening, refrigerate overnight, and bake in the morning for a make-ahead chocolate French toast casserole. This can free up your morning and also results in very well-soaked bread (super custardy). It might need a tad longer baking time if it’s cold from fridge.
Source Link: Chocolate Bread Pudding – Olives + Thyme
20. Sweet Berry Bruschetta – Whipped Yogurt Mascarpone on Toast with Berries
Description: A delightful dessert bruschetta that’s essentially a new way to enjoy berries and cream.
Slices of challah or brioche are toasted or grilled, then spread with a lightly sweetened whipped mixture of Greek yogurt and mascarpone cheese (Sweet Berry Bruschetta | The Modern Proper).
On top goes a spoonful of macerated mixed berries (strawberries, blueberries, raspberries, etc.), and a drizzle of honey. The result is an “insanely simple dessert that celebrates ripe berries” (Sweet Berry Bruschetta | The Modern Proper).
It’s easy to make, gorgeous to serve, and far lighter than cake or pastries – letting the natural sweetness of summer fruit shine. Think of it as a healthier, elegant take on a berry tartine.

Why It’s Great:
- Fresh and Light – This dessert isn’t heavy or overly sweet. It’s basically fruit, yogurt, and a bit of bread – so you get the satisfaction of a dessert without feeling too weighed down. It’s also lower sugar than cakes/pies typically, relying on the berries’ sweetness.
- Great Texture Combo – You have the crunch of the toasted bread, the creamy cool topping, and the juicy burst of berries. It’s satisfying to bite into and has a lovely contrast between crisp and creamy.
- Quick Assembly – Very fast to prepare especially if you’ve strained the yogurt in advance. No baking required (just a quick toast). Perfect for when you need a dessert in minutes.
- Healthy Vibe – With Greek yogurt and fresh fruit, it packs protein and vitamins. Honestly, you could even eat it for breakfast or a snack (it’s not far off from yogurt with fruit on toast). It’s indulgent enough for dessert but nutritious enough to not feel guilty.
- Beautiful Presentation – Those glossy mixed berries atop the white cream and golden toast looks restaurant-quality with minimal effort. You can choose berry combinations that give a pop of color (blueberries + strawberries for red-blue contrast, etc.).
Suitable For:
- Summer Gatherings – Ideal for outdoor dinners, BBQs, or whenever berries are in season. A nice ending after a grilled meal.
- Brunch Upgrade – Serve this at brunch as a sweet option – it’s like an open-faced fruit Danish but lighter. Pairs nicely with mimosas or tea.
- Health-Conscious Dessert – For those who usually skip dessert due to heaviness or sugar, this is a great compromise – it feels indulgent but is relatively wholesome (especially if you moderate the honey).
- Kids and Adults – Kids might love assembling their own berry bruschetta, and adults appreciate the not-too-sweet, fresh flavors. It’s pretty family-friendly unless someone hates yogurt tang.
- Last-Minute Guests – If someone drops by, you can whip this up if you have berries and some form of creamy dairy. Even swapping mascarpone with cream cheese could work in a pinch (just adjust sweetness).
Tips & Tricks:
- Strain the Yogurt: The recipe suggests straining Greek yogurt for 4 hours (Sweet Berry Bruschetta | The Modern Proper) to make it thicker (similar to labneh). If using already thick Greek yogurt, you can strain less or skip if time is short – just know the spread might be a bit looser. Combining with mascarpone helps stabilize it. Make sure both yogurt and mascarpone are at room temp before whipping to avoid lumps, then chill until using.
- Sweeten to Taste: Mix the mascarpone-yogurt with a bit of honey or sugar and vanilla. It should be mildly sweet, like lightly sweetened whipped cream. Don’t overwhip or it could break; just beat until smooth and slightly fluffy. This spread can be made ahead and kept chilled.
- Bread Choice: Challah, brioche, or any soft, slightly sweet bread works best. Slice it about 1/2 to 3/4 inch thick. You can grill it (for nice char lines) or toast it in the oven until just golden and crisp on the edges (Sweet Berry Bruschetta | The Modern Proper) (Sweet Berry Bruschetta | The Modern Proper). Let cool slightly so it doesn’t melt the topping immediately.
- Macerating Berries: Toss the berries with a little bit of honey or sugar and maybe a squeeze of lemon, and let sit for 10 minutes to draw out juices and soften (if using strawberries, definitely slice them). This creates a bit of syrup that can drip into the toast deliciously. If your berries are super ripe and juicy, you can skip macerating and just pile them on fresh.
- Assembly: Spread a generous layer of the yogurt-mascarpone cream on each toast. Spoon the berry mixture on top, including some of the juices. Drizzle with a touch more honey over everything. Serve immediately so the bread stays crisp (it will soften as it sits with the berries, but still tasty).
Possible Improvements:
- Herbal Note: A little fresh mint or basil chiffonnade sprinkled on top of the berries can add a sophisticated herbaceous note that complements the fruit.
- Citrus Zest: Add some lemon or orange zest into the yogurt-mascarpone mix for extra zing that can brighten the flavors.
- Different Fruits: You can adapt this with other fruits too – sliced peaches or nectarines work beautifully (essentially a peach melba vibe with raspberries). Kiwi and strawberries could be nice for color contrast. Or in autumn, ripe figs and a drizzle of balsamic glaze could be a lovely variation.
- Cinnamon Toast Base: If you want a more dessert-like base, you could butter the bread and sprinkle cinnamon sugar, then toast – giving a bit of a snickerdoodle flavor under the berries.
- Vegan Swap: Use a thick coconut yogurt and vegan cream cheese or silken tofu blend to mimic the creamy spread, and use maple syrup instead of honey. And choose a vegan brioche or bread. It won’t be as rich as mascarpone, but you’ll still get a pleasant creamy-fruity toast.
Source Link: Sweet Berry Bruschetta – The Modern Proper
Key Takeaways:
From sweet morning indulgences like Chocolate Bread Pudding and Hong Kong French Toast, to globally-inspired savory dishes like Spanish Migas and Indian Bread Pakora, these 20 bread recipes showcase just how inventive you can get with a loaf of bread.
Trends among them include using leftover or day-old bread to avoid waste (panzanella, bread pudding, migas), combining sweet and savory elements for maximum flavor (Monte Cristo, Caprese Garlic Bread), and embracing quick, easy preparation without sacrificing taste (French bread pizza, berry bruschetta).
Standout ingredients like seasonal fruits, aromatic herbs, and rich cheeses appear often, boosting the humble bread canvas.
Overall, each recipe offers its own benefits – be it healthful twists (yogurt in berry bruschetta), time-saving techniques (overnight strata, make-ahead stuffing), or pure crowd-pleasing decadence (cheesy pull-apart bread, gooey monkey bread).
Together, they prove that bread is far more than a side dish – it can be the star of creative sweets and savories alike.
Conclusion:
Whether you’re in the mood for a quick snack or planning a special meal, these bread-based recipes deliver a world of flavors and textures.
We journeyed through different cuisines and meal types – from a vibrant salad and hearty soup to fancy toasts and comfort casseroles – all unified by the use of bread.
Not only do they show bread’s versatility (soaking up custards, adding crunch, bulking up salads, or serving as the main structure of a dish), but they also highlight smart ways to minimize waste and maximize taste.
The mix of sweet and savory options ensures there’s something here for every craving and occasion. Try a few of these recipes and you’ll never look at a simple loaf the same way again.
With a bit of creativity, that bread on your counter can lead to deliciously innovative dishes – proving that the best meals may start with just a slice of bread and a spark of inspiration.