
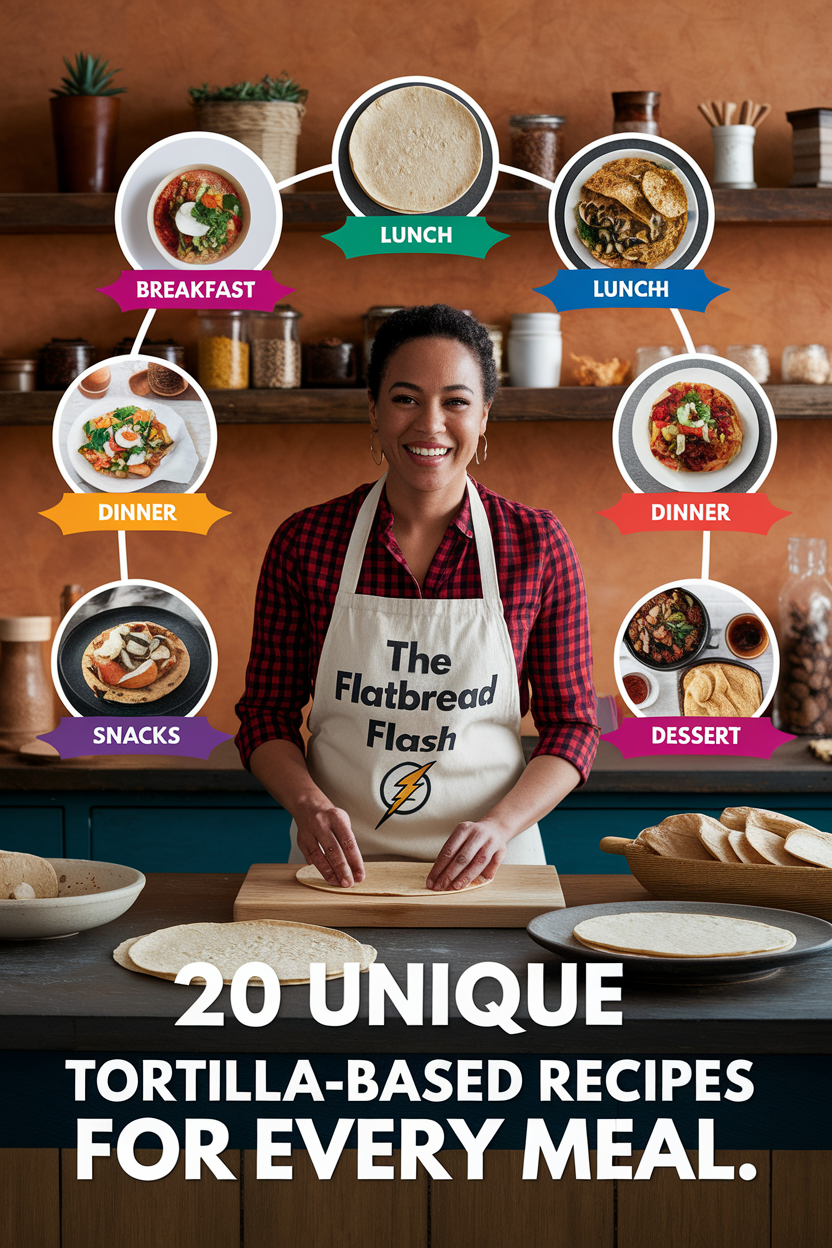
Tortillas are one of the most versatile kitchen staples, serving as the foundation for countless delicious creations. From hearty breakfast burritos to crispy dessert treats, these flour or corn wraps can transform into an entire day’s worth of meals.
In this roundup, we’ve gathered 20 unique tortilla-based recipes from different food bloggers – each recipe highlighting a special twist or benefit. Whether you’re craving a protein-packed breakfast, a light lunch, a comforting dinner, a crunchy snack, or even a sweet dessert, there’s a tortilla recipe here for you.
Read on to discover how you can elevate simple tortillas into crowd-pleasing dishes for any occasion.
Key Takeaways
- Incredibly Versatile: Tortillas can be used in all types of dishes – breakfast, lunch, dinner, snacks, and even desserts, showing just how adaptable they are.
- Quick & Easy Options: Many of these recipes are weeknight-friendly, coming together in around 30 minutes or less for maximum convenience (some in as little as 10 minutes!).
- Tasty & Healthy Twists: Enjoy the bold flavors of global cuisines (Mexican, Thai-inspired, etc.) while also benefiting from healthier swaps – many recipes are loaded with veggies, lean proteins, or can be made vegetarian/vegan.
- Family & Crowd Pleasers: Tortilla-based dishes tend to be fun and customizable, making them perfect for feeding picky eaters, meal prepping, or entertaining a crowd with build-your-own options.
- Creative Uses of Tortillas: This list goes beyond basic wraps – you’ll see tortillas baked into pizzas, layered as “lasagna,” crisped into bowls, rolled into pinwheels, and more, sparking inspiration to get creative in your own kitchen.
1. Veggie-Packed Breakfast Burrito – Fresh & Filling Morning Kickstart
Description: A hearty vegetarian breakfast burrito filled with scrambled eggs, roasted potatoes, and fresh veggies like avocado and spinach.
Wrapped in a large flour tortilla, it’s a fun, fresh, and healthy way to kickstart your morning (Breakfast Burrito Recipe – Love and Lemons). Each bite bursts with creamy eggs, smoky spiced potatoes, and zesty pico de gallo, all rolled up in a convenient handheld package.

Why It’s Great:
- Fresh & Flavorful: Loaded with veggies and herbs, this burrito tastes bright and satisfying with a mix of textures in every bite (Breakfast Burrito Recipe – Love and Lemons).
- Filling & Nutritious: Packed with protein from the eggs and black beans, plus fiber from the veggies, it’s a healthy breakfast that will keep you full till lunchtime (Breakfast Burrito Recipe – Love and Lemons) (Breakfast Burrito Recipe – Love and Lemons).
- Quick & Easy: Simple to assemble and can even be made ahead; it’s freezer-friendly for busy mornings – just reheat and go (Breakfast Burrito Recipe – Love and Lemons) (Breakfast Burrito Recipe – Love and Lemons).
- Versatile: A great way to use up leftover veggies or herbs (that last bit of cilantro or spinach in your fridge) – just toss them in and roll it up (Breakfast Burrito Recipe – Love and Lemons).
Suitable For:
- Busy Professionals & Students: Meal-prep these burritos, freeze them, and reheat for a grab-and-go nutritious breakfast on hectic mornings (Breakfast Burrito Recipe – Love and Lemons).
- Vegetarians (or anyone avoiding meat) – it’s a satisfying meat-free option loaded with plant-based goodness.
- Families & Kids: Mild, customizable fillings make this a hit for all ages; plus, eating a burrito with your hands is always fun for kids.
- Weekend Brunch Lovers: Also perfect for a laid-back brunch spread, where everyone can add their favorite toppings or sauces.
Tips & Tricks:
- Use Large Tortillas: Go for burrito-size (12-inch) flour tortillas so you can tuck and roll them easily without spillage (Breakfast Burrito Recipe – Love and Lemons). Warm them briefly to make them more pliable.
- Layer Smart: Lay down a bed of spinach on the tortilla first, then keep other fillings in a narrow strip – this makes rolling tighter and less messy (Breakfast Burrito Recipe – Love and Lemons).
- Tuck & Roll: Fold in the sides, then roll up firmly (the “tuck and roll” method) to get that compact, restaurant-style burrito (Breakfast Burrito Recipe – Love and Lemons). If needed, wrap it in foil to hold its shape.
- Make Ahead: These burritos freeze well. Wrap each in foil and freeze; to reheat, microwave (out of foil) then optionally crisp it in a skillet for a toasty exterior (Breakfast Burrito Recipe – Love and Lemons) (Breakfast Burrito Recipe – Love and Lemons).
Possible Improvements:
- Go Vegan: Swap the scrambled eggs for a tofu scramble and omit the cheese (or use a plant-based cheese) for a vegan burrito (Breakfast Burrito Recipe – Love and Lemons) (Breakfast Burrito Recipe – Love and Lemons).
- Whole-Grain Upgrade: Use whole wheat or high-fiber tortillas for extra nutrients, or try a gluten-free tortilla if needed.
- Spice It Up: Add a dash of hot sauce or chopped jalapeños inside if you like a spicy kick in the morning.
- Extra Toppings: Serve with a side of salsa, Greek yogurt (as a protein-packed sour cream substitute), or cilantro-lime dipping sauce for added flavor.
Read the full recipe here: Love & Lemons – Breakfast Burrito
2. Healthy 30-Minute Veggie Chilaquiles – Veggie-Packed Mexican Comfort
Description: A lightened-up version of chilaquiles, the classic Mexican breakfast (or brunch) comfort dish. In this recipe, corn tortillas are cut into chips and simmered in a flavorful salsa verde until just tender, then topped with black beans, veggies, and a sunny-side up egg.
It’s essentially a warm tortilla casserole that’s ready in under 30 minutes and bursting with smoky, tangy flavors (Homemade Mexican Chilaquiles Recipe | Feasting At Home).
Each bite delivers a delightful mix of soft tortilla, runny egg yolk, and hearty beans, all infused with salsa goodness.

Why It’s Great:
- Wholesome & Nutritious: Unlike heavier restaurant versions, this chilaquiles is loaded with veggies and beans, making it high in fiber and nutrients while still tasting indulgent (Homemade Mexican Chilaquiles Recipe | Feasting At Home).
- Quick & Easy: You can have this on the table in about 30 minutes (Homemade Mexican Chilaquiles Recipe | Feasting At Home) – great for busy mornings or a speedy dinner fix.
- Versatile Meal: Perfect for breakfast or brunch, but also satisfying enough for a meatless lunch or dinner. Plus, you can enjoy it any time of day and even make the chips from leftover tortillas (Homemade Mexican Chilaquiles Recipe | Feasting At Home).
- Great Use of Leftovers: Originally devised to use leftover chips and salsa, this dish welcomes any salsa roja or verde you have on hand and helps reduce waste (Homemade Mexican Chilaquiles Recipe | Feasting At Home).
- Authentic Yet Lighter: It delivers the authentic Mexican flavors you crave (tangy salsa, cilantro, cotija cheese) but in a lighter, baked-not-fried form that you can feel good about (Homemade Mexican Chilaquiles Recipe | Feasting At Home) (Homemade Mexican Chilaquiles Recipe | Feasting At Home).
Suitable For:
- Vegetarians: Completely meat-free yet high in protein (thanks to beans and eggs), it’s an ideal vegetarian meal. Leave off the egg or use a tofu scramble for a vegan version.
- Gluten-Free Eaters: Uses corn tortillas (naturally gluten-free), so it’s safe for those avoiding gluten.
- Brunch Fans: Anyone who loves brunch foods like huevos rancheros or migas will adore chilaquiles – it’s a fantastic dish for a weekend brunch gathering.
- Budget Cooks: Made mostly from pantry staples (tortillas, canned beans, jarred salsa), it’s inexpensive and perfect for stretching ingredients.
- Comfort Food Seekers: If you want comfort food without feeling too heavy, this hits the spot – warm, “casserole-like” goodness with a healthier profile (Homemade Mexican Chilaquiles Recipe | Feasting At Home).
Tips & Tricks:
- DIY Tortilla Chips: For a lighter version, bake your own tortilla chips from corn tortillas (just spritz with oil and bake until crisp) instead of frying (Homemade Mexican Chilaquiles Recipe | Feasting At Home). This also lets you control the crispness – you can leave some extra crunchy to sprinkle on top at serving.
- Don’t Over-Soak: When simmering the chips in salsa, cook just until they soften slightly but still hold some texture (a few minutes). This prevents the chilaquiles from turning too mushy – unless you prefer it super soft like a casserole.
- Customize the Salsa: Try it with red salsa (salsa roja) for chilaquiles rojos or green tomatillo salsa for chilaquiles verdes. Both work great, so use your favorite salsa or whatever you have (Homemade Mexican Chilaquiles Recipe | Feasting At Home) (Homemade Mexican Chilaquiles Recipe | Feasting At Home).
- Toppings Bar: Prepare an array of toppings so everyone can dress their bowl: fried eggs, crumbled feta or cotija cheese, avocado slices, fresh cilantro, lime wedges, crema or Greek yogurt, and hot sauce. The fresh toppings add texture and brightness.
- One-Pan Option: To save dishes, you can assemble and sauté everything in an oven-safe skillet, then broil for a minute at the end to toast the top and cook the egg (if you’d rather bake the egg than fry it separately).
Possible Improvements:
- Add Protein: Toss in some shredded chicken or sautéed tofu if you want to boost the protein even more (though the beans and egg provide plenty). Chorizo (or soy chorizo) is another flavorful add-in for meat-eaters.
- Different Beans or Veg: Swap black beans for pinto or add sautéed zucchini, bell peppers, or spinach to sneak in extra veggies. Chilaquiles is very forgiving – throw in what you have.
- Cheese Upgrade: Instead of cotija, try a sprinkle of melted cheddar or Monterey Jack and pop it under the broiler for a “nacho-style” cheesy finish.
- Spice Level: If you like heat, use a spicy salsa and garnish with jalapeño or a dash of chipotle chili powder. To keep it mild, stick to a mild salsa and serve hot sauce on the side.
- Make it Brunch-Party Ready: Serve the chilaquiles in mini cast iron skillets or ramekins for individual portions – it looks adorable and guests can customize their own.
Read the full recipe here: Feasting At Home – Chilaquiles Recipe
3. Smoky Vegan Quesadillas with Black Beans – 30-Minute Dairy-Free Delight
Description: A 100% plant-based quesadilla that doesn’t skimp on flavor. These vegan quesadillas are filled with smoky spiced black beans, sautéed peppers and onions, and a layer of melty dairy-free “cheddar” sauce (Vegan Quesadillas with Smoky Black Beans – Minimalist Baker Recipes).
Sandwiched in a tortilla and pan-toasted until golden and crisp, they deliver all the cheesy, hearty satisfaction of a traditional quesadilla without any meat or dairy.
With just 9 ingredients and about 30 minutes required, it’s a quick, wholesome meal that’s as comforting as it is nutritious (Vegan Quesadillas with Smoky Black Beans – Minimalist Baker Recipes).

Why It’s Great:
- Big on Flavor: Thanks to cumin, chili powder, and a dash of smoky spices, these quesadillas are loaded with savory, “cheesy” goodness and a hint of smoke in each bite (Vegan Quesadillas with Smoky Black Beans – Minimalist Baker Recipes). You won’t even miss the dairy – the seasoned black beans and vegan cheddar sauce make sure of that.
- Quick & Easy: Requires only 9 ingredients and ~30 minutes to make (Vegan Quesadillas with Smoky Black Beans – Minimalist Baker Recipes), so it’s perfect for a weeknight dinner or a speedy lunch. Sauté the filling, assemble, and pan-fry – done!
- Hearty & Satisfying: Packed with protein- and fiber-rich black beans, plus veggies, it’s surprisingly filling and energizing for a vegan meal (Vegan Quesadillas with Smoky Black Beans – Minimalist Baker Recipes) (Vegan Quesadillas with Smoky Black Beans – Minimalist Baker Recipes). The texture is decadently creamy and satisfying (without any actual cheese).
- Comfort Food (Vegan-Style): Delivers that comfort factor you expect from a quesadilla – warm, oozy, and crispy – making it a great option for both vegans and omnivores looking to eat more plant-based meals (Vegan Quesadillas with Smoky Black Beans – Minimalist Baker Recipes).
- Customizable: The recipe is very flexible – you can toss in extra veggies like zucchini or corn, adjust the spices, or use your favorite store-bought vegan cheese. It’s a forgiving template (“fill it up and fold it over”) that welcomes personal twists (Vegan Quesadillas with Smoky Black Beans – Minimalist Baker Recipes).
Suitable For:
- Vegans & Dairy-Free Eaters: It’s completely vegan, using a homemade cashew “cheese” or store-bought vegan cheese, so those with lactose intolerance or on a plant-based diet can indulge freely.
- Gluten-Free Option: Use corn tortillas or gluten-free tortillas, and it becomes a gluten-free dish as well (the filling is naturally GF) (Vegan Quesadillas with Smoky Black Beans – Minimalist Baker Recipes).
- Busy Schedules: Great for busy professionals or students – minimal prep and cooks fast. Plus, the black bean filling can be made ahead and even frozen for future quesadilla nights (Vegan Quesadillas with Smoky Black Beans – Minimalist Baker Recipes).
- Family-Friendly: A good way to sneak some beans and veggies into picky eaters’ diets – the smoky flavor and the fun of finger food might win them over. You can also cut quesadillas into smaller wedges for little hands.
- Meatless Mondays (or Any Day): If you’re an omnivore trying to eat a bit less meat, this recipe is an excellent choice – it’s hearty and flavorful enough to satisfy without meat.
Tips & Tricks:
- Warm Tortillas First: Briefly heat your tortillas in a dry pan or microwave before filling – warm tortillas are more pliable and less likely to crack when folded (Vegan Quesadillas with Smoky Black Beans – Minimalist Baker Recipes).
- Fill & Fold Method: Spread the black bean mixture on half of each tortilla, then fold the other half over. Filling only half (rather than sandwiching between two tortillas) makes flipping easier and less messy (Vegan Quesadillas with Smoky Black Beans – Minimalist Baker Recipes).
- Get it Crispy: Cook the quesadillas in a lightly oiled skillet on medium heat until each side is golden brown. Press down gently with a spatula to help the fillings “seal” and the tortilla crisp up evenly (Vegan Quesadillas with Smoky Black Beans – Minimalist Baker Recipes). A few minutes per side should do – watch closely so they don’t burn.
- Make Filling Ahead: The black bean filling can be prepared 1-2 days in advance and kept in the fridge (it actually develops even deeper flavor). Also, any extra “cheese” sauce can be saved for dipping or future use.
- Reheat Right: Leftover quesadillas reheat best in a skillet or toaster oven to recapture the crispiness (microwaving will make them a bit soggy). You can also freeze assembled, uncooked quesadillas and cook them from frozen in a pan – just go low and slow to heat through.
Possible Improvements:
- Add More Veggies: You can sneak in more veggies like chopped spinach, mushrooms, or even sweet potato. Sauté or roast them and mix into the filling for extra nutrients and flavor.
- Spice Level: Love heat? Add a pinch of cayenne or some diced jalapeños into the bean mix. You could also spread a little chipotle sauce inside for a smoky kick.
- Different Beans or Protein: Swap black beans with pinto or kidney beans, or add crumbled tofu/tempeh for variety. Even omnivores could add shredded chicken or beef if they wanted (though it wouldn’t be vegan anymore).
- Cheese Swap: If you’re not up for making a vegan cheese sauce, use your favorite dairy-free shredded cheese. Conversely, if not strictly vegan, you can certainly use regular cheddar or pepper jack for a vegetarian version.
- Serve with Dips: Elevate the experience by serving these quesadillas with fresh guacamole, salsa, or a cilantro-lime cashew crema on the side (Vegan Quesadillas with Smoky Black Beans – Minimalist Baker Recipes). A squeeze of lime on top just before eating also brightens everything.
Read the full recipe here: Minimalist Baker – Vegan Quesadillas
4. Quick Fish Tacos with Garlic Lime Slaw – 15-Minute Coastal Treat
Description: These easy fish tacos bring a burst of Baja flavor to your table in no time.
Tender white fish fillets (such as cod) are seasoned with a spicy rub and either quickly pan-fried or baked, then wrapped in warm tortillas and topped with a refreshing garlic-cilantro lime slaw and creamy avocado (Best Easy Fish Tacos Recipe – Pinch of Yum).
The result is a taco that’s light, crispy, and full of zesty goodness, reminiscent of a seaside vacation meal – yet it comes together in about 15 minutes flat for the perfect weeknight treat.

Why It’s Great:
- Super Fast & Easy: Designed as the “best easy fish tacos,” this recipe is incredibly quick – you can have restaurant-quality tacos in ~15 minutes, making it ideal for busy nights (Best Easy Fish Tacos Recipe – Pinch of Yum). Minimal ingredients and steps, but maximum flavor.
- Fresh & Healthy: With lean fish, a yogurt-based slaw dressing, and plenty of cabbage and herbs, it’s a lighter alternative to fried tacos that still delivers crunch and satisfaction (Best Easy Fish Tacos Recipe – Pinch of Yum) (Best Easy Fish Tacos Recipe – Pinch of Yum). You get protein, healthy fats, and veggies all in one.
- Flavor-Packed: From the spicy seasoning on the fish to the garlic cilantro lime slaw (which adds a tangy, creamy bite) (Best Easy Fish Tacos Recipe – Pinch of Yum), these tacos are bursting with bright flavors and textures – tender flaky fish, cool crunchy slaw, rich avocado, and a squeeze of lime. Every bite has contrast and “vacation vibes” (Best Easy Fish Tacos Recipe – Pinch of Yum).
- Fun & Casual: Tacos are always a crowd-pleaser. This recipe is described as “peppy and fun” (Best Easy Fish Tacos Recipe – Pinch of Yum) – perfect for a relaxed family dinner or even a taco party where everyone can assemble their own.
- Adaptable: Works with any firm white fish (cod, mahi mahi, halibut) and even shrimp. Plus, you can cook the fish grilled, baked, or pan-seared – whatever method you prefer or have access to (Best Easy Fish Tacos Recipe – Pinch of Yum). It’s very flexible with toppings too.
Suitable For:
- Weeknight Dinners: When time is short but you want something delicious, these tacos are your friend. Beginners in the kitchen will also find this approachable (few steps, forgiving recipe).
- Pescatarians & Seafood Lovers: A great inclusion of seafood into your routine – it’s not fishy or complicated, so even those new to cooking fish will enjoy it.
- Light Eaters or Health-Conscious: Those looking for a healthier taco will love that these are not deep-fried and loaded with heavy sauce, but rather fresh, gluten-free friendly (with corn tortillas), and veggie-forward.
- Families: Kids can customize their taco (adding cheese or not using the slaw, for example). The mild white fish and fun hand-held format often go over well with youngsters.
- Entertaining: These tacos make a fantastic casual dinner for guests – easy to scale up, and you can set up a taco bar with extra toppings. Think summer cookouts, “Taco Tuesday” gatherings, or game night meals.
Tips & Tricks:
- Choose the Right Fish: Any flaky white fish works. Pat the fish dry and season it liberally with the spice mix for best flavor. If pan-frying, a quick sear on medium-high heat will give a nice lightly charred exterior while keeping it moist inside.
- Warm Your Tortillas: Briefly warm the corn or flour tortillas on a dry skillet or directly over a gas flame (or wrap in damp paper towel and microwave). This makes them pliable and adds a bit of char for flavor. Keep them wrapped in a towel to stay warm.
- Don’t Overcook Fish: White fish cooks very quickly – usually just a few minutes per side (when it turns opaque and flakes easily, it’s done). Overcooked fish can get tough, so keep an eye on it. With high heat, you often need only ~2-3 minutes per side for average fillets.
- Make the Slaw Ahead: The garlic-lime slaw dressing (a blend of lime juice, garlic, cilantro, maybe a touch of yogurt or mayo) can be made in advance (Best Easy Fish Tacos Recipe – Pinch of Yum). Toss it with shredded cabbage just before serving to keep it crunchy (Best Easy Fish Tacos Recipe – Pinch of Yum). This slaw is a star component – it adds tang and crunch, so don’t skip it!
- Layer Properly: To build the taco, start with the fish in the tortilla, then top with slaw, then add sliced avocado, extra cilantro, and any other toppings (like a drizzle of hot sauce or a spoon of salsa). Putting slaw on top keeps the tortilla from getting soggy and lets that vibrant slaw shine.
Possible Improvements:
- Swap in Shrimp: Not a fan of fish? This recipe adapts wonderfully to shrimp – just sauté or grill shrimp with the same spices (they cook in 2-3 minutes) and you’ve got amazing shrimp tacos (Best Easy Fish Tacos Recipe – Pinch of Yum).
- Use Corn Tortillas for Authenticity: The recipe mentions flour tortillas, but you can use corn tortillas for a more authentic flavor and gluten-free option (Best Easy Fish Tacos Recipe – Pinch of Yum). Lightly frying the corn tortillas in a bit of oil will make them sturdier for holding fillings.
- Add Extra Toppings: While simple is great, you can certainly load these up if you wish – crumbled queso fresco, pickled jalapeños or red onions, a spoonful of pico de gallo, or a spicy chipotle crema would all be fantastic additions.
- Grill for Char: If it’s grilling season, try grilling the fish for an extra smokey flavor. A grill or grill pan will give you a nice charred edge that complements the fresh slaw.
- Make it Creamier: If you prefer a creamier slaw, use Greek yogurt or a mix of yogurt and mayo as the base for the slaw dressing (the recipe’s lime and garlic will cut through the richness). You can also whip up a quick “fish taco sauce” with sour cream, lime, and sriracha to drizzle on top for tangy heat.
Read the full recipe here: Pinch of Yum – Best Easy Fish Tacos
5. Vegetarian Tortilla Soup with Crispy Strips – Zesty One-Pot Comfort
Description: A vibrant vegetarian twist on chicken tortilla soup that’s so hearty you won’t miss the meat.
This soup features a tomato-rich broth simmered with black beans, corn, fire-roasted tomatoes, and warm spices, then finished with loads of fun toppings: think crispy baked tortilla strips, creamy avocado, fresh cilantro, and a squeeze of lime (Vegetarian Tortilla Soup Recipe – Cookie and Kate).
The result is a bowl of soup that’s fresh, flavorful, a little spicy, and immensely satisfying, yet light enough to enjoy for lunch or dinner. Bonus: it tastes even better the next day as the flavors meld (Vegetarian Tortilla Soup Recipe – Cookie and Kate)!

Why It’s Great:
- Fresh & Flavorful: This soup packs a punch of flavor – it’s earthy, a little spicy, and bright all at once, thanks to ingredients like chili powder, cumin, and fresh lime. The toppings add bursts of texture and taste (nothing beats those crunchy tortilla strips on top) (Vegetarian Tortilla Soup Recipe – Cookie and Kate).
- Light but Satisfying: It’s a light broth-based soup that still eats like a meal. Loaded with fiber-rich black beans and corn, it’s very filling and has a good dose of protein without any meat (Vegetarian Tortilla Soup Recipe – Cookie and Kate). Perfect if you want comfort food without feeling heavy.
- Easy & One-Pot: Everything comes together in one pot, and it’s pretty straightforward – sauté aromatics, dump in veggies, beans, broth, simmer, done. Great for weeknights, and minimal cleanup.
- Meal-Prep Star: This soup is one of those that taste even better the next day (Vegetarian Tortilla Soup Recipe – Cookie and Kate), as the spices and flavors develop. It also freezes well. Make a big batch and you have flavorful lunches/dinners ready for days.
- Customizable & Fun: Everyone can dress up their bowl as they like – with dollops of Greek yogurt or sour cream, extra jalapeños for heat, cheese, etc. The array of toppings (crisp tortilla strips, anyone?) makes it interactive and fun to eat.
Suitable For:
- Vegetarians & Vegans: Naturally vegetarian and easily made vegan (just ensure your toppings like yogurt or cheese are vegan or omit them). It provides plant-based protein from beans and could be boosted with tofu if desired.
- Gluten-Free Diets: By using corn tortillas for the strips, this soup is completely gluten-free. It’s a great option for those who need GF but crave a comforting, Tex-Mex dish.
- Healthy Eaters: Low in fat, high in fiber, and filled with vegetables and legumes – this soup is nutritious and low-calorie yet super flavorful. Ideal for anyone looking for a lighter meal that still warms you up.
- Families: Mild enough for most (you control the heat), and kids will enjoy topping their soup with crunchy chips and cheese. Plus, it’s a sneaky way to get them to eat beans and vegetables in a familiar format.
- Meal Prep/Make-Ahead: Busy individuals or meal planners will appreciate that this soup can be cooked in advance. It holds up well and can be portioned out for the week. It also scales easily to feed a crowd or to freeze for later.
Tips & Tricks:
- Homemade Tortilla Strips: Cut corn tortillas into strips, toss with a bit of oil and salt, and bake until crispy golden (Vegetarian Tortilla Soup Recipe – Cookie and Kate). These beat store-bought chips for freshness and you can make just as much as you need (they tend to disappear fast!). Pro tip: only bake the amount you’ll eat at once – homemade strips can stale quickly by next day (Vegetarian Tortilla Soup Recipe – Cookie and Kate).
- Layer Flavors: Sauté onions, garlic, and perhaps a chopped jalapeño at the start to build a flavor base. Bloom the spices (cumin, chili powder, etc.) in the oil for 30 seconds before adding liquids – this wakes up their flavor.
- Simmer Gently: Once everything’s in, let the soup simmer enough for the canned tomatoes and spices to meld (about 20 minutes). This also softens the beans and corn and infuses the broth with all the flavors. Too high a boil can break down the beans too much.
- Season to Taste: Before serving, definitely taste and adjust salt, pepper, and lime. A squeeze of fresh lime juice at the end really brightens the soup and brings out the flavors – don’t skip it! Add more broth if it got too thick, or a pinch of sugar if your tomatoes are very acidic.
- Toppings Bar: Set up a mini topping station: tortilla strips, diced avocado, crumbled queso fresco or cheddar, chopped cilantro, sliced radishes, lime wedges, hot sauce, and Greek yogurt or sour cream. Everyone can tailor their bowl, and the contrast of hot soup with cool creamy toppings (and crunchy chips) is delightful.
Possible Improvements:
- Protein Boost: If you’d like meat, add shredded rotisserie chicken or cooked turkey when simmering for a chicken tortilla soup (the recipe is flexible – even the original notes that traditional versions often use chicken) (Vegetarian Tortilla Soup Recipe – Cookie and Kate). You could also stir in some quinoa for extra protein and body.
- Different Beans/Veggies: Swap black beans with kidney or pinto beans, or add others like zucchini or bell peppers to the simmer for more veg content. A handful of chopped kale or spinach added in the last few minutes wilts nicely and ups the greens.
- Smokier Flavor: For a smokier depth, you can use fire-roasted tomatoes (if not already) or add a bit of chipotle chili in adobo to the soup. A teaspoon of smoked paprika can also lend a lovely smoky note.
- Creamy Version: If you prefer a creamier texture, you can puree a cup of the soup and stir it back in, or simply add a splash of cream or coconut milk. Another trick: blend some of the corn tortillas (or a handful of tortilla chips) into the broth; they will thicken the soup slightly and add corn flavor.
- Serve with Sides: To make it an even heartier meal, serve this soup with a side of cheese quesadillas or cornbread. Dunking a corner of quesadilla into the spicy soup… divine! You can also serve over rice (pour the soup on top) for a tortilla soup “stew.”
Read the full recipe here: Cookie and Kate – Vegetarian Tortilla Soup
6. Classic Chicken Enchiladas with Homemade Sauce – Freezer-Friendly Family Favorite
Description: These classic chicken enchiladas are the ultimate cozy dinner.
Shredded cooked chicken is sautéed with green chiles, beans, and a bit of cheese, rolled up in tortillas, and smothered in a rich, flavorful homemade red enchilada sauce, then baked until bubbly and melty (Chicken Enchiladas Recipe | Gimme Some Oven).
The secret is the from-scratch sauce – it only takes a few extra minutes but adds major flavor (way better than canned) (Chicken Enchiladas Recipe | Gimme Some Oven).
The enchiladas emerge from the oven covered in sauce and cheese, tender inside, and absolutely irresistible.
Plus, they’re easy to make ahead and freeze, so they’re perfect for meal prep or bringing to a friend in need (Chicken Enchiladas Recipe | Gimme Some Oven).

Why It’s Great:
- Crowd-Pleasing Comfort: This is Tex-Mex comfort food at its finest – soft tortillas, savory chicken, and ooey-gooey cheese all in one dish. It’s a tried-and-true recipe that the blogger has made for over a decade and readers make on repeat (Chicken Enchiladas Recipe | Gimme Some Oven) (Chicken Enchiladas Recipe | Gimme Some Oven). In short, it’s a proven hit for family dinners or gatherings.
- Amazing Flavor with Homemade Sauce: The homemade enchilada sauce truly sets these apart. Just a few pantry ingredients to whisk up a quick red chile-tomato sauce, and the payoff is huge – “sooo much better than the canned stuff!” (Chicken Enchiladas Recipe | Gimme Some Oven). It’s deeply flavored and ties everything together in the most delicious way.
- Make-Ahead & Freezer-Friendly: These enchiladas are wonderful for meal prep – you can assemble them ahead of time (unbaked) and refrigerate or freeze. They keep well and reheat beautifully, and the recipe even suggests making a double batch: one for now and one to freeze for later (Chicken Enchiladas Recipe | Gimme Some Oven). Leftovers also freeze nicely for quick future dinners.
- Customizable & Diet-Friendly: The recipe offers easy adaptations – use corn tortillas for gluten-free, swap fillings (beef, veggies, etc.) to your liking, or adjust the cheese. It’s versatile to accommodate preferences or dietary needs (e.g., whole wheat tortillas for extra fiber, or light cheese to cut fat) (Chicken Enchiladas Recipe | Gimme Some Oven).
- Feeds a Crowd: The batch yields a full casserole dish of enchiladas, making it great for serving a large family or a party. It’s “always a hit with friends and family” and even recommended as a meal to gift to someone (new parents, a neighbor, etc.) because it transports and reheats well (Chicken Enchiladas Recipe | Gimme Some Oven).
Suitable For:
- Families & Picky Eaters: Kids typically love cheesy enchiladas, and adults do too! The flavors are gentle (not too spicy unless you add heat) and familiar. Plus, you can sneak extra beans or finely chopped veggies into the filling for nutrition.
- Meal Preppers: Busy individuals who like to cook once and eat multiple times will value how these enchiladas can be made ahead. They even freeze up to 3 months, so they’re superb for stocking the freezer with homemade meals (Chicken Enchiladas Recipe | Gimme Some Oven).
- Gluten-Free (with swaps): Simply use corn tortillas instead of flour and ensure your sauce ingredients are GF – voila, it’s a naturally gluten-free comfort dish (Chicken Enchiladas Recipe | Gimme Some Oven).
- Potlucks & Parties: Enchiladas are a reliable potluck dish. This recipe can be doubled or tripled and kept warm in the oven until serving. Also great for a casual Mexican-themed dinner night with friends.
- Comfort Food Seekers: Anyone needing a bit of cozy, home-cooked comfort – whether someone recovering from illness or just a rainy day craving – these enchiladas delivered to their doorstep would be like a hug in a pan.
Tips & Tricks:
- Use Rotisserie Chicken: To save time, use shredded rotisserie chicken or any leftover cooked chicken you have. It cuts prep significantly (the recipe itself mentions it was one of their most-made dinners for years, partly because it’s easy) (Chicken Enchiladas Recipe | Gimme Some Oven) (The BEST Baked Chicken Taquitos: Family friendly and Freezer Friendly!). Mix dark and white meat for best flavor.
- Warm Tortillas to Roll: Warm your tortillas before filling to prevent cracking. For corn tortillas (if using), lightly fry each in a bit of oil or dip in warm sauce to make them pliable. Flour tortillas usually roll easily when warm from the microwave or oven.
- Don’t Overfill: A few tablespoons of filling per tortilla is enough (The BEST Baked Chicken Taquitos: Family friendly and Freezer Friendly!). Overstuffing can cause them to burst or not roll tightly. You want a snug roll that you place seam-side down in the baking dish.
- Sauce Generously: Be sure to coat the bottom of your baking dish with a little sauce and pour remaining sauce over the top of the rolled enchiladas (Chicken Enchiladas Recipe | Gimme Some Oven). This ensures every bite is moist and flavorful. Extra sauce is your friend – serve any left on the side for spooning over.
- Bake Covered Then Uncovered: For gooey enchiladas that aren’t dried out, you can cover the dish with foil for the first part of baking, then uncover for the last 5-10 minutes to melt/brown the cheese on top. This keeps everything moist inside.
- Let Them Rest: After baking, let the enchiladas sit for about 5-10 minutes. This helps them set so they’re easier to serve (and prevents the sauce from burning your tongue!). Use that time to set out toppings or sides.
Possible Improvements:
- Alternate Filling: While chicken is classic, you can easily swap in ground beef or turkey (cooked and seasoned), pulled pork, or make them vegetarian with sautéed peppers, onions, and zucchini or spinach. Black beans could replace the chicken for a high-protein veggie enchilada.
- Try Different Sauces: Once you’ve mastered the homemade red sauce, you might try a green enchilada sauce or a creamy white sauce in the future for variety. The recipe is a great base for experimentation (the blog even references an authentic Mexican version to try next (Chicken Enchiladas Recipe | Gimme Some Oven)).
- Spice Level: Adjust the heat by choosing mild or spicy green chiles, and adding jalapeños or cayenne to taste. As-is, these enchiladas are typically mild to medium. You can also mix a little chipotle chili in adobo into the sauce for a smoky kick.
- Cheese Choices: A mix of cheeses gives best flavor – the recipe suggests using a soft melty cheese plus maybe pepper jack for heat (Chicken Enchiladas Recipe | Gimme Some Oven). You can also sprinkle some crumbled cotija after baking for a salty finish. For a lower fat option, use part-skim mozzarella or reduce the cheese inside.
- Serving Suggestions: Serve these enchiladas with cool and fresh sides to balance the richness – shredded lettuce or cabbage on top (for crunch), diced tomatoes, a dollop of sour cream or Greek yogurt, and extra cilantro. On the side, Mexican rice or a simple corn salad would round out the meal nicely.
Read the full recipe here: Gimme Some Oven – Best Chicken Enchiladas
7. Thai Peanut Chicken Wrap – Rainbow Crunch & Protein in a Wrap
Description: This isn’t your average lunch wrap – it’s a Thai-inspired flavor bomb in a tortilla!
Grilled or shredded chicken is layered in a soft tortilla with a vibrant rainbow of crunchy veggies (shredded red cabbage, carrots, bell peppers, spinach) and drizzled generously with a creamy, tangy peanut sauce (Crunchy Rainbow Thai-Inspired Peanut Chicken Wraps – Ambitious Kitchen).
The wrap is big, bold, and filling – each bite delivers a satisfying crunch, lots of color, and that addictively tasty sweet-savory peanut dressing. It’s like enjoying your favorite Thai peanut salad, but in convenient hand-held form.
The best part? It’s easily made vegetarian or vegan by swapping the chicken for chickpeas or tofu (Crunchy Rainbow Thai-Inspired Peanut Chicken Wraps – Ambitious Kitchen).

Why It’s Great:
- Vibrant & Nutritious: This wrap is packed with fresh veggies – truly “eating the rainbow” with red cabbage, carrots, spinach, bell peppers, etc. (Crunchy Rainbow Thai-Inspired Peanut Chicken Wraps – Ambitious Kitchen). Not only does that mean tons of vitamins and fiber, but it also provides great crunch and flavor variety. It’s a delicious way to get more vegetables in your diet.
- High-Protein & Satisfying: Between the chicken and the peanut butter in the dressing, this wrap is protein-packed and very satisfying. It’ll keep you full and fueled, making it a great post-workout or midday meal. If using plant-based protein instead, you still get plenty of protein from peanuts and perhaps edamame or chickpeas, depending on your swaps.
- Flavorful Peanut Sauce: The Thai peanut dressing is the star – rich peanut flavor with notes of soy, ginger, garlic, and lime. It adds a delicious creamy element that ties all the veggies and chicken together (Crunchy Rainbow Thai-Inspired Peanut Chicken Wraps – Ambitious Kitchen). Each bite has that yummy Thai-inspired taste that’s both indulgent and healthy.
- Quick No-Cook Meal: If you use leftover or rotisserie chicken, there’s no actual cooking required – it’s mostly chopping and assembling. Even if cooking chicken from scratch, it’s minimal (or you could grill a batch beforehand). Perfect for hot days or quick lunches when you don’t want to turn on the stove.
- Easily Customizable: The recipe is easily made vegetarian or vegan (swap chicken with chickpeas or omit, and use a vegan peanut sauce), and you can adjust veggies to what you have. It’s also adaptable to gluten-free (use GF tortilla or wrap). Basically, it’s versatile for various diets and what’s in your fridge.
Suitable For:
- Meal Preppers & Lunchbox Meals: These wraps hold up well if made in advance (just keep the dressing separate until eating to avoid sogginess). They’re great for meal prep – make a few and wrap tightly in foil; they’ll last a couple of days for grab-and-go lunches.
- Fitness Enthusiasts: With its high protein and balanced carbs and fats, this wrap is excellent for those who need a hearty, healthy meal. It’s essentially a salad and protein in one portable package, ideal for after the gym or a healthy office lunch.
- Families & Picky Eaters: Surprisingly kid-friendly if they like peanut butter! You can scale back the herbs or green bits for picky eaters. Cutting the wrap into pinwheels can also make it more approachable for kids.
- Gluten-Free or Low-Carb Folks: Can be made with gluten-free tortillas or even wrapped in large collard green leaves or lettuce for a low-carb, gluten-free version (like an “unwich”). The fillings and sauce themselves are gluten-free (if you use tamari or GF soy sauce).
- Those Bored of Sandwiches: It’s a wonderful change-up from the usual sandwich or salad. If you find yourself in a lunch rut, this brings exciting flavors and textures to keep things interesting.
Tips & Tricks:
- Prep Veggies Ahead: You can slice/shred all the veggies and keep them ready in the fridge. The firmer veggies like cabbage and carrots will last a few days pre-cut. This way, assembly is even faster (just grab your prepped veggies, chicken, sauce, and wrap it up).
- Warm the Tortilla: A brief 10-second warm-up of the tortilla (in the microwave or a pan) makes it more pliable and easier to roll without tearing. A soft tortilla will hug all those fillings better, especially since this wrap is quite stuffed.
- Don’t Overstuff: Aim for a balance – this wrap is meant to be big, but if you put too much, rolling will be difficult and it might fall apart. A good rule: layer fillings in the center, fold sides in, then roll tightly. You can always serve extra slaw on the side if it doesn’t all fit.
- Keep Sauce Separate (if storing): If you’re making wraps for later, store the peanut sauce separately and drizzle it just before eating, or line the inside of the tortilla with a bit of lettuce as a barrier. This prevents the wrap from getting soggy. Alternatively, you can toss the veggies in a little dressing right before you roll it up for immediate eating – it becomes like a dressed salad wrap.
- Cut on Bias: For a nice presentation (or for easier handling), slice the wrap in half diagonally. You’ll see the beautiful layers of veggies inside, and it’s more manageable, especially if serving others.
Possible Improvements:
- Herb it Up: Add fresh herbs like basil or mint into the wrap for extra Thai flavor. A little handful of cilantro or Thai basil leaves would complement the peanut sauce wonderfully.
- Spice Level: If you like heat, add some sriracha or crushed red pepper to the peanut sauce, or include sliced jalapeños in the wrap. Conversely, for a milder version, ensure you use a mild peanut sauce and maybe omit raw onions if they’re in your slaw mix.
- Swap Protein: Grilled shrimp or tofu would be fantastic in place of chicken. Even strips of steak could work for a Thai beef twist. For vegetarian, roasted peanuts or cashews themselves can add extra crunch and protein if you skip the chicken.
- Different Wrapper: While a flour tortilla is great, you could also make this in a whole wheat tortilla for more fiber, or even as a rice paper roll (like fresh spring roll style) for a lighter variation. Collard greens or large lettuce leaves also make a fun, messier but low-carb wrap version.
- Extra Crunch: If you crave even more crunch, toss in a few crushed peanuts or cashews inside, or a sprinkle of sesame seeds. Another idea: include crispy chow mein noodles for texture (though that’s more Chinese-American, it can still be tasty!).
Read the full recipe here: Ambitious Kitchen – Thai Peanut Chicken Wraps
8. Ham & Cheese Ranch Pinwheels – No-Cook Party Appetizer in 10 Minutes
Description: These tortilla pinwheels (also known as roll-ups) are an unbelievably quick and tasty appetizer or snack.
Soft flour tortillas are spread with a ranch-seasoned cream cheese, then layered with slices of ham and cheddar cheese, rolled up tight and sliced into bite-sized spirals (Easy Tortilla Pinwheels – The Cookie Rookie).
The result is a flavor-packed finger food that’s creamy, cheesy, and savory with a hint of herb-ranch tang. They only take 10 minutes to prepare (and no cooking!), yet they look fun and fancy – perfect for parties, game day, or an easy after-school snack.

Why It’s Great:
- Ridiculously Easy & Fast: With just 6 simple ingredients and 10 minutes of prep (Easy Tortilla Pinwheels – The Cookie Rookie) (Easy Tortilla Pinwheels – The Cookie Rookie), this is one of the easiest recipes around. It’s basically spread, roll, and slice. Great for when you need a last-minute appetizer that still impresses.
- Crowd-Pleasing Flavor: The combination of creamy ranch-infused cheese, smoky ham, and cheddar is a proven hit. It’s familiar yet addictive – like everyone’s favorite party dip (ranch + cheese) wrapped up in a tidy package. “Everyone loves these,” notes the blogger, and they always get compliments despite how simple they are (Easy Tortilla Pinwheels – The Cookie Rookie).
- Make-Ahead Friendly: You can assemble the rolls ahead of time and chill them, then slice right before serving. In fact, chilling for an hour or two helps them firm up for cleaner cuts. This makes party planning easier – one less thing to do last minute.
- Versatile Use: These pinwheels are super versatile – use them as an appetizer, a grab-and-go snack, or even in lunchboxes. They travel well (the blogger mentions taking them to potlucks and they’re always a hit (Easy Tortilla Pinwheels – The Cookie Rookie)). Also, you can swap the fillings to create new flavors (turkey & cranberry, veggie & hummus, etc.).
- Kid-Friendly: Kids tend to love these – they’re basically fun sandwich bites. The ranch flavor especially makes them enticing. If you have little helpers, they can even assist in making them by spreading and rolling. And since they’re not messy, they’re great for kids’ parties or picnics.
Suitable For:
- Parties & Potlucks: Ideal for any gathering – from holiday parties to game-day spreads. They’re easy to pick up and eat, and you can make a large batch without much effort. Plus, they add a nice visual variety to the table (swirly pinwheel shape).
- Busy Hosts (No Cook Recipe): If you’re hosting and your oven/stove is occupied (or you want cold appetizers), these are perfect. Also great for summer when you don’t want to heat up the kitchen.
- Families & Kids: As mentioned, perfect for kids’ snacks or lunch. Cut them into pinwheels or even leave as whole rolls for older kids. They’re soft and easy to chew for toddlers (just perhaps skip the ranch seasoning if too salty and use plain cream cheese).
- New Cooks/Beginners: If you’re not very comfortable in the kitchen, you can still nail this recipe. It’s virtually foolproof and a great introduction to making party apps.
- Budget-Conscious: Made with affordable ingredients (deli ham, cream cheese, a packet of ranch seasoning), this recipe yields a lot of pieces for very little cost. Great when you need to feed a lot of people without breaking the bank.
Tips & Tricks:
- Room Temp Cream Cheese: Make sure your cream cheese is softened to room temperature before mixing in the ranch seasoning. This ensures it spreads easily without tearing the tortilla. If short on time, give it a few quick pulses in the microwave (not melting it, just softening).
- Roll Tightly: When rolling up the tortillas, roll them as tightly as you can without the filling squeezing out. A tight roll prevents gaps and makes the pinwheels hold together better when cut. You can even wrap each roll in plastic wrap and chill, which helps maintain the shape.
- Chill Before Slicing: If possible, let the rolled tortillas chill in the refrigerator for at least 30 minutes (or up to a few hours) before slicing. This firms up the cream cheese and makes for neater slices (less smearing and squishing).
- Use a Serrated Knife: To slice, a sharp serrated knife (like a bread knife) works best. Saw gently back and forth rather than pressing straight down – this will cut through the ham and tortilla cleanly without compressing the roll. Wipe the knife blade between cuts if needed to keep edges clean.
- Prevent Sogginess: If making a day ahead, consider patting the ham slices dry if they’re very moist and don’t overdo any watery veggies (this recipe doesn’t include veggies that release water, which is good). You can also place a layer of lettuce between the spread and ham if you want a barrier. However, generally these hold up well for a day refrigerated.
Possible Improvements:
- Swap Fillings: The formula (tortilla + flavored spread + fillings) is endlessly adaptable. Try turkey instead of ham, or roast beef with horseradish cream cheese. For a vegetarian version, use finely chopped veggies like bell peppers and olives in the cream cheese, or a layer of roasted vegetables.
- Flavor Variations: Experiment with different flavored wraps (spinach or tomato tortillas) for color, or different seasoning in the cream cheese (taco seasoning for a Tex-Mex pinwheel, or add dill and chives for an herb garden vibe). You could also use flavored cream cheese (like garlic & herb) to skip the ranch packet and tweak the taste.
- Add Veggie Crunch: You can include a very thin layer of lettuce or spinach, or even shredded carrot, in the roll for extra color and crunch. Just don’t over-stuff or it won’t roll tightly. Chopped green onion or pimentos can also be mixed into the cream cheese for extra flavor.
- Healthier Twist: Use whole wheat tortillas and a light cream cheese (or Neufchâtel) to cut calories. You could also sub plain Greek yogurt for part of the cream cheese to increase protein and lighten it up (the ranch mix will still flavor it, though the texture will be a bit looser).
- Serve with Dips: While these pinwheels are great on their own, you could serve them with a dip on the side like extra ranch dressing, honey mustard, or a salsa-ranch mix for people to dunk – though they’re plenty flavorful as is. Another idea: stick a toothpick in each and serve with pickles or olives for a decorative touch and tangy contrast.
Read the full recipe here: The Cookie Rookie – Easy Tortilla Pinwheels
9. Baked Cinnamon Sugar Tortilla Chips – Sweet & Crispy Dessert Snack
Description: A brilliant way to turn leftover tortillas into a sweet, crispy treat!
These baked cinnamon sugar tortilla chips are made from flour tortillas brushed with butter, sprinkled generously with cinnamon and sugar, and baked until golden and crunchy (Easy to Make Cinnamon Sugar Tortilla Chips | The Recipe Critic).
They come out tasting like delicate churro chips – sweet, warmly spiced, and absolutely addictive.
Serve them on their own as a snack, or pair with fun dips (like fruit salsa, chocolate sauce, or ice cream). With just 4 ingredients and 15 minutes, you’ll have a bowl of dessert nachos that kids and adults will devour.

Why It’s Great:
- Super Simple: Only flour tortillas, butter, cinnamon, and sugar are needed (Easy to Make Cinnamon Sugar Tortilla Chips | The Recipe Critic) – items you likely have on hand. It’s a very easy recipe, great for when you want a quick sweet snack without baking an entire dessert.
- Lighter Than Fried: These chips are baked, not fried, yet they come out perfectly crispy (Easy to Make Cinnamon Sugar Tortilla Chips | The Recipe Critic). That means you get the satisfying crunch and sweet taste without the excess oil (and calories) of frying. They’re a relatively lighter treat to satisfy a sweet tooth.
- Nostalgic Flavor: If you ever loved cinnamon toast as a kid, these chips will hit the spot – the butter, cinnamon, sugar combo gives a nostalgic, comforting flavor (Easy to Make Cinnamon Sugar Tortilla Chips | The Recipe Critic). In fact, the blogger mentions they evoke that same feeling of warm cinnamon-sugar comfort food (Easy to Make Cinnamon Sugar Tortilla Chips | The Recipe Critic).
- Versatile Serving Options: These chips can be enjoyed in so many ways – make a batch for movie night, use them to scoop fruit salsa or yogurt, top them with fresh berries and whipped cream for “dessert nachos,” or simply munch on them with coffee or tea. You can even crumble them over ice cream for a crunchy topping.
- Great Use of Tortillas: Ever have leftover tortillas that are starting to go stale? This is a perfect solution (Easy to Make Cinnamon Sugar Tortilla Chips | The Recipe Critic). It reduces waste by transforming them into something delightful. The blogger notes it’s a favorite snack from childhood that’s affordable and uses pantry staples (and it still feels like a treat) (Easy to Make Cinnamon Sugar Tortilla Chips | The Recipe Critic).
Suitable For:
- Kids & Families: Children love these sweet, finger-friendly chips. It’s a fun cooking project to do with kids too – they can help brush butter or sprinkle cinnamon sugar. Perfect for after-school snacks or dessert that isn’t too heavy.
- Parties & Gatherings: Serve a bowl of these at a party and watch them disappear. They’re an excellent addition to a dessert table or a fun twist for a brunch. Pair with a fruit dip or chocolate dip at a party and you have an interactive sweet appetizer.
- Anyone with a Sweet Tooth: When you want something sweet but not as rich as cake or cookies, these fit the bill. They’re also dairy-free (if you use dairy-free butter) and can be made vegan, so they accommodate various diets.
- Budget-Conscious Cooks: Extremely cheap to make – tortillas plus basic baking staples. If you’re looking for an inexpensive dessert option that yields a lot, this is it.
- Cinnamon Lovers: If you adore cinnamon-sugar flavors (think churros, snickerdoodles), you will be obsessed with these chips. They’re basically like bite-size churros in chip form, with lots of cinnamon goodness (Easy to Make Cinnamon Sugar Tortilla Chips | The Recipe Critic).
Tips & Tricks:
- Use Pizza Cutter: To cut tortillas into chips quickly, use a pizza wheel or large knife. You can cut them into traditional triangles or have fun with strips for a “cinnamon stick” feel. Try to cut uniform sizes so they bake evenly.
- Single Layer Baking: Arrange the tortilla pieces in a single layer on your baking sheet and don’t overlap them (Vegetarian Tortilla Soup Recipe – Cookie and Kate). This ensures they all get evenly toasted. If making a big batch, bake in multiple batches or use two sheets.
- Watch Closely: They can go from perfectly golden to over-browned relatively fast. Bake at the recommended temperature (around 350°F) and start checking a minute or two before the suggested time is up. Look for lightly golden edges. They will crisp up more as they cool, so you don’t need to bake until very dark.
- Cooling = Crisping: Let the chips cool completely on the baking sheet or a wire rack. They’ll harden as they cool, achieving that satisfying crunch (Vegetarian Tortilla Soup Recipe – Cookie and Kate). If they still feel a tad soft, you can pop them back in the oven for another minute or two, but be careful not to burn the sugar.
- Variations: For an extra caramelized touch, you can use a mix of brown sugar and white sugar. Also, feel free to adjust the cinnamon to your taste – 1 teaspoon per 1/2 cup sugar is a common ratio, but cinnamon lovers can add more. A tiny pinch of salt on top before baking can also enhance the sweetness (salt makes sweet sweeter!).
- Storage: Store any leftovers in an airtight container at room temp. They’ll stay crispy for a couple of days (if they last that long!). If they soften, you can re-crisp them in the oven for a few minutes.
Possible Improvements:
- Cinnamon Sugar Variations: You could add a dash of nutmeg or pumpkin pie spice to the cinnamon sugar for a different spice profile. Or stir a little vanilla extract into the melted butter before brushing for extra flavor.
- Drizzles and Dips: Take these over the top by drizzling melted chocolate or caramel over the finished chips and letting it set. Or, serve them with a side of cream cheese fruit dip, Nutella, or even peanut butter yogurt dip for added fun.
- Tortilla Type: While flour tortillas yield a flaky, pastry-like chip (ideal for this recipe), you can also try corn tortillas for a crunchier, more corn-forward flavor (like a sweet corn chip). The texture will be different but still tasty – kind of like a sweet tostada. Keep an eye on them as corn tortillas might bake a bit faster.
- Make a Nacho Platter: For a playful dessert, make “dessert nachos” – arrange the cinnamon chips on a plate and top with diced strawberries, banana slices, a drizzle of chocolate or honey, and maybe whipped cream or a scoop of ice cream. It’s a show-stopping yet easy dessert that guests can pull chips from, like nachos (Cinnamon Sugar Tortilla Chips??? | DIS Disney Discussion Forums).
- Savory-Sweet Twist: If you’re adventurous, try sprinkling a tiny bit of cayenne pepper for a spicy kick along with the cinnamon sugar (Mexican hot chocolate vibe), or use coconut oil instead of butter and sprinkle shredded coconut after baking for an island twist. You can also experiment with honey butter instead of cinnamon sugar for a different kind of glaze.
Read the full recipe here: The Recipe Critic – Cinnamon Sugar Tortilla Chips
10. Grilled Strawberry Cheesecake Quesadillas – Fruity, Creamy Summer Dessert
Description: Think quesadilla meets cheesecake meets summer!
This unique dessert quesadilla grills up a tortilla filled with a mixture of sweet mascarpone cheese (or cream cheese) and fresh strawberries, creating a hand-held strawberry cheesecake turnover (Strawberry Cheesecake Quesadillas Recipe + VIDEO – The Recipe Rebel) (Strawberry Cheesecake Quesadillas Recipe + VIDEO – The Recipe Rebel).
The tortilla gets lightly crisp on the grill, the mascarpone turns lusciously creamy, and the juicy berries warm and soften – it’s an incredible blend of flavors and textures.
With no oven needed and just a few ingredients, it’s an easy dessert to satisfy your sweet tooth on a warm evening, complete with a hint of smoky char from the grill.

Why It’s Great:
- Easy “Grilled” Dessert: You get to use the grill for dessert, which is a fun twist and keeps your kitchen cool. No baking required – perfect for summer. And if you’re already grilling dinner, throwing these on afterwards is a cinch. (They can also be made in a pan on the stovetop if needed.)
- Cheesecake Vibes: The sweetened mascarpone or cream cheese inside gives a rich, tangy cheesecake-like flavor to the filling, which pairs so well with the strawberries. It feels like enjoying a slice of strawberry cheesecake, but much lighter and in a fraction of the time (Strawberry Cheesecake Quesadillas Recipe + VIDEO – The Recipe Rebel).
- Fresh & Seasonal: This recipe celebrates fresh seasonal fruit – ripe strawberries (or any berries/stone fruits) shine here. It’s a great way to enjoy a fruit-forward dessert that still has a touch of indulgence from the cheese.
- Customizable & Fun: You can switch up the fruit (blueberries, peaches, etc.), add a drizzle of chocolate or a sprinkle of cinnamon sugar inside, or top the grilled quesadillas with a scoop of ice cream or whipped cream for extra decadence. It invites creativity while being extremely simple.
- Tastes Gourmet: The concept is simple, but the result is impressive – the blogger even calls it one of the best summer desserts (Strawberry Cheesecake Quesadillas Recipe + VIDEO – The Recipe Rebel). When you serve it, people are intrigued (“a dessert…quesadilla?”) but one bite converts them. It’s got that fancy feel (grilled fruit, mascarpone) with minimal effort.
Suitable For:
- BBQ & Cookout Fans: If you love grilling, this adds a new dimension to your repertoire. Great for summer cookouts – surprise your guests with dessert off the grill!
- Outdoor Enthusiasts: It’s also campfire-friendly if you have a grill grate – imagine making this at a campsite or cabin. Similarly, anyone who prefers not to bake in hot weather will appreciate this dessert approach.
- Families: Kids can help assemble the quesadillas (spreading cheese, adding berries). And who doesn’t like the idea of fruit and creamy cheese in a toasted wrap? It’s a hit with kids and adults alike. If kids are picky about fruit, you can even add a little chocolate spread to theirs.
- Smaller Gatherings or Couples: The recipe as written makes a few quesadillas (about 4 servings), but it’s easy to scale up or down. It’s a lovely dessert for a date night or family dinner, when you want something more than plain fruit but not a huge dessert.
- Vegetarian (and can be Gluten-Free): It’s naturally vegetarian. To make gluten-free, just use GF tortillas or even try with corn tortillas (though flour is preferred for sweetness). It’s not overly sugary, either – a relatively moderate dessert option.
Tips & Tricks:
- Don’t Overfill: Spread a moderately thick layer of the mascarpone (which you can sweeten with a bit of powdered sugar and vanilla) on the tortilla and top with a single layer of sliced strawberries. Overfilling can lead to oozing out on the grill and harder handling. Plus, you want the tortilla to crisp up against the grill, not be too bulky.
- Secure with Toothpicks: If your quesadilla tries to open, use a soaked toothpick to secure the edges when placing on the grill (just don’t forget to remove them!). Alternatively, you can fold the tortilla in half (like a half-moon shape) instead of sandwiching two tortillas, to make flipping easier and filling more contained (crisp black bean tacos with feta and slaw – smitten kitchen).
- Moderate Heat: Grill over medium heat (or medium-low). You want the tortilla to brown and crisp somewhat slowly, giving the cheese time to melt and the berries to warm. A very hot grill might burn the tortilla before the inside gets gooey. Usually about 2-3 minutes per side is sufficient, but watch closely.
- Oil the Grill or Use Foil: To prevent sticking or any cheese leakage disasters, make sure your grill grates are clean and lightly oiled. You can also grill the quesadillas on a piece of foil or grill mat if you’re worried about mess – they won’t get as much direct char, but will still crisp up.
- Let it Rest a Minute: Once off the grill, let the quesadilla sit for a minute or two. The cheese will set slightly (so it doesn’t all run out when cut) and the interior won’t scorch your tongue. Then cut into wedges.
Possible Improvements:
- Try Different Fillings: The method works with many fruits – try peaches or nectarines with a bit of cinnamon, blueberries with lemon zest in the cheese, or banana slices with a smear of Nutella for a grilled banana “foster” quesadilla. Even a spoonful of jam with fresh fruit can amp up the flavor if your fruit isn’t super sweet.
- Sauce it Up: Elevate the presentation by drizzling the finished quesadillas with chocolate sauce, berry coulis, or salted caramel. A dusting of powdered sugar on top also looks great and adds extra sweetness.
- Serve A La Mode: For an extra-special dessert, serve each warm quesadilla wedge with a small scoop of vanilla ice cream or whipped cream. The cold cream against the warm, grilled tortilla and fruit is amazing – like pie a la mode, but faster.
- Make It Lighter or Richer: For lighter version, use low-fat cream cheese and plenty of fruit. For richer, mix some white chocolate chips into the filling, or use a flavored sweet spread like Biscoff cookie butter with the cream cheese for a different flavor profile.
- Indoor Adaptation: No grill? No problem. Cook these in a nonstick skillet or grill pan on the stove over medium heat (or even use a panini press). You’ll still get a lovely toasty exterior. Just butter the outsides of the tortilla lightly (like you would a grilled cheese) to aid browning and flavor. The blogger notes you can do them on the stovetop as well (Strawberry Cheesecake Quesadillas Recipe + VIDEO – The Recipe Rebel).
Read the full recipe here: The Recipe Rebel – Strawberry Cheesecake Quesadillas
11. Baked Creamy Chicken Taquitos – Freezer-Ready Crunchy Roll-Ups
Description: These baked chicken taquitos are rolled tortillas filled with a luscious mix of shredded chicken, cream cheese, jack cheese, green salsa, and spices, then baked (or air-fried) until crispy (The BEST Baked Chicken Taquitos: Family friendly and Freezer Friendly!) (The BEST Baked Chicken Taquitos: Family friendly and Freezer Friendly!).
They come out crunchy on the outside, creamy and savory on the inside – all the goodness of fried taquitos but in a lighter, oven-baked form.
They make a fantastic appetizer, snack, or weeknight meal, and as a bonus, they’re extremely freezer-friendly (the blogger loves to make a double batch and freeze some) (The BEST Baked Chicken Taquitos: Family friendly and Freezer Friendly!).
Serve them with salsa, guac, or cilantro-lime ranch for dipping and watch them disappear!

Why It’s Great:
- Ultimate Family Favorite: According to the blog, this is one of the most popular recipes ever – a beloved family favorite that readers obsess over (for good reason!) (The BEST Baked Chicken Taquitos: Family friendly and Freezer Friendly!). The combination of melty cheese and seasoned chicken in a crunchy wrap is simply irresistible, and it’s kid-approved as well as adult-approved.
- Creamy, Cheesy, Crunchy: The texture and flavor trifecta here is perfect – you get that crave-able crunch without frying (they bake up golden brown (The BEST Baked Chicken Taquitos: Family friendly and Freezer Friendly!)), and the filling is ultra-creamy and cheesy, spiked with green chiles and lime for extra zing (The BEST Baked Chicken Taquitos: Family friendly and Freezer Friendly!). It’s comfort food that feels indulgent but is actually lighter.
- Make & Freeze: These taquitos are excellent for meal prep. You can assemble a big batch, freeze them uncooked, and then bake straight from frozen whenever you need a quick meal or snack (The BEST Baked Chicken Taquitos: Family friendly and Freezer Friendly!) (The BEST Baked Chicken Taquitos: Family friendly and Freezer Friendly!). They’re like your own homemade version of store-bought frozen taquitos, but much tastier and made with real ingredients.
- Party-Perfect: Bake up a tray and you have a hit party appetizer. They’re hand-held, dippable, and not messy – ideal for game day, movie night, or any casual gathering. And because they’re baked, you can do them all at once in the oven (no standing over a fryer).
- Customizable Filling: While the creamy chicken and cheese combo is a winner, you can also customize these – the blog notes variations like beef or vegetarian fillings work too. So once you have the technique down, you can get creative with what you stuff in them.
Suitable For:
- Busy Weeknights: When you need dinner in a hurry, grab those frozen taquitos you prepped and bake – dinner’s ready in 20-25 minutes, no thawing needed (The BEST Baked Chicken Taquitos: Family friendly and Freezer Friendly!). Serve with a side salad or rice and beans, and you have a complete meal.
- Picky Eaters & Kids: Kids love foods they can pick up and dip. These taquitos hide some green salsa and chiles in the creamy filling, but all kids notice is the yummy cheesy chicken. Great for picky eaters (you can also sneak in a bit of spinach or corn in the filling if you want some veg).
- Snacking & Appetizers: Keep a batch in the freezer for whenever the craving strikes – whether it’s a mid-afternoon snack or unexpected guests, you’ll be ready. They reheat well, too, maintaining their crunch.
- Health-Conscious Cooks: Baking instead of frying significantly cuts down on calories and fat, and you can further lighten the filling with Neufchâtel cheese or Greek yogurt in place of some cream cheese. They’re gluten-free friendly if you use corn tortillas, and the recipe even notes how to adapt for that (Chicken Enchiladas Recipe | Gimme Some Oven).
- Anyone Who Loves Mexican/Tex-Mex Flavors: If you enjoy enchiladas, quesadillas, or flautas, you’ll adore these. They hit all the same flavor notes, in a convenient crispy roll.
Tips & Tricks:
- Soften Tortillas: To prevent the tortillas from cracking when you roll them (especially if using corn tortillas), warm them up. Wrap a stack in a damp paper towel and microwave for 30 seconds, or pass each tortilla over a stove flame briefly. Warm tortillas are pliable and roll easily (The BEST Baked Chicken Taquitos: Family friendly and Freezer Friendly!). If using corn, you might also lightly spray or brush them with oil for flexibility.
- Roll Tight & Place Seam-Side Down: Roll each taquito firmly so it’s snug, and place it seam-side down on the baking sheet to keep it closed during baking (The BEST Baked Chicken Taquitos: Family friendly and Freezer Friendly!). You can also secure with a toothpick if needed (remove before serving).
- Use Cooking Spray or Brush Oil: Before baking, lightly spray the taquitos with olive or avocado oil, or brush with a bit of oil, and sprinkle with a pinch of salt (The BEST Baked Chicken Taquitos: Family friendly and Freezer Friendly!). This promotes that beautiful golden crunchiness in the oven. A sprinkle of kosher salt adds a great finish like a restaurant taquito.
- Bake on a Wire Rack: If you want even crispier taquitos, place them on a wire rack set on the baking sheet, so heat circulates all around. If you don’t have that, flipping them once during baking also helps brown all sides.
- Cool Before Freezing: If freezing a batch, lay the rolled (unbaked) taquitos on a tray to freeze individually before transferring to a bag so they don’t stick together. You can also freeze baked taquitos and reheat in the oven or air fryer; they’ll still be crunchy.
Possible Improvements:
- Add Veggies or Beans: Make the filling go further (and sneak in veggies) by adding things like black beans, corn, diced sautéed peppers, or spinach. You can replace some of the chicken volume with these to lighten it up and add nutrients.
- Spice Level: The recipe as is is mild (family-friendly). To spice it up, add some diced jalapeños or a dash of cayenne to the filling. Pepper jack instead of plain jack cheese also adds a nice kick (the recipe even mentions using pepper jack for extra heat) (The BEST Baked Chicken Taquitos: Family friendly and Freezer Friendly!). Serve with hot sauce or a spicy salsa for those who like it fiery.
- Dipping Sauces: While delicious on their own, taquitos are even better with dips. Serve with salsa verde, pico de gallo, guacamole, and/or sour cream on the side. For a fun twist, try a cilantro-lime ranch or chipotle mayo as a dip. The blog suggests they pair well with all your favorite Mexican toppings (The BEST Baked Chicken Taquitos: Family friendly and Freezer Friendly!).
- Alternate Proteins: Once you’ve done chicken, experiment! Shredded beef with a bit of BBQ sauce (for a Tex-Mex BBQ taquito), pulled pork with jalapeños, or a breakfast taquito with scrambled eggs and bacon – the possibilities are endless.
- Air Fryer Method: If you have an air fryer, these taquitos cook up wonderfully in it, getting extra crisp. Brush with oil and air fry at ~400°F for about 6-8 minutes, flipping halfway. That’ll make them even closer to the fried texture (but still using minimal oil).
- Cheese Lovers: Sprinkle a little extra cheese on top of the taquitos in the last few minutes of baking for a cheesy topping, or mix a little grated cheddar into the filling for extra gooeyness. Just note, too much cheese can ooze out, so moderate amount is key.
Read the full recipe here: Our Best Bites – Baked Creamy Chicken Taquitos
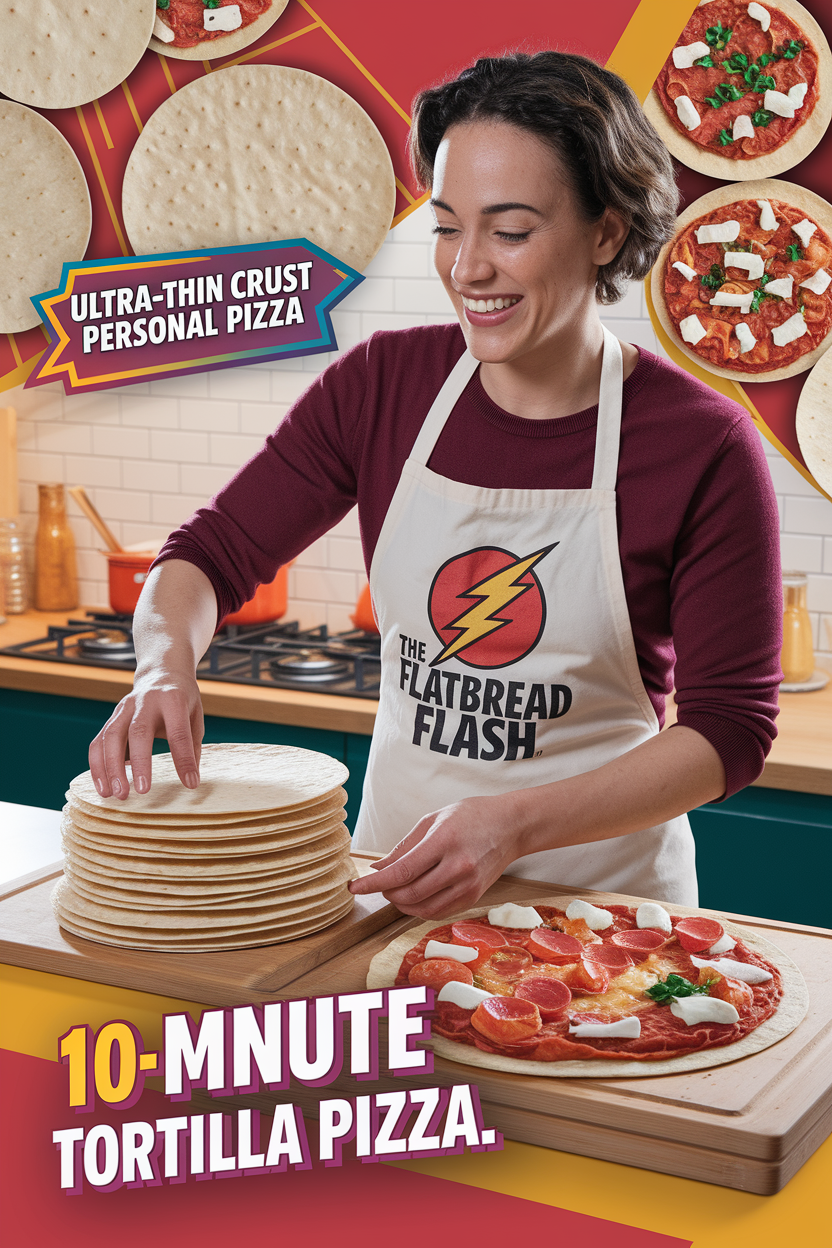
12. 10-Minute Tortilla Pizza – Ultra-Thin Crust Personal Pizza
Description: Craving pizza in a hurry? This tortilla pizza is the answer. Using a large flour tortilla as an ultra-thin crust, you can whip up a crispy-edged, cheesy pizza in literally minutes (10-Minute Tortilla Pizza – A Simple Palate).
Simply top the tortilla with your favorite pizza sauce, shredded mozzarella (or a blend), and your choice of toppings, then bake or toast until the tortilla is golden and the cheese bubbly.
The result is a pizza that tastes like a crispy flatbread – thin, light, and wonderfully crunchy (10-Minute Tortilla Pizza – A Simple Palate) (10-Minute Tortilla Pizza – A Simple Palate).
It’s perfect for a quick lunch, snack, or light dinner, and it’s portioned just right for one or two.
Why It’s Great:
- Incredibly Fast: We’re talking about a pizza ready in 8-10 minutes total (10-Minute Tortilla Pizza – A Simple Palate). No dough to knead or rise – using a ready-made tortilla cuts the cooking time to practically nothing. It’s faster (and cheaper) than delivery, and frankly, just as satisfying when you want pizza in a pinch.
- Crispy Thin Crust: The tortilla crisps up in the oven to a beautiful crunch – you get those lightly browned, crackly edges that make it taste like a gourmet thin-crust flatbread (10-Minute Tortilla Pizza – A Simple Palate). Reviewers often mention they were surprised how much it satisfies their pizza cravings despite the simplicity.
- Low Effort, Low Mess: Only a baking sheet is needed (or put it directly on the oven rack for extra crisp). It’s a great recipe for kids or beginner cooks – basically as easy as making an open-faced sandwich. Cleanup is minimal, especially if you line the pan with foil.
- Portion-Controlled: Sometimes you don’t want a whole pizza or dealing with leftovers. This makes a perfect personal-sized pizza – ideal for one or two people. And you can easily make multiple if feeding a group, customizing each person’s toppings.
- Diet-Friendly Options: Because the “crust” is just a thin tortilla, these pizzas are relatively light in calories. Use a whole wheat or low-carb tortilla if you like. They are naturally lower in carbs and portioned smaller than traditional pizza, which is great for those watching their intake but still wanting a pizza treat.
Suitable For:
- College Students & Busy Individuals: With minimal ingredients and equipment needed, this is dorm-friendly and weeknight-friendly. If you have tortillas, sauce, and cheese, you’ve got pizza.
- Families: Kids can each “decorate” their own tortilla pizza with toppings – a fun dinner activity. And since they cook so quickly, nobody has to wait long. It’s also a clever way to use up random bits of leftover veggies or cooked meat as toppings.
- Pizza Lovers Seeking a Lighter Option: When you want the flavor of pizza without the heavy dough, this scratches the itch. It’s also a smart way to serve pizza alongside a soup or salad for a more balanced meal, since it’s lighter.
- Experimenters: Foodies who like to experiment will appreciate this hack – you can try all sorts of topping combos without investing in making dough each time. Think BBQ chicken tortilla pizza, pesto veggie pizza, or even dessert pizzas (using Nutella and fruit!).
- Those with Dietary Restrictions: Easy to make vegetarian (just use veg toppings) or even dairy-free (use vegan cheese). Gluten-free folks can use GF tortillas. It’s very adaptable to different needs.
Tips & Tricks:
- Preheat Oven Well: A hot oven (around 400°F) helps achieve a crispy crust quickly without over-drying the toppings. You can bake directly on the rack or on a preheated sheet pan/pizza stone for an even crisper bottom (10-Minute Tortilla Pizza – A Simple Palate). Keep an eye—tortillas brown fast.
- Don’t Overload Toppings: Since it’s thin, a tortilla can’t hold as many toppings as a regular pizza. Spread a thin layer of sauce (too much can make it soggy) (10-Minute Tortilla Pizza – A Simple Palate), a modest amount of cheese, and sparse toppings. Think flatbread-style — a little goes a long way on each bite.
- Edge to Edge Cheese: For a really crispy edge, consider sprinkling cheese all the way to the tortilla’s rim or even slightly overhanging. As it bakes, the cheese at the edges will crisp up like frico (cheese crisps), giving an extra crunch barrier that mimics a crust.
- Experiment with Tortilla Types: Standard flour tortillas yield a texture like a bar-style thin crust. But you can also try corn tortillas for a smaller, gluten-free mini pizza (they’ll be about 6-inch personal pizzas with a corn flavor, kind of like tostada pizzas). Just monitor time as corn may crisp faster.
- Quick Broil Finish: If your cheese hasn’t browned by the time the tortilla is crisp, you can switch to broil for 30 seconds to a minute – just until you get some golden spots on the cheese. This gives that pizzeria look and taste (but watch closely to avoid burning the edges).
Possible Improvements:
- Garlic Herb Crust: Before saucing, brush the tortilla lightly with olive oil and sprinkle with a bit of garlic powder or Italian seasoning. This infuses flavor into the crust itself (some recipes even suggest this to mimic a seasoned pizza dough).
- Multiple Flavors at Once: Because it’s so quick, you can make a “pizza party” by doing several different tortilla pizzas in one oven batch. Make one Margherita, one Hawaiian, one pepperoni, etc., and cut them into small wedges for variety. Great for tasting multiple kinds without lots of work.
- Up the Crunch: For an even crisper base, you can pre-bake the plain tortilla for 2-3 minutes to stiffen it slightly (10-Minute Tortilla Pizza – A Simple Palate), then add sauce and toppings and finish baking. This extra step can help if you found the center not as crisp as you like. Also, using a perforated pizza pan or wire rack under it can keep it crisp (preventing steam buildup).
- Cheese Blend: While mozzarella gives that classic stretch, mixing in a bit of Parmesan or cheddar can add flavor and help with browning (10-Minute Tortilla Pizza – A Simple Palate). A sprinkle of Parmesan on top after baking also adds a nice salty finish.
- Make it a Wrap: Fun idea – if you don’t end up eating it flat, you can actually roll up the tortilla pizza and eat it like a pizzarito (pizza-burrito). It sounds messy but can be tasty! Perhaps more for experimental eaters, but essentially you created a pepperoni pizza roll-up.
Read the full recipe here: A Simple Palate – Easy Tortilla Pizza
13. Cinnamon Sugar Cream Cheese Roll-Ups – Mini Cinnamon Roll Tortillas
Description: These delightful cinnamon sugar cream cheese roll-ups transform regular tortillas into something resembling mini cinnamon roll-ups or French toast sticks – but in a lighter, gluten-free possible format (Cinnamon Sugar Cream Cheese Roll Ups).
You take a warm tortilla, spread sweetened cream cheese over it, roll it up tight, then slice into bite-sized pieces.
The pieces are then sautéed in a skillet with a bit of butter until golden, and finally tossed in cinnamon sugar for a crispy, caramelized exterior (Cinnamon Sugar Cream Cheese Roll Ups).
Dip them in maple syrup and you have an insanely yummy treat that’s a little crunchy, a little creamy, and tastes just like a cinnamon roll pancake bite!

Why It’s Great:
- Cinnamon Roll Flavor in 10 Minutes: These roll-ups pack all the flavor of cinnamon rolls (buttery, cinnamon-sweet, creamy filling) into a super quick recipe – just about 10 minutes from start to finish (Cinnamon Sugar Cream Cheese Roll Ups). No baking or waiting for dough to rise, so it’s great for satisfying those cinnamon roll cravings fast.
- Healthier Twist: The recipe creator wanted a “bit healthier version” of a childhood treat (which was made with bread and lots of sugar) (Cinnamon Sugar Cream Cheese Roll Ups). By using tortillas (even paleo/gluten-free ones) and coconut sugar (if preferred), these can be made surprisingly wholesome. They’re also easily adapted to be vegan or paleo by using vegan butter and cream cheese alternatives (Cinnamon Sugar Cream Cheese Roll Ups).
- Perfect Texture Combo: The outside of each roll-up gets crispy and caramelized in the cinnamon sugar (almost like a churro), while the inside remains warm and creamy from the sweet cream cheese (Cinnamon Sugar Cream Cheese Roll Ups). That contrast is chef’s kiss. And because they’re cut into small pieces, you get lots of that crunchy surface area per bite.
- Fun Dipping Snack: They’re just the right size to dunk into maple syrup or even a cream cheese glaze. This makes them a fun finger-food dessert or even a special breakfast treat. Imagine a platter of these on a weekend morning or at a brunch party – guaranteed to impress.
- Gluten-Free/Vegan Friendly: The blogger specifically notes these can be made gluten-free (using GF or paleo tortillas) and vegan (using dairy-free cream cheese and butter) (Cinnamon Sugar Cream Cheese Roll Ups) (Cinnamon Sugar Cream Cheese Roll Ups). So, it’s inclusive for those with dietary restrictions while still being utterly indulgent in taste.
Suitable For:
- Weekend Breakfast or Brunch: These roll-ups will elevate any brunch spread. They’re like a fusion of French toast and cinnamon rolls in convenient bite form. Great for holidays (think Easter or Christmas morning) or when you want to surprise family with something special.
- Kids & Family Treat: Kids will absolutely love these – both making and eating. It’s a simple enough process that older kids can help roll and dunk the pieces in cinnamon sugar. And of course, they’ll enjoy devouring these finger-friendly sweets.
- Dessert Lovers: Serve these as a dessert, perhaps with a scoop of vanilla ice cream or just with warm syrup. They’re a nice change from cookies or donuts yet hit similar flavor notes. Also, ideal for a dessert potluck or a party where bite-sized desserts are convenient.
- Small Batch Craving: The recipe yields 1-2 servings (using 2 tortillas) (Cinnamon Sugar Cream Cheese Roll Ups), so it’s perfect when you want just a little something sweet and don’t want tons of leftovers. Of course, you can scale it up if needed.
- Those Avoiding Ovens: No need to turn on an oven, so it’s great in warm weather or for those without full kitchen appliances (like students in dorms with just a hot plate, or RV/cabin cooking).
Tips & Tricks:
- Use Soft Tortillas: This works best with soft, pliable tortillas (flour or cassava or similar). If using smaller taco-size tortillas, you might not even need to cut them, just roll and cook whole, then cut after cooking. If your tortillas are stiff at all, warm them briefly so they roll without cracking (Cinnamon Sugar Cream Cheese Roll Ups).
- Seal the Roll: After spreading the cream cheese and sprinkling a little cinnamon sugar inside, roll the tortilla tightly. You can use a bit of the cream cheese as “glue” on the edge to keep it sealed. Slice into about 3-4 pieces (like cutting sushi). Make sure the seam side of each piece is somewhat sealed or will be face-down in the pan first to hold it together while it cooks (Cinnamon Sugar Cream Cheese Roll Ups).
- Fry Gently: Cook the roll-ups in butter (or coconut oil) over medium heat, turning to get all sides golden. They only need a couple minutes per side. Don’t walk away – the sugar can burn if heat is too high. You want a nice golden toast, like the color of a good French toast.
- Toss in Cinnamon Sugar Quickly: Have a cinnamon-sugar mixture ready in a bowl or bag. As soon as the roll-ups come out of the pan (while they’re hot and a bit buttery on the outside), toss them in the mixture to coat (Cinnamon Sugar Cream Cheese Roll Ups). The heat helps the sugar stick and form that slight crunch. Work in batches if necessary, so each piece gets sugared while hot.
- Serve Warm: These are best enjoyed warm when the centers are creamy and the coating crisp. If you need to hold them, keep in a 200°F oven for a short time, but they really are at peak right out of the pan. Serve with maple syrup, honey, or even a simple icing (powdered sugar + milk) if you want extra sweetness.
Possible Improvements:
- Different Fillings: While cream cheese is tangy and rich, you could experiment with other fillings: Nutella and banana (for a chocolatey spin), sweetened ricotta with lemon zest (for a blintz-like vibe), or peanut butter and jelly for a fun twist. Just keep the layer thin so it doesn’t all ooze out.
- Cinnamon Sugar Variations: Try using pumpkin pie spice instead of plain cinnamon for an autumnal flavor, or add a touch of cardamom for something different. You could also use brown sugar in the coating for a deeper caramel flavor (just watch it doesn’t burn in the pan).
- Make It French Toast-y: Dip the rolled and sliced pieces in a little beaten egg (like French toast) before frying – that would create an even more custardy inside. You’d have to then coat in cinnamon sugar after (since egg would wash some off), but it could be interesting – basically a stuffed French toast roll-up.
- Oven Method: For a big batch, you might try baking the roll-ups: Brush them with melted butter, roll in cinnamon sugar, then bake until crisp. They won’t be as uniformly golden as pan-frying, but you could broil at the end for color. This way, you can do many at once without standing at the stove.
- Presentation: If serving to impress, stack these on a plate with small ramekins of syrup and maybe chocolate sauce for dipping. Sprinkle a bit of extra cinnamon sugar over them or even a drizzle of icing. They’ll look like fancy little churro bites or mini cinnamon rolls, sure to entice anyone.
Read the full recipe here: Gathered Nutrition – Cinnamon Sugar Cream Cheese Roll Ups
14. Copycat Taco Bell Mexican Pizza – Layered Crunchy Treat, Homemade Upgrade
Description: This recipe recreates the famous (and dearly missed) Taco Bell Mexican Pizza at home – and dare we say, it’s even better.
Picture two crisp flour tortillas sandwiching a filling of seasoned ground beef and refried beans, topped with a layer of zesty enchilada sauce, melty cheese, and diced tomatoes (Taco Bell Mexican Pizza Recipe – 40 Aprons).
Baked until everything is hot and bubbly, you can cut it into quarters just like the fast-food version.
It has all the nostalgic flavor – the crunchy tortilla, the tangy sauce, the hearty beans and beef – but made with simple ingredients from your kitchen and “naturally healthier” (baked, not fried, and easy to go light on cheese or use lean beef) (Taco Bell Mexican Pizza Recipe – 40 Aprons).

Why It’s Great:
- Nostalgic and Fun: If you ever loved Taco Bell’s Mexican Pizza, this will bring you joy. The recipe is noted to be a “dead ringer” for the original (Taco Bell Mexican Pizza Recipe – 40 Aprons), meaning you get that same combo of textures and flavors that made the original cult-favorite, but you can make it anytime (especially great since the item had disappeared for a while).
- Quick & Simple: It’s essentially assembling tortillas with common pantry ingredients. Using canned enchilada sauce and refried beans plus a quick skillet beef cook, you can have these ready in a flash – definitely a 30-minute meal. Perfect for weeknight dinners with a twist.
- Crowd-Pleasing: It’s a hit with both kids and adults, because who doesn’t like tacos and pizza? Here you get both in one. You can also customize each “pizza” with different toppings if desired (spicier sauce on some, no tomatoes on others, etc.).
- Healthier Homemade Version: Baking the tortillas to crisp them (or pan-frying lightly) uses less oil than the deep-fried fast food version. Plus, you can use whole grain tortillas, low-fat cheese, or plant-based meat as you prefer, making it as wholesome as you want. The recipe points out it’s naturally healthier and can even be made vegetarian easily (Taco Bell Mexican Pizza Recipe – 40 Aprons).
- Fun Presentation: Cutting into a Mexican pizza is just plain fun and looks cool on the plate. It’s a great meal for a family movie night or casual dinner – perhaps serve with some Mexican rice or corn on the side and churros for dessert to complete the theme.
Suitable For:
- Family Dinners: This will break the monotony of typical taco night while still being in the comfort zone for picky eaters. Kids will get a kick out of having “pizza” that’s actually a taco mash-up.
- Game Day or Parties: Make several, cut into quarters, and you have excellent party snacks that are a conversation starter. They hold together well enough to eat by hand, especially if the cheese has glued the top in place.
- Beginner Cooks: Even if you’re new to cooking, this recipe is straightforward – brown meat, layer things, and bake. The reward-to-effort ratio is high.
- Taco Bell Fans: Obviously, if someone you know constantly laments the Mexican Pizza or loves fast food copycats, surprise them with this. It’s a great example of homemade fast food that satisfies cravings.
- Meal Variety: It’s also a neat addition to a Tex-Mex rotation – when you’re tired of soft tacos or quesadillas, throw Mexican Pizza night into the mix. Everyone gets a personal “pizza” and can top with extra lettuce, jalapeños, sour cream, etc., as they like.
Tips & Tricks:
- Crisp the Tortillas: To get that signature crunch, you should crisp the flour tortillas before assembling. You can do this by baking them in the oven until lightly browned or by lightly pan-frying them in a bit of oil. Ensure they cool to crisp up. If they’re not crisp, they’ll be chewy rather than crunchy. Corn tortillas can be used too for extra crunch and a different flavor, just handle carefully.
- Season the Beef Well: Use a good taco seasoning for the ground beef (cumin, chili powder, garlic, onion, etc.), and cook off any excess moisture so your filling isn’t soggy. Also, warm the refried beans a bit so they spread easily onto the tortilla without tearing it.
- Assembly Order: It usually goes tortilla, bean layer, cooked meat, then second tortilla on top, then sauce, then cheese, tomatoes. Don’t overfill the middle or it might slide; a thin even layer of beans and beef is enough since you have two layers of tortilla. Spread sauce to near the edges on top so the whole thing gets flavor (Best Easy Fish Tacos Recipe – Pinch of Yum).
- Broil to Finish: After baking to heat everything, you can broil for 1-2 minutes at the end to get the cheese spotty and lightly browned – that makes it look and taste even more authentic. Just watch it so it doesn’t burn the tortillas.
- Let it Set: Give the assembled pizza a minute or two after coming out of the oven before slicing. This helps the layers stick together a bit (the cheese acts as glue). Use a sharp knife or pizza cutter to cut into quarters. Serve with a fish spatula or flat spatula to keep layers aligned.
Possible Improvements:
- Alternative Fillings: The classic is beans and beef, but you could do shredded chicken with green enchilada sauce inside, or a veggie version with sautéed peppers, onions, and corn (and maybe a layer of cheese inside too). You can also sub ground turkey or plant-based ground “meat” to suit dietary preferences without sacrificing much flavor.
- Spice & Toppings: Feel free to add jalapeño slices or green chiles on top with the tomatoes for zing. A sprinkle of green onions or cilantro on top after baking adds freshness. Also, serving each piece with a dollop of sour cream or guacamole takes it to the next level (just like you might add to tacos).
- Cheese Choices: The recipe probably calls for a Mexican blend or cheddar. Using a bit of pepper jack can add heat, or a touch of cotija after baking can add authentic tang. But melty cheese is key on top to mimic that fast-food style.
- Fry for Extra Authenticity: If you don’t mind a little indulgence, you can shallow-fry the tortillas in oil to get them super crisp like Taco Bell’s. Drain on paper towels. It’s more oil but yields a very crunchy result. However, the baking method given is likely sufficient for most cravings.
- Multiple at Once: If making many, you can assemble on a large baking sheet. Just ensure not to overload the sheet so they heat evenly (you might do two sheets and rotate them in the oven). This is a fun item for a build-your-own setup too – let everyone stack their own, then you bake all at once.
Read the full recipe here: 40 Aprons – Taco Bell Mexican Pizza (Copycat)
15. Layered Mexican Tortilla Lasagna – Cheesy Taco Casserole
Description: This Mexican tortilla lasagna (also known as a Mexican casserole or Mexican pie) is a hearty, layered dish that’s like a cross between tacos and lasagna.
Instead of pasta, soft flour (or corn) tortillas are used as the “noodles,” layered with seasoned ground beef, refried beans, black beans, corn, salsa, and plenty of cheese (Mexican Lasagna with Tortillas — Salt & Baker) (Mexican Lasagna with Tortillas — Salt & Baker).
Baked together, it becomes a bubbling, savory pie that you can slice into – each piece yielding layers of flavorful taco meat, creamy beans, melty cheese, and tortillas in between.
It’s family-friendly comfort food with a fun Mexican twist, and you can load it up with all your favorite taco toppings after baking (like crunchy lettuce, tortilla chips, sour cream, etc.) (Mexican Lasagna with Tortillas — Salt & Baker) (Mexican Lasagna with Tortillas — Salt & Baker).
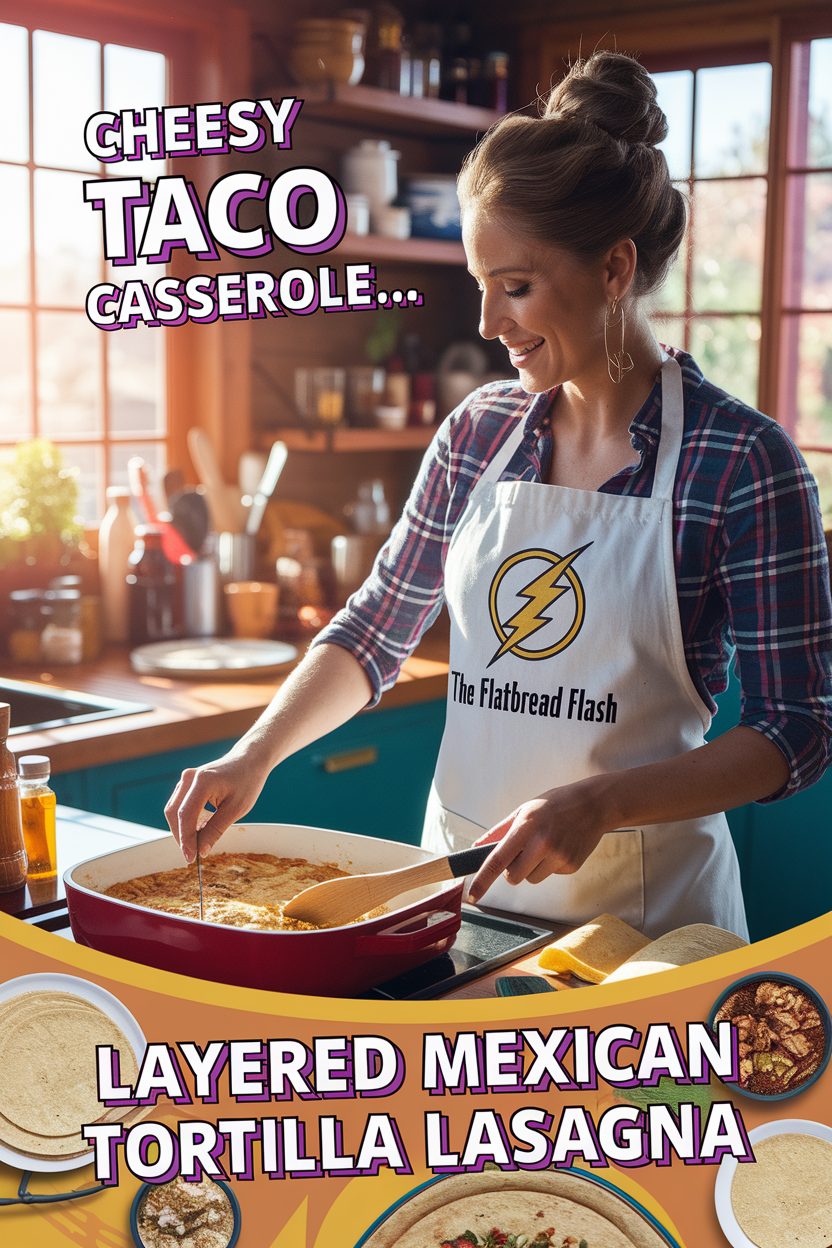
Why It’s Great:
- One-Pan Meal: This casserole covers all the bases – protein, carbs, veggies – in one dish. It’s an easy weeknight dinner option, and since it’s all layered in one pan, cleanup is relatively simple. Plus, it feeds a crowd and leftovers reheat well, making it great for meal planning or batch cooking.
- Comforting & Cheesy: If you love cheesy tacos or enchiladas, this hits the spot. Every bite is oozing with cheese and packed with taco flavor, not to mention the satisfaction of that tortilla “pasta” that gives it a lasagna-like heartiness (Mexican Lasagna with Tortillas — Salt & Baker). It’s the kind of meal that makes everyone go for seconds.
- Flexible & Pantry-Friendly: You can modify the fillings based on what you have – the recipe includes things like black beans, corn, and salsa along with beef and refried beans (Mexican Lasagna with Tortillas — Salt & Baker), but you could add chopped veggies or use chicken instead. It’s a good way to use up odds and ends (half a jar of salsa, that can of beans, etc.).
- Freezer- and Make-Ahead-Friendly: Much like a traditional lasagna, you can assemble this tortilla lasagna ahead of time and refrigerate or freeze it before baking. It’s a perfect candidate for a freezer meal – just thaw and bake. The blogger even notes that it’s an ideal freezer meal that “freezes well” (Mexican Lasagna with Tortillas — Salt & Baker). This is a lifesaver on busy nights.
- Family Favorite: This kind of layered casserole is usually a hit with kids – it’s like a giant soft taco that’s been baked with lots of cheese. And for adults, you can spice it up or add toppings to your portion to customize. The dish is described as a “delicious twist on classic lasagna that the whole family will love” (Mexican Lasagna with Tortillas — Salt & Baker).
Suitable For:
- Large Families or Gatherings: This recipe is great for feeding a bunch of hungry people. It’s filling, and you can easily stretch it by serving with a side salad or rice. It’s also a good potluck dish – easy to transport in the baking dish and can be reheated.
- New Cooks: It’s quite straightforward – if you can cook ground beef and layer things in a dish, you can make this. No tricky techniques. The forgiving nature of a casserole means even if the layers aren’t perfect, it will still taste good.
- Freezer Meal Preppers: If you like stocking your freezer with homemade ready-to-go meals, add this one to your list. Assemble and freeze (maybe in a disposable aluminum pan). It will be such a treat to bake it off on a night you don’t want to cook from scratch.
- Gluten-Free Eaters: By using corn tortillas, this easily becomes gluten-free (and corn tortillas add a nice texture and flavor too). It’s naturally packed with protein and can be adjusted for other diets (like using dairy-free cheese for lactose intolerant folks).
- Comfort Food Seekers: On a cold or rainy day, this bubbly, cheesy baked goodness is pure comfort. It’s also a fun alternative for Taco Tuesday when you want the flavors without assembling individual tacos.
Tips & Tricks:
- Prevent Tortilla Sogginess: Lightly coat the bottom of the baking dish with a bit of sauce or salsa, but not too much liquid. Corn tortillas hold up well, but flour can get soggy if too wet. Some recipes lightly fry the tortillas first to create a barrier – you can do that if you want extra insurance (or brush them with oil and toast in oven). But generally, if you don’t over-sauce, it will be fine (Mexican Lasagna with Tortillas — Salt & Baker).
- Season Each Layer: Just like lasagna, lightly season or ensure flavor in each component. The beef should be taco-seasoned (Mexican Lasagna with Tortillas — Salt & Baker). If using plain canned beans/corn, add a pinch of cumin or chili powder to them. This ensures the final dish is well-flavored throughout and not bland in spots.
- Let It Rest: After baking, let the tortilla lasagna sit for about 10-15 minutes before cutting (Vegetarian Tortilla Soup Recipe – Cookie and Kate). This helps it set up (and won’t burn mouths). It will slice cleaner, almost like a pie, once it cools slightly.
- Layering Tips: Layer like this (though it can vary): a bit of sauce, tortillas (overlap or cut to fit a single layer), meat & bean mixture, cheese, then repeat. End with tortillas on top, then sauce and a generous layer of cheese (Mexican Lasagna with Tortillas — Salt & Baker). The top tortillas will get slightly crisp around the edges, almost like chips – yum!
- Toppings Bar: While the casserole has lots inside, fresh toppings on serving really brighten it up. Have shredded lettuce, diced tomatoes, olives, jalapeños, cilantro, sour cream, and crushed tortilla chips available. People can customize each serving just like they would a taco (Mexican Lasagna with Tortillas — Salt & Baker). The blogger specifically mentions topping it with crunchy tortilla chips, sour cream, guac, pico, etc., which adds texture and flavor (Mexican Lasagna with Tortillas — Salt & Baker) (Mexican Lasagna with Tortillas — Salt & Baker).
Possible Improvements:
- Make It Vegetarian: Omit the ground beef and increase beans/veggies. You could do a layer of sautéed zucchini, mushrooms, or use spinach. With the beans and cheese, it’s still very hearty (and you could use a meatless crumbles product for that texture, too).
- Alternate Proteins: Use shredded chicken (perhaps from a rotisserie chicken) with green enchilada sauce for a “verde” version, or pulled pork for a carnitas twist. You can adapt the flavor profile (for example, enchilada sauce instead of salsa, pepper jack cheese for spice, etc.).
- Spice Level Control: Use mild salsa and omit jalapeños if you want it very mild for kids. Or spice it up with hot salsa, a can of diced green chiles, or a layer of pickled jalapeños in the middle. A few dashes of hot sauce in the meat mix can also do the trick.
- Texture Variations: If you like a little crunch, you can incorporate some crushed nacho chips or toasted tortilla strips on top in the last few minutes of baking (so they don’t get soggy). A sprinkle of corn or layer of rice can add different textures inside too.
- Sauce Swap: Instead of salsa, you can use enchilada sauce (red or green) between layers for a more saucy, enchilada-like casserole. Some recipes even mix sour cream into the sauce for creaminess. But note, too much liquid could make it more like a dip, so add just enough to keep it moist.
- Individual Servings: For fun, you could build these in individual ramekins or mini foil pans for personal servings (great for freezing in portions). Or layer in a springform pan, then unmold like a cake for a party presentation. But the 9×13 pan approach is easiest and most practical.
Read the full recipe here: Salt & Baker – Mexican Lasagna with Tortillas
16. Loaded Sheet Pan Nachos – 30-Minute Ultimate Snack Dinner
Description: An entire sheet pan piled high with tortilla chips, taco-seasoned ground beef, refried beans, melty cheese, and all your favorite nacho toppings (Sheet Pan Nachos – Quick and Easy!).
These loaded nachos are baked briefly to melt the cheese and warm the toppings, creating the ultimate shareable platter that’s perfect for a crowd or a fun family dinner.
They’re ridiculously easy to throw together (ready in about 30 minutes) and endlessly customizable – truly an “everyone dig in” kind of meal that’s equal parts dinner and party snack. Crunchy, cheesy, and absolutely delicious (Sheet Pan Nachos – Quick and Easy!).

Why It’s Great:
- Fast & Easy One-Pan Meal: You cook up some beef (or use pre-cooked meat), then just layer everything on a sheet pan. It’s a 30-minute recipe from start to finish (Sheet Pan Nachos – Quick and Easy!) (Sheet Pan Nachos – Quick and Easy!), and since it all goes on one pan, cleanup is easy too (especially if you line the pan with foil). Great for busy nights when you want something fun but low-fuss.
- Fun and Communal: There’s something so enjoyable about everyone gathering around a sheet of nachos. It turns dinner into a casual, interactive experience. The nachos are crowd-pleasing – who can resist cheesy chips? – and you can stretch them by serving with sides or extra chips if needed.
- Customizable & “Clear Out the Fridge” Friendly: Nachos are very forgiving – you can put just about any taco or burrito-type ingredient on them. Got leftover chicken? Use it. Vegetarian? Skip meat and add extra beans or roasted veggies. Plus, people can add their own extra toppings after baking (more jalapeños, sour cream, etc.) to their section.
- Perfect for Game Day or Parties: This is the snack for watching sports or having friends over. The recipe even emphasizes how it’s “large enough to feed a crowd” (Sheet Pan Nachos – Quick and Easy!). And unlike assembled individual nachos, doing it on a sheet pan means you get an even distribution of toppings and it’s easy to serve.
- Balanced (ish) Meal: Despite being “nachos,” these can actually be a decent meal – you’ve got protein from beef and beans, calcium from cheese, and if you load them with tomatoes, avocado, lettuce, etc., some veggies too. The recipe notes it’s a fun family dinner option that’s kid-friendly (Sheet Pan Nachos – Quick and Easy!), and you can feel okay about it as an occasional dinner treat, especially if you include those fresh toppings.
Suitable For:
- Families with Kids: Kids will love eating nachos for dinner and can even help build the tray (sprinkling cheese, layering chips). It’s also easy to modify part of the tray for picky eaters (e.g., one corner with just meat and cheese, no spicy stuff).
- Game Day/Appetizer: Whether it’s a Super Bowl party or a casual movie night, sheet pan nachos are ideal. Set it on a coffee table and let everyone graze. You might want to make two pans if it’s a big group – they go fast!
- Beginner Cooks or College Students: If you have access to an oven, you can make these. They’re very straightforward and hard to mess up. Also relatively inexpensive ingredients for a large yield – good for feeding roommates or friends on a budget.
- Nacho/Taco Lovers: It’s basically the ultimate nacho platter, so anyone who loves Tex-Mex flavors will be on board. It’s also gluten-free if you use corn chips, which most are, so it’s celiac-friendly (just watch out for seasoning mixes).
- Quick Party Prep: If you forgot to plan a dish for a potluck or need an appetizer in a hurry, you can whip these up with minimal cooking (even skip the beef and use only beans if in a real time crunch). Pop in oven right before serving.
Tips & Tricks:
- Choose Sturdy Chips: Use a thick, sturdy tortilla chip that can hold toppings without getting soggy too fast or breaking. Thin cantina-style chips might not hold up as well. Also, layer in a single layer or slightly overlapping at most – if you pile chips too deep, the bottom ones won’t get any toppings and might sog. It’s better to cover one whole pan surface generously than have too many layers.
- Melting Strategy: Put a layer of chips, then distribute beans and beef (and any melty ingredients like queso) and a lot of the cheese. Then you can add another light layer of chips and more cheese on top. The cheese acts as glue, so try to have cheese touching most ingredients. Save fresh toppings (tomatoes, cilantro, etc.) for after baking (Sheet Pan Nachos – Quick and Easy!).
- Bake or Broil Briefly: You only need to bake until cheese is melted and maybe lightly browned. If your oven runs cool, you can broil for a minute at the end to get that bubbly, toasty cheese (but careful not to burn chips). Since everything like beef is pre-cooked and beans are canned, you’re just heating it through and melting cheese (Sheet Pan Nachos – Quick and Easy!). Usually 5-10 minutes in a hot oven (~400°F) is enough.
- Serve Immediately: Nachos are best hot and fresh. Assemble and bake when ready to eat, because chips will soften as they sit. If you need to wait a bit, keep them warm in the oven (200°F) for a short period. Or serve in batches to keep the experience crisp.
- Toppings Galore: Set out bowls of sour cream, guacamole or diced avocados, salsa, extra hot sauce, sliced olives, pickled jalapeños, shredded lettuce, etc. Some people like to squeeze lime over their nachos too. Because the base is so crave-worthy, the fresh/cool toppings really add contrast and allow each person to tailor flavor (Sheet Pan Nachos – Quick and Easy!).
Possible Improvements:
- Alternative Protein or Veg: Swap ground beef for ground turkey or chicken, or make it vegetarian by using soy crumbles or just doubling the beans (you could use pinto or charro beans too). You can also add sautéed bell peppers and onions (like fajita veggies) on top for more veg content.
- Cheese Blend: Use a mix of cheeses for depth of flavor – cheddar for sharpness, Monterey Jack for meltiness, maybe a sprinkle of crumbled cotija after baking for a salty punch. A little cream cheese dolloped with the refried beans can also make the texture extra creamy.
- Refried Beans Tip: If your refried beans are thick, stir in a splash of water or broth and warm them so they’re more dollop-able. You can then drop small spoonfuls across the chips so they don’t all stick in one spot. Or put beans in a zip bag, snip the corner, and “pipe” dollops evenly. This ensures good coverage.
- Individual Servings: For a party, you could make individual foil packets or mini-sheet-pan nachos for each guest, but truthfully, communal style is more fun. Another idea: use the sheet pan nachos as the centerpiece of a nacho bar – bake plain cheese nachos, then have all toppings on the side for people to customize. This also keeps chips from getting too soggy.
- Leftover Transformation: If by chance you have leftover nachos that got soft, don’t toss them – you can scramble them into eggs (chilaquiles style) the next morning or bake them into a casserole with more cheese on top. Essentially, repurpose into a new dish so nothing’s wasted.
Read the full recipe here: House of Yumm – Sheet Pan Nachos
17. Authentic Huevos Rancheros – Hearty Ranch-Style Breakfast Tacos
Description: Huevos Rancheros is a classic Mexican breakfast consisting of fried eggs on lightly fried corn tortillas, smothered in a cooked tomato-chile salsa, and usually served with refried beans on the side (Easy & Authentic Huevos Rancheros – Muy Bueno) (Easy & Authentic Huevos Rancheros – Muy Bueno).
This authentic recipe offers sunny-side-up eggs with runny yolks, perched atop warm corn tortillas that have been crisped just a bit, then ladles on a homemade ranchero sauce packed with veggies and chiles.
It’s a fresh, flavorful, and filling breakfast or brunch plate – you get the comforting egg-and-tortilla base plus the bright, spicy kick of salsa, all in one. A sprinkle of cilantro and some crumbled cheese finish it off for the true ranchero experience.

Why It’s Great:
- Authentic Flavor: This recipe is true to the traditional roots of the dish – the blogger notes it’s “the most basic, traditional huevos rancheros around” (Easy & Authentic Huevos Rancheros – Muy Bueno). So you’ll be tasting the real deal: simple ingredients that pack a punch (corn tortillas, eggs, refried beans, salsa ranchera). It’s tried-and-true and bursts with Mexican flavor from the homemade ranchero sauce.
- Quick and Simple: Despite being often served in restaurants, huevos rancheros are quite easy to make at home. The sauce can be made in about 15 minutes, and frying up tortillas and eggs is quick too. The whole dish comes together in around 20 minutes with 10 ingredients (Easy & Authentic Huevos Rancheros – Muy Bueno), making it feasible for a hearty breakfast even on moderately busy mornings.
- Filling and Satisfying: With eggs, beans, and tortillas, this is a stick-to-your-ribs breakfast (as one might expect from something called “rancher’s eggs” – it was meant to fuel a long morning of work (Easy & Authentic Huevos Rancheros – Muy Bueno)). It’s got protein, some carbs, and if you serve with avocado or cheese, some fats – a balanced, energizing meal.
- Vegetarian & Wholesome: It’s completely vegetarian (even healthy, with fiber from beans and lycopene from tomatoes), yet omnivores won’t miss a thing because the eggs provide plenty of richness. It’s also naturally gluten-free if using corn tortillas. You can make it dairy-free easily by omitting cheese toppings.
- Versatile for Meal Time: While it’s a breakfast dish, it’s also great for brunch, lunch, or even a light dinner. Breakfast for dinner, anyone? The flavors work any time of day, and you can pair it with a margarita or a coffee depending on the hour!
Suitable For:
- Brunch Lovers: If you like savory, spicy breakfasts or brunches (e.g., shakshuka, breakfast burritos), this will be right up your alley. It’s a great dish to serve at a brunch gathering – you can keep the sauce warm and fry eggs to order. Impress friends by bringing a bit of Mexican cuisine to the table.
- Those Bored of Plain Eggs: Huevos rancheros is an excellent way to jazz up eggs. So if you have eggs and tortillas on hand, skip the basic scramble and make this. It’s almost as easy, but way more exciting on the palate.
- Spice Tolerance Flexibility: You can tailor the heat by the type of chile in your ranchero sauce. The recipe likely uses jalapeño or serrano for some kick (Easy & Authentic Huevos Rancheros – Muy Bueno). Keep seeds out for milder, or include for spicier. Thus, it can be enjoyed by those who like just a little spice or those who love a lot.
- Gluten-Free Eaters & Vegetarians: As noted, it fits these diets nicely. If someone is vegan, they could even try it with a tofu scramble or vegan egg substitute (though the runny yolk is kind of the best part, so maybe do another dish for them). But vegetarians will rejoice at such a hearty option that’s meat-free.
- Breakfast Traditionalists and Adventurers Alike: It still has familiar elements (eggs, toast-like tortilla, tomato sauce) for those wary of very unusual breakfasts, yet it’s distinct enough from typical American fare to feel novel and interesting.
Tips & Tricks:
- Make the Sauce Ahead: You can prepare the ranchero sauce (the tomato-chile salsa) the night before and just reheat it in the morning (Easy & Authentic Huevos Rancheros – Muy Bueno). It might even taste better as the flavors meld. Then you only have to fry tortillas and eggs when ready to eat.
- Fry Tortillas Lightly: Typically, corn tortillas are lightly fried in a bit of oil to firm them up (so they hold the toppings) but not to the point of fully crispy tostadas (Easy & Authentic Huevos Rancheros – Muy Bueno). They should still be pliable. A quick shallow fry for about 20-30 seconds per side, then drain. Alternatively, you can char them on a gas flame or griddle for a lighter version – they’ll be softer, knife-and-fork style, which is fine.
- Sunny Side Up Eggs: Huevos rancheros usually have runny yolks that mingle with the sauce. Cook sunny side up or over-easy eggs so the yolk is still soft. If serving a crowd, you can even do basted eggs or cook them on a sheet pan in the oven to keep many at once warm (but careful not to overcook).
- Warm Plates/Beans: This dish is best served hot. Warm your plates slightly (or serve immediately) so the sauce and eggs stay warm. Also, if including refried beans on the side or spreading on tortillas, make sure they’re hot so they don’t cool everything down.
- Serving Suggestions: Traditionally, it’s served with refried beans (either on the side or smeared on the tortilla under the egg) and maybe rice. But at home, you can also add slices of avocado or a bit of crumbled queso fresco or cotija cheese on top. A dash of hot sauce or extra cilantro as garnish is great too. The blogger suggests it’s commonly served with beans and the recipe has authentic variations to try once you master the basic (Easy & Authentic Huevos Rancheros – Muy Bueno).
Possible Improvements:
- Add Ham or Chorizo: While authentic is vegetarian, if you want meat, you can serve with a side of bacon/ham or cook bits of Mexican chorizo sausage in the sauce for a meaty twist (but then it’s more like Shakshuka with eggs poached in sauce, which is also delicious).
- Cheese Melt: Some modern versions sprinkle shredded cheese over the sauce-topped eggs and briefly broil to melt it. Not traditional, but if you’re a cheese lover, a little Monterey Jack or cheddar melted on top can be tasty.
- Green Huevos Rancheros: Try a salsa verde (tomatillo-based sauce) instead of red ranchero sauce for a change. Huevos “divorciados” serve one egg with red and one with green sauce – fun if you make both sauces.
- Crispier Base: If you like a crunch, make tostadas (fully crispy fried tortillas) and build on that. It will be messier to eat (likely need a knife and fork to cut through), but some prefer the texture contrast of a crisp base. Alternatively, layer two tortillas with a bit of beans in between, then fry – this makes it thicker and crunchier.
- Sauce Shortcuts: In a pinch, you can use a good quality bottled ranchero or enchilada sauce (or even a chunky salsa) to save time. The flavor might not be as fresh, but it works. Doctor it up with fresh cilantro and a squeeze of lime. But the recipe’s homemade sauce is best for authenticity (Easy & Authentic Huevos Rancheros – Muy Bueno).
- More Toppings: Beyond the basic cheese and cilantro, you could top with pickled onions or radish slices for zing, or a dollop of crema. Just note that too many extras and it starts straying into more of a Tex-Mex pile (which might be yummy but less classic). The basic combination is so good it really doesn’t need much else.
Read the full recipe here: Muy Bueno – Easy & Authentic Huevos Rancheros
18. Cheesy Chicken Tortilla Stack – Layered Quesadilla “Cake”
Description: Imagine a giant stacked quesadilla, and you’ve got the chicken tortilla stack.
Flour tortillas are layered in a springform pan with a savory filling of shredded chicken, sour cream, and three types of cheese, then baked so you can cut it into wedges like a cake (Chicken Tortilla Stack – Damn Delicious) (Chicken Tortilla Stack – Damn Delicious).
It’s creamy, ultra-cheesy, and indulgent – the tortilla layers bake up together into a sliceable dish with distinct layers of chicken and gooey cheese in between. It’s like a Tex-Mex spin on lasagna or an epic multi-layer quesadilla pie.
Perfect for a party or fun weeknight meal when you want something a bit different but still comforting.
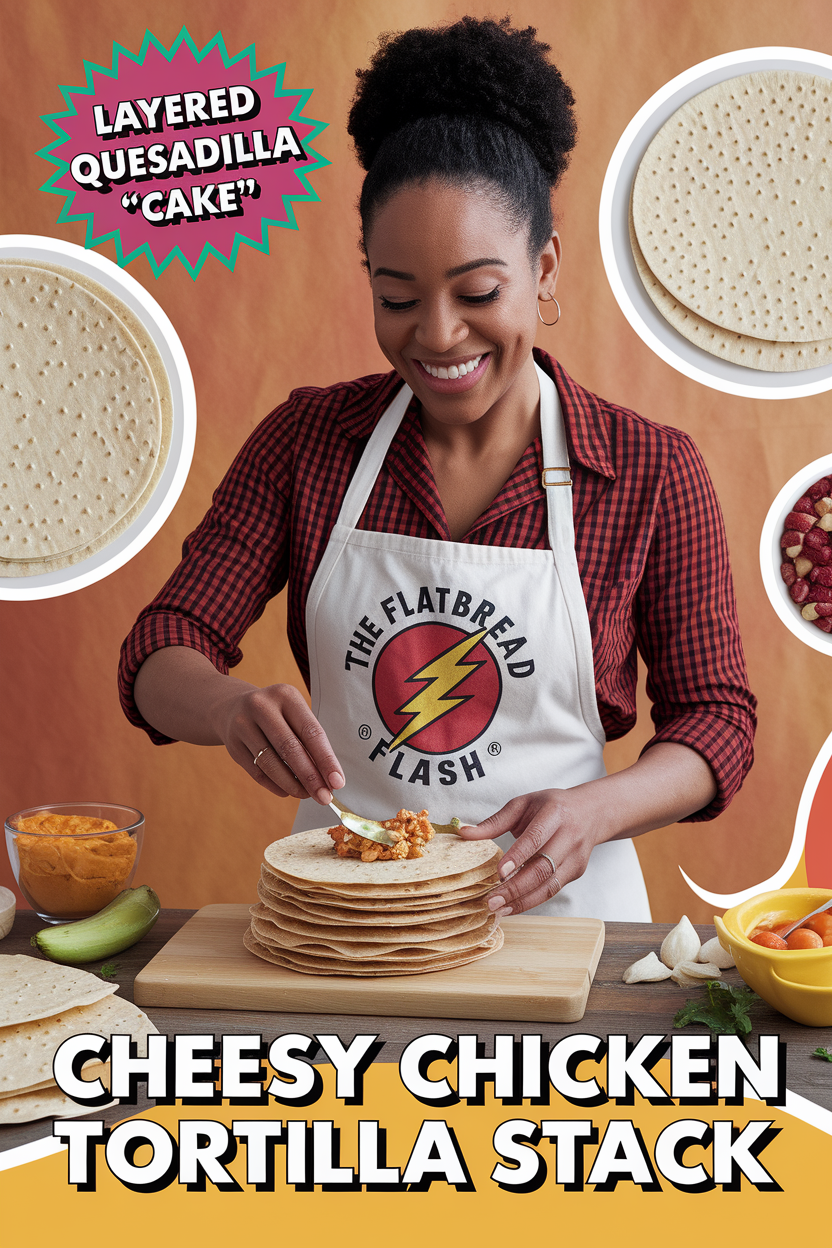
Why It’s Great:
- Showstopper Appeal: The presentation is fantastic – a mile-high stacked tortilla pie that you cut into like a dessert. It has that “wow” factor (the blogger even made it for Cinco de Mayo and called it a “mile-high tortilla stack pizza” (Chicken Tortilla Stack – Damn Delicious)). Yet it’s easy to serve, since you just slice and everyone gets a wedge that holds together with all the layers.
- Cheesy Comfort: This recipe is loaded with cheese (cheddar, Pepper Jack, mozzarella, plus cream cheese or sour cream) (Chicken Tortilla Stack – Damn Delicious) (Chicken Tortilla Stack – Damn Delicious), so it’s definitely a comfort food treat. If you love melty, creamy casseroles or dips, this has your name on it. The combination of cheeses and seasoned chicken creates an ooey-gooey, savory delight in each bite.
- Easy Assembly: Using a springform pan is genius for this – you stack everything in, bake, and then release the pan for a perfect stack. No tricky pastry or dough to deal with; flour tortillas are your “layers” and they’re very forgiving. It’s a matter of mixing filling, layering, and baking – quite straightforward.
- Party-Friendly: This dish was born to party. It feeds about 6 people generously (Chicken Tortilla Stack – Damn Delicious) (more if served in smaller wedges as an app), and it stays warm and cohesive, making it great for potlucks or game day. The blogger mentions it’s a crowd-pleaser and even references bringing it to gatherings where it was a hit (Chicken Tortilla Stack – Damn Delicious).
- Freezer/Make-Ahead Potential: You could likely assemble this ahead (maybe freeze or refrigerate before baking) and then bake when needed, since it’s similar to a casserole. The ingredients like cooked chicken and cheese handle freezing well. That way, you can have a ready-to-bake impressive meal on hand.
Suitable For:
- Cheese Lovers: If you or your family adore ultra cheesy dishes (like queso dip, mac and cheese, etc.), this will be a new favorite. It’s basically cheese and chicken held together by tortillas.
- Teenagers & Hungry Crowds: It’s very hearty and filling. Perfect for feeding teens after sports practice or a hungry crowd during a big game. Serve slices with salsa, guac, or a salad to cut the richness a bit.
- Moderate Skill Cooks: It’s not difficult to make, but handling the springform and slicing might require some basic kitchen confidence. Still, even a beginner could follow the steps since layering is simple and the result is quite forgiving (cheese covers any “mistakes”).
- Rainy Day Comfort Dinner: When the weather’s dreary or you have a cheat day, this fits the bill. It’s warm, rich, and satisfying in the same way a creamy casserole or pot pie is.
- Leftover Makeover: Got leftover rotisserie or roasted chicken? This is an excellent way to use it creatively rather than chicken salad or soup again. Shred and season that chicken to become the star of this stack.
Tips & Tricks:
- Use a Springform Pan: The recipe likely calls for a 9-inch springform pan (as indicated by using 9-inch tortillas) (Chicken Tortilla Stack – Damn Delicious). Grease it a bit so the tortillas don’t stick. The springform makes unmolding easy; if you don’t have one, you can use a cake pan but will have to scoop servings out like a casserole rather than slicing neatly.
- Pack the Layers: Layer tortilla, spread filling evenly, then next tortilla, etc. Press down lightly on each new tortilla to compact the layers, especially if using a lot of them. This will make it slice cleaner. There’s probably around 4-5 tortillas stacked with filling between in the recipe (Chicken Tortilla Stack – Damn Delicious). Save some cheese for the very top to create a nice golden crust after baking.
- Let it Cool Slightly: Just like lasagna, let the tortilla stack rest 5-10 minutes after baking and before removing the springform ring. This helps it set so layers don’t slide apart and it’s easier to cut. A serrated knife can help slice through the tortillas without squishing out too much filling.
- Season to Taste: The recipe likely uses ranch or taco seasoning mix (the blogger mentioned ranch seasoning somewhere?) or other spices in the filling (Chicken Tortilla Stack – Damn Delicious). Make sure the chicken is well-seasoned (taste the mixture if you want). Some green chiles or salsa mixed into the chicken could add flavor too. Just be careful adding chunky veggies because you want neat layers.
- Serving Suggestions: Serve each wedge with a spoonful of salsa, a dollop of sour cream, or some guacamole on the side to brighten the flavors (the filling is rich and creamy, so a fresh contrast is nice). A sprinkle of green onion or cilantro on top adds color and freshness.
Possible Improvements:
- Add Veggies to Filling: Finely diced bell peppers, corn, or even spinach could be mixed with the chicken to add some vegetables to the stack (and color). Just don’t go overboard or it might affect structural integrity. You could also alternate a veggie layer (like sautéed peppers and onions) with the chicken layer for variation.
- Spice or Sauce Layer: Spread a thin layer of salsa or enchilada sauce on some of the tortilla layers for extra moisture and zing. Or add a few pickled jalapeño slices in the layers for a surprise heat. Even mixing some hot sauce into the filling could give it a kick.
- Different Meats or Beans: Swap chicken for cooked taco beef or pulled pork for a different flavor profile. Or make it vegetarian by using seasoned beans (refried or black beans) and maybe some sautéed mushrooms or squash for texture. The cheese and tortilla will still make it indulgent enough.
- Crunchy Top: After removing the springform, you could sprinkle crushed tortilla chips on top for a crunchy texture contrast, or even along with some extra cheese in the last few minutes of baking (though the recipe as is has a fully cheesy top which is delicious on its own).
- Sauce Drizzle: Drizzle a chipotle crema or avocado crema on the plate or over the slice for presentation and added flavor. A zigzag of Mexican crema (thinner sour cream) can also look nice and add tang to each bite.
- Storage: Leftovers, if any, can be refrigerated and reheated. To keep the stack intact when reheating, do it in the oven covered with foil until warm, then uncover to re-crisp the top. In the microwave, it’ll be softer but still tasty. Perhaps turn leftover slices into new creations like stuffing in a burrito (since it’s basically filling and tortilla already).
Read the full recipe here: Damn Delicious – Chicken Tortilla Stack
19. Crispy Bean Tostadas – Open-Faced Crunchy Tortilla Salads
Description: Tostadas are essentially flat, crispy tortillas topped with layers of flavorful ingredients – like an open-faced taco with a crunchy shell. In this recipe, corn tortillas are baked or fried until shatteringly crisp (Tostadas (Crispy Mexican Tortillas) – Budget Bytes).
They’re then smeared with refried pinto beans, and piled high with fixings: fresh salsa, crisp shredded slaw or lettuce, radishes, avocado, queso fresco, cilantro, sour cream – you name it (Tostadas (Crispy Mexican Tortillas) – Budget Bytes).
Each bite delivers the ultimate combo of crunchy, creamy, and fresh. It’s a satisfying weeknight meal that’s budget-friendly and fun to eat (yes, it’s a little messy in the best way possible).

Why It’s Great:
- Texture Heaven: Tostadas are all about that crunch. Using a fried or baked tortilla as the base, you get a sturdy, chip-like vehicle for toppings (Tostadas (Crispy Mexican Tortillas) – Budget Bytes). When you bite in, you get crunch from the shell and veggies, creaminess from beans and avocado, and juiciness from salsa. It’s a party of textures that is so enjoyable.
- Fresh & Customizable: As per the recipe, these tostadas come “piled high with salsa, veggies, and cheese” (Tostadas (Crispy Mexican Tortillas) – Budget Bytes), meaning you get a lot of fresh produce in. It’s like a salad on a crispy tortilla. You can customize each tostada to your liking – more heat, more creaminess, etc. Great for families or groups because everyone can tailor their own (or build a tostada bar).
- Quick and Easy: Especially if you use canned refried beans and store-bought tostada shells (or quickly fry your own), this meal can come together in 20 minutes. Even making simple components from scratch (like mashing beans or chopping a quick salsa) is fast. It’s mostly assembly. Budget Bytes, the source likely, emphasizes how cheap and easy this recipe is (Tostadas (Crispy Mexican Tortillas) – Budget Bytes).
- Meatless & Healthy: Tostadas can be light and very healthy when loaded with veggies and beans. They’re high in fiber, and can be made completely vegetarian or even vegan (skip cheese or use a vegan one). Yet they’re still very filling thanks to the beans and avocado.
- Budget-Friendly: Using beans as the protein is extremely cost-effective. The recipe even calls it “inexpensive” (likely showing how a can of beans and some tortillas can feed a family) (Tostadas (Crispy Mexican Tortillas) – Budget Bytes). You maximize flavor with minimal pricey ingredients, making this a great end-of-week or pantry meal.
Suitable For:
- Family Dinners: Kids can have fun assembling their own tostadas. If they’re young, you might break the tortilla into chips for easier eating, but older kids usually enjoy the interactive aspect even if it’s a bit messy. It’s a good way to get them to eat veggies (under some cheese and salsa).
- Vegetarians/Vegans: Simply use vegetarian refried beans (or mashed black beans) and omit cheese (or use a plant-based cheese) to make it vegan. The dish is still packed with flavor due to the spiced beans, salsa, and textures.
- Busy Weeknights: When you’re short on time or energy, this meal requires minimal cooking. You can even use leftovers as toppings (like leftover grilled corn, or shredded chicken if people want meat).
- Summer Meals: Tostadas are great in warm weather because they’re not too heavy and you can use lots of raw, fresh toppings – like a salad on a shell. Pair with cold drinks for a refreshing dinner.
- Entertaining: Consider a tostada party – fry up lots of tortillas (or buy a stack of ready tostada shells) and set out an array of toppings and spreads. Guests will have fun building and customizing, much like a taco bar but crunchier.
Tips & Tricks:
- Prevent Soggy Tostadas: Only assemble right before eating. If making multiple, perhaps let everyone assemble their own at the table. The tortilla will start to soften under wet toppings after a few minutes. Also, a tip: spread beans first on the shell (Tostadas (Crispy Mexican Tortillas) – Budget Bytes) – the fat in beans can create a barrier that slows the shell from getting soggy by the wetter salsa.
- Baking vs Frying Shells: You can bake tortillas brushed with oil at ~400°F until golden (about 5-10 minutes) flipping once (Tostadas (Crispy Mexican Tortillas) – Budget Bytes) for a less oily version. Or you can fry in 1/2 inch of hot oil for about 30 seconds each side until crisp. Either way, drain on paper towels and salt lightly. Store-bought tostada shells save time and are consistent in crunch – they’re basically pre-fried tortillas. Use those if available to make this meal ultra quick.
- Season the Beans: Refried beans are best if you warm them with a bit of seasoning – maybe a spoon of the salsa, or cumin and garlic powder, or some of that taco seasoning. The recipe mentions adding water to make them mashable (Tostadas (Crispy Mexican Tortillas) – Budget Bytes) and an easy spread. Also a little hot sauce or chipotle in the beans can add depth since the beans are a large part of the flavor.
- Layer Thoughtfully: On a tostada, try to put some “sticky” ingredients on first (beans, then maybe a sprinkle of cheese) to hold on some of the looser ones (like lettuce tends to slide off plain chips). Then add your lettuce or slaw, then salsa, then finishes like crema and cheese. This way, things stay on as you take bites.
- Eat Over a Plate: Obvious perhaps, but tostadas can shatter! That’s part of the fun. Eat it over a plate to catch the fallout – which you can then scoop up with any extra chips or just fork up. Some people eat tostadas by breaking them apart and eating pieces (like large nachos) rather than biting straight in – do whatever is easier.
Possible Improvements:
- Protein Additions: While this recipe is bean-focused (and deliciously so), you can add cooked taco meat, grilled shrimp, or shredded chicken on top of the beans if you want to cater to meat-eaters. That makes it more substantial (and is traditional in some regions). But honestly, the beans provide plenty of protein.
- Variety of Bean Spreads: Try black bean refritos with a bit of crumbled chorizo for a different flavor, or even a layer of queso dip or guacamole under the veggies for a change (that edges toward a different dish, but hey, tostadas are versatile). The Budget Bytes snippet suggests using leftover (Not) Refried Beans recipe or canned – flexible (Tostadas (Crispy Mexican Tortillas) – Budget Bytes).
- Slaw Mix Shortcut: They suggest a bag of coleslaw mix as a cheap veg addition (Tostadas (Crispy Mexican Tortillas) – Budget Bytes). Great idea – toss it with some lime and salt for instant salad topping. You could upgrade this by making a quick lime-cilantro dressing for the slaw to give it more zing on the tostada. Or simply use shredded lettuce if preferred.
- Different Sauces: Instead of tomato salsa, you could do a drizzle of salsa verde or a corn salsa. Even a smoky chipotle sauce or taco sauce could be good. Tostadas are a canvas – some even do a layer of mayo (common in some Mexican street versions) before other toppings for richness.
- Cheese Choices: Queso fresco gives an authentic mild salty touch but doesn’t melt; you could also sprinkle shredded cheddar or jack and give it a quick broil to melt (then add lettuce after). Or do both: a melted layer of jack, then finish with crumbled cotija. Layering flavors like that never hurts!
- Meal Pairings: Serve with a side of Mexican rice or elote (Mexican street corn) if making it a larger meal. For a light meal, the tostadas alone are fine because they have fiber and veg. A cold beer or horchata or agua fresca goes nicely since they have a slight kick (depending on your salsa).
Read the full recipe here: Budget Bytes – Tostadas
20. Crisp Black Bean Tacos with Feta Slaw – 10-Minute Vegetarian Tacos with a Twist
Description: These unique pan-fried black bean tacos are a quick dinner miracle. A cumin-spiced black bean mash is spooned into corn tortillas with a bit of crumbly feta, then the tortillas are folded and pan-fried in a little oil until ultra crispy (crisp black bean tacos with feta and slaw – smitten kitchen).
They’re served with a bright lime-dressed cabbage slaw that includes crumbled feta, adding a tangy, crunchy counterpoint to the warm, crispy tacos (crisp black bean tacos with feta and slaw – smitten kitchen).
The combination of the salty, creamy feta, earthy spiced beans, and zesty slaw is unexpectedly delicious and comes together in about 10 minutes (indeed, the origin story is a last-minute meal) (crisp black bean tacos with feta and slaw – smitten kitchen) (crisp black bean tacos with feta and slaw – smitten kitchen).
Think of it like a vegetarian taco-quesadilla hybrid that’s all texture and flavor.

Why It’s Great:
- Lightning Fast: This meal was literally born from the need for a 10-minute dinner (crisp black bean tacos with feta and slaw – smitten kitchen), and it delivers. You use canned black beans (no need to fully refry, just mash with spices) and you don’t even need to bake – just crisp them quickly in a skillet. It’s faster than ordering takeout and uses very few ingredients.
- Crispy, Crunchy, Creamy: Pan-frying the filled tortillas gives you a taco that’s almost like a crispy pocket – similar to a flauta or pressed taco. You get that satisfying crunch when you bite in (crisp black bean tacos with feta and slaw – smitten kitchen). Inside is the creamy seasoned black bean filling. Then the side of lime-dressed cabbage (with feta) gives another layer of crunch and a burst of freshness. The limey feta slaw is what elevates these to something special, providing acidity and brightness to balance the richness (crisp black bean tacos with feta and slaw – smitten kitchen).
- Cheap & Vegetarian: Minimal ingredients – black beans, some seasonings, tortillas, a bit of cabbage and feta – make this an extremely low-cost meal that happens to be vegetarian. Yet, thanks to the beans and cheese, it’s got protein and heft. It’s also fairly healthy, with fiber from beans and cabbage, and you can control the oil for frying (they’re shallow pan-fried, not deep-fried, so they’re not overly greasy).
- Flavor Pop with Feta: Feta isn’t a typical Mexican ingredient, but here its briny tang works like cotija or queso fresco but even more pronounced. The recipe writer admitted it was a thrown-together meal with what was on hand (crisp black bean tacos with feta and slaw – smitten kitchen), but it turned out so tasty that it’s become a beloved recipe. The feta in the slaw provides the saltiness that pairs wonderfully with mild black beans.
- Small Batch Friendly: The original recipe made just enough for 2 servings (crisp black bean tacos with feta and slaw – smitten kitchen) – great for singles or couples. It can scale up easily, but it’s also nice to have recipes that serve 1-2 without tons of leftovers. And if you do have extra filling, you can always make more tacos or dip with chips later.
Suitable For:
- Weeknight Warriors: This is the definition of a weeknight win – minimal effort, max reward. Perfect for those evenings when you “can’t even” but still want something homemade and satisfying.
- Meatless Monday or Quick Vegetarian Night: If you want to eat less meat or need a vegetarian option that’s exciting (not just salad or pasta), this is a fantastic choice. It feels a bit indulgent due to the frying and cheese, so you don’t even think about it being vegetarian.
- Budget Cooking: Students, families on a budget, anyone – the ingredients here are pantry staples or cheap produce (cabbage is usually inexpensive). You can feed a few people for just a few dollars.
- Snacks or Appetizers: Cut these tacos in half and they could be a great party appetizer or snack – like little black bean empanadas or so. Serve the slaw as a topping or dip. They’ll go fast.
- Fans of Crunchy Tacos: If you like the texture of hard-shell tacos but prefer corn tortillas’ flavor, this is a nice hybrid (and doesn’t require buying separate shells). It’s similar to the famous fast-food “black bean crunchwrap” ideas but in taco form and way quicker.
Tips & Tricks:
- Warm Tortillas to Fold: Corn tortillas can crack when folded, so make sure to warm them up (microwave in a damp paper towel or heat on a skillet) before filling and folding in half. Some recipes even lightly oil and warm each before filling to prevent breaking. You might lose one or two to cracks until you get the hang, but warm and pliable is key (crisp black bean tacos with feta and slaw – smitten kitchen).
- Don’t Overfill: A heaping tablespoon or so of beans per taco is enough. Too much and the filling will ooze out when you press them in the pan. Also, leaving a little edge unfilled helps seal them (the natural starch of the tortilla plus a bit of bean acts like glue when heated). The recipe indicated using about 1/3 cup beans for 6 tacos, so ~1.5-2 Tbsp each (crisp black bean tacos with feta and slaw – smitten kitchen).
- Pan-Fry in Sufficient Oil: You want enough oil to make the tortillas sizzle and crisp (like 2-3 Tbsp in the pan). Too little and they might just dry out instead of fry. But they don’t need to be submerged. Fry on one side until golden, flip carefully (tongs or a spatula to support the open side so filling doesn’t fall) and fry the other. Drain on paper towels. They should hold together once one side is crisped.
- Work in Batches: Don’t overcrowd the pan or you’ll lower the oil temp and they won’t crisp as nicely. Do 2-3 at a time depending on pan size. They fry quick, like 1-2 min per side, so it’s not lengthy.
- Serve Immediately: These are best hot and crisp. The slaw can be piled on top of each taco or served on the side and you take a bit with each bite. The recipe implied they ate it in front of Top Chef within minutes of making it (crisp black bean tacos with feta and slaw – smitten kitchen), which is the idea – quick from pan to plate to mouth for peak crunch. You can also garnish with extra lime or hot sauce if desired.
Possible Improvements:
- Add Garlic/Onion to Beans: The original quick recipe just seasoned canned beans with cumin and maybe salt (crisp black bean tacos with feta and slaw – smitten kitchen). To boost flavor, you could mash the beans with a little sautéed garlic or onion, or a dash of chili powder or smoked paprika. Even a spoon of salsa or pickled jalapeño brine in the beans could be nice. Just don’t make it too wet – it needs to be thick to stay in the taco.
- Green Chile or Corn Variation: You can mix a couple of tablespoons of canned diced green chiles or corn kernels into the bean mash for extra texture and flavor. Green chiles would give a slight tang and heat that complements the feta.
- Cheese inside Taco: The recipe doesn’t mention cheese inside, only in slaw (crisp black bean tacos with feta and slaw – smitten kitchen). But you could sprinkle a little feta or other cheese inside with the beans before frying, turning it more quesadilla-like. The feta won’t melt but will soften; Monterrey Jack or cheddar would melt if you prefer melty. But too much might ooze out in the oil, so be sparing.
- Alternative Slaw Add-ins: The lime and green onion slaw with feta is simple and perfect (crisp black bean tacos with feta and slaw – smitten kitchen). You could add a bit of carrot for color or jalapeño for heat to the slaw. Or swap feta for cotija if you want to go more Mexican (feta is a stand-in that works well, as Deb from Smitten Kitchen did). Even a quick pico de gallo instead of slaw could work, but the slaw’s crunch is nicer against the fried taco.
- Sauce On Side: If you love a saucy finish, serve with a cilantro-lime crema or even Greek yogurt/sour cream with hot sauce mixed in. Though the tacos aren’t dry (beans are creamy, slaw is moist), a drizzle of cool crema can be yummy.
- Make more – they go fast!: The recipe makes 6 small tacos for 2 people (crisp black bean tacos with feta and slaw – smitten kitchen). If feeding more or if you’re particularly hungry, double it. They reheat okay in a toaster oven (will re-crisp) if you somehow have leftovers. You can also freeze the fried tacos and reheat in oven, but fresh is best. Good news: they’re so quick to make another batch!
Read the full recipe here: Smitten Kitchen – Crispy Black Bean Tacos with Feta and Slaw
Conclusion:
Tortillas truly prove their versatility across these 20 recipes – from morning burritos to midnight nachos, sweet to savory, light to hearty.
We’ve seen them take the form of crispy chips for dessert, act as crunchy bases for loaded meals, wrap up all our favorite fillings, and even stack into party-worthy pies.
Whether you’re looking for a quick 10-minute fix or a showy dinner centerpiece, there’s a tortilla-based recipe here to fit the bill.
The beauty of cooking with tortillas is how creative yet convenient it can be: you’re never far from a delicious meal when you have a pack of tortillas in the pantry.
Plus, these recipes draw from a world of flavors – Mexican, Tex-Mex, Thai-inspired, American classics – showcasing how a simple tortilla can be a canvas for almost any cuisine or course.
Try incorporating a few of these ideas into your weekly menu. You’ll not only keep meal time exciting and flavorful, but also appreciate how budget-friendly and flexible cooking with tortillas can be.
From breakfast tacos to dessert quesadillas, the possibilities are endless. So grab a stack of tortillas and start exploring – your next favorite dish might just be a tortilla creation away!
Key Takeaways:
Tortillas are incredibly versatile and can be used to create dishes for every meal of the day. With minimal ingredients and time, you can craft anything.
From hearty breakfasts (like Veggie-Packed Breakfast Burritos (Breakfast Burrito Recipe – Love and Lemons)) to quick lunches (like the crunchy Black Bean & Feta Tacos (crisp black bean tacos with feta and slaw – smitten kitchen)) to comforting dinners (hello, Chicken Enchilada Casserole (Chicken Enchiladas Recipe | Gimme Some Oven)) and even desserts (such as Cinnamon Sugar Tortilla Chips (Easy to Make Cinnamon Sugar Tortilla Chips | The Recipe Critic) or Strawberry Cheesecake “Dessert-dillas” (Strawberry Cheesecake Quesadillas Recipe + VIDEO – The Recipe Rebel)).
Tortilla-based recipes often require only pantry staples and are budget-friendly (Tostadas (Crispy Mexican Tortillas) – Budget Bytes), making them accessible for home cooks.
They’re also easily adaptable – you can swap proteins, add veggies, or adjust spices to suit your taste or dietary needs.
Most importantly, they deliver big on flavor and texture: think crunchy tostadas, chewy cheesy quesadillas, crisp fried tacos, soft baked enchiladas, and more.
Using the recipes and tips above, you can confidently turn humble tortillas into exciting breakfasts, fun snacks, or crowd-pleasing dinners any day of the week.