
Potatoes are one of the most versatile ingredients on the planet, lending their starchy goodness to appetizers, main courses, snacks, and even desserts. In this roundup, we’ve gathered 20 unique potato-based recipes from 20 different food blogs, each completely distinct in style and flavor.
From crispy appetizers to hearty mains and even sweet desserts, these recipes span global cuisines and cater to various dietary needs (vegan, vegetarian, gluten-free, and more). If you’re a potato lover or just looking for creative dishes, you’re in the right place.

Get ready to explore spicy Indian street foods, comforting European classics, fluffy potato breads, and indulgent treats, all celebrating the humble potato. Let’s dig in!
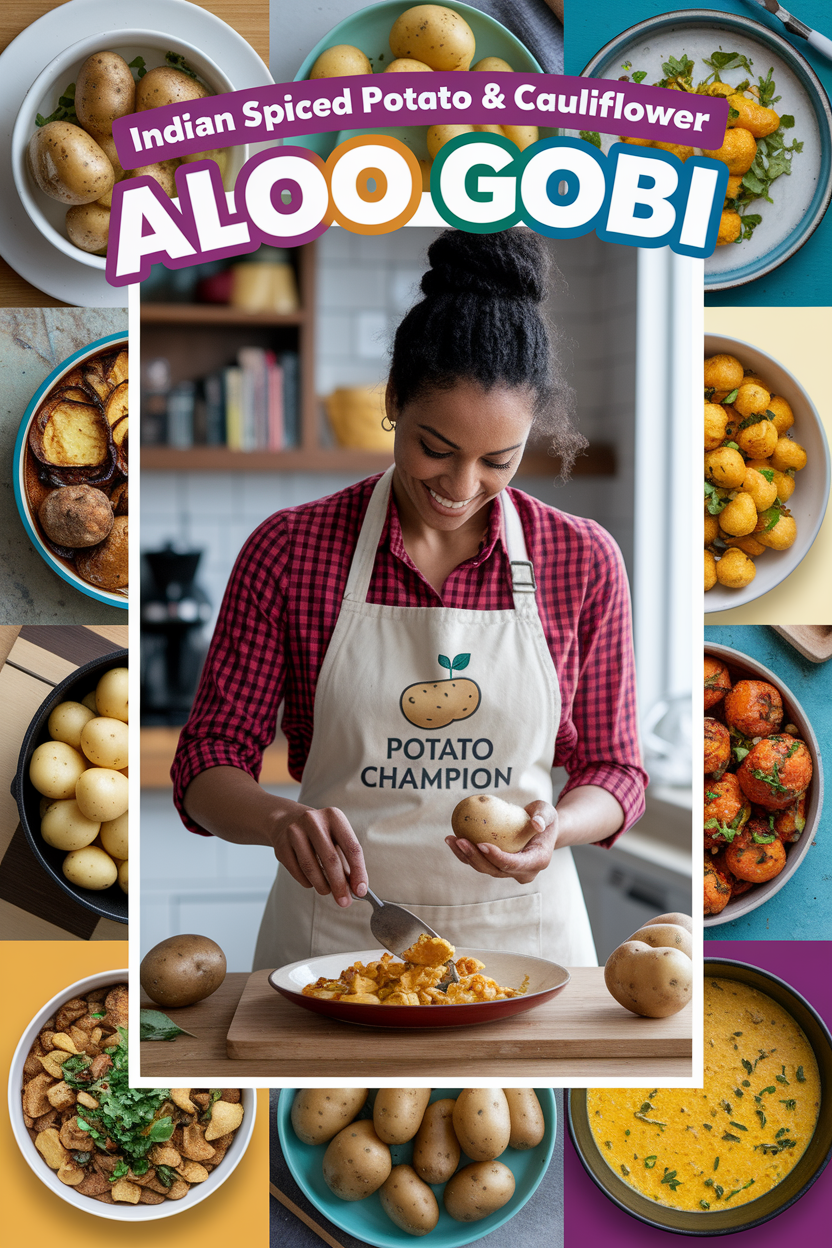
1. Aloo Gobi (Indian Spiced Potato & Cauliflower)
Why It’s Great: This North Indian classic is a deeply nourishing, comforting, and budget-friendly dish featuring tender potatoes (aloo) and cauliflower (gobi) simmered with tomatoes and warm spices (Aloo Gobi – Rainbow Plant Life) (Aloo Gobi – Rainbow Plant Life).
It’s naturally vegan and easy to make, yet packs a ton of flavor. Roasting the veggies before tossing in the masala gives a lightly crispy texture and a slightly smoky, caramelized flavor to the dish, making it anything but ordinary.
In short, it “checks all the boxes” – hearty, flavorful, and wholesome (Aloo Gobi – Rainbow Plant Life).
Suitable For:
- Vegan & Vegetarian: 100% plant-based ingredients (no dairy or animal products).
- Gluten-Free: Grain-free and made with veggies and spices only.
- Budget Meals: Uses affordable staples like potatoes and cauliflower.
- Weeknight Dinners: Ready in under an hour, great for meal prep or next-day leftovers.
Tips & Tricks:
- Use starchy potatoes (like russets) for best texture, and cut them into equal pieces so they cook evenly.
- For deeper flavor, roast or pan-fry the potatoes and cauliflower until golden before simmering – this adds extra depth and prevents them from turning mushy (Aloo Gobi – Rainbow Plant Life).
- Adjust the spice level by increasing or reducing the chili powder or fresh chilies. A squeeze of lemon at the end can brighten the flavors.
- Garnish with fresh cilantro and a sprinkle of garam masala just before serving for an authentic touch.
Possible Improvements:
- Add Protein: Turn it into a fuller meal by tossing in some chickpeas or cubes of fried tofu/paneer.
- Green Twist: Add a handful of peas or spinach for extra color and nutrients.
- Creamy Variation: Stir in a spoon of coconut milk or cashew cream at the end for a creamier gravy without compromising the vegan profile.
- Spice Swap: Experiment with garam masala or curry leaves to give different aromatic notes, or a pinch of fenugreek (methi) for a restaurant-style finish.
Full Recipe: Aloo Gobi – Rainbow Plant Life
2. Old-Fashioned Potato Candy (No-Bake Dessert)
Why It’s Great: Who knew you could use potatoes to make candy? This old-fashioned sweet treat is surprisingly simple – only 4 ingredients and no baking required (Potato Candy – Preppy Kitchen).

Mashed potato is the secret that binds together a soft, fudgy confection, rolled with creamy peanut butter for a salty-sweet kick. You’d never guess there’s potato in it, but that spud makes the texture perfectly tender (Potato Candy – Preppy Kitchen).
It’s a great way to use up leftover mash, and it’s ready in minutes. With its nostalgic charm and rich flavor, this potato candy is the perfect holiday dessert or anytime sugar fix – and an awesome conversation starter (“there’s potato in this?!”).
Suitable For:
- Vegan / Dairy-Free: Uses plant-based ingredients (just verify your sugar and peanut butter are vegan). No butter, milk, or eggs involved.
- Gluten-Free: Naturally gluten-free as it contains no flour – it’s basically potato, sugar, and peanut butter.
- Nut-Free Option: Swap peanut butter with a seed butter (like sunflower seed butter) if needed for allergies.
- Kid-Friendly: Fun to make with kids (they can help roll it up) and it tastes like a peanut butter cup filling – a hit with picky eaters.
Tips & Tricks:
- Cool the Potatoes: Let your boiled/mashed potato cool completely before mixing with sugar (Potato Candy – Preppy Kitchen). Adding powdered sugar to hot potatoes will melt the sugar and turn the mixture runny (Potato Candy – Preppy Kitchen). Room temperature mash ensures a workable dough.
- Add Sugar Gradually: Start mixing in sugar a cup at a time (Potato Candy – Preppy Kitchen). You might not need the full amount – stop when the “dough” is soft but not sticky. Too much sugar can make it stiff.
- Dust with Sugar: Dust your rolling surface and rolling pin with powdered sugar (not flour, since this is a no-bake treat) to prevent sticking (Potato Candy – Preppy Kitchen).
- Rolling Technique: When spreading the peanut butter and rolling the candy into a log, leave a small border with no filling at the end to help seal it without PB oozing out (Potato Candy – Preppy Kitchen). If it tears while rolling, you can press it back together – it’s forgiving.
Possible Improvements:
- Chocolate Drizzle: After slicing, drizzle or dip the pieces in melted chocolate for a “potato peanut butter cup” vibe.
- Flavor Twists: Add a drop of vanilla or a pinch of cinnamon to the potato mixture for extra flavor. You can even try crunchy peanut butter for texture.
- Color Fun: Mix a little natural food coloring into the dough for festive occasions (pastel pink or green candy rolls look fun for holidays).
- Shape It: Instead of the traditional log slices, you can roll the dough into small balls and then in shredded coconut or chopped nuts to make potato truffles.
Full Recipe: Potato Candy – Preppy Kitchen
3. Crispy Loaded Potato Skins (Baked Appetizer)
Why It’s Great: You know those potato skins on restaurant menus? These are even better – crispy “fried-style” skins without deep frying (they’re oven-baked!) (Crispy Oven Baked Potato Skins – Spend With Pennies) (Crispy Oven Baked Potato Skins – Spend With Pennies).

Each potato skin is brushed with garlic butter, baked until golden and crunchy, then loaded with melty cheddar, smoky bacon bits, and scallions. The result: the ultimate game-day appetizer that’s perfectly crisp outside and fluffy inside, with tons of savory flavor (Crispy Oven Baked Potato Skins – Spend With Pennies).
They reheat well and are a total crowd-pleaser. Bonus: you also get the “two-in-one” benefit – the scooped out potato flesh can be used for mashed potatoes or soup the next day (Crispy Oven Baked Potato Skins – Spend With Pennies)!
Suitable For:
- Gluten-Free Indulgence: Naturally gluten-free since it’s all potatoes, cheese, and bacon (no breading or flour). Great for those avoiding gluten but craving a decadent snack.
- Comfort Food Lovers: Cheesy, bacon-topped potatoes – need we say more? This is comfort food 101.
- Party Appetizers: Ideal for game nights, Super Bowl parties, or any gathering – serve with sour cream or ranch on the side and watch them disappear.
- Make-Ahead Cooks: You can bake the potato shells in advance. They keep 2-3 days refrigerated and crisp up nicely when reheated (Crispy Oven Baked Potato Skins – Spend With Pennies), making party prep easier.
Tips & Tricks:
- Choose the Right Potato: Go for Russet (baking) potatoes for sturdy skins that crisp up well (Crispy Oven Baked Potato Skins – Spend With Pennies). Their thicker skin and starchy interior are perfect for this recipe.
- Bake then Scoop: Bake or microwave the whole potatoes until tender, then scoop out gently leaving about 1/4-inch of potato on the skin. This bit of potato attached to the skin gives structure and extra fluff inside. (Don’t throw away the scooped potato – use it for mashed potatoes or soup!).
- Garlic Butter Brush: Brush the skins inside and out with a mixture of melted butter (or olive oil) and garlic powder before baking (Crispy Oven Baked Potato Skins – Spend With Pennies). This adds tons of flavor and helps them get that gorgeous golden crunch.
- Broil at the End: After filling the skins with cheese and bacon, pop them under the broiler for a minute or two to fully melt the cheese and extra-crisp the edges. Watch closely so they don’t burn.
Possible Improvements:
- Vegetarian Swap: Omit the bacon and top with chopped sautéed mushrooms or a sprinkle of smoked paprika for a meat-free version that still has a smoky kick.
- Different Cheeses: Try pepper jack for a spicy twist or a combo of cheddar and mozzarella for extra gooey pull.
- Toppings Bar: Serve with a toppings bar – think sour cream or Greek yogurt, chives, diced tomatoes, jalapeños, or even a scoop of chili. Let people customize their potato skins.
- Mini Version: Use small baby potatoes to create “bite-sized” loaded skins – great for hors d’oeuvres. (You won’t need to cut those in half; just scoop a little crater in each and fill.)
Full Recipe: Crispy Potato Skins – Spend With Pennies
4. Patatas Bravas (Spanish Paprika Potatoes with Aioli)
Why It’s Great: A staple of Spanish tapas, patatas bravas are irresistible bite-size potatoes that are crispy, golden, and boldly flavored (Patatas Bravas Recipe – Fox and Briar).

These potato chunks are baked (or fried) to a shatteringly crisp exterior and drizzled with a spicy bravas sauce (smoky tomato-paprika sauce) plus a creamy garlic aioli.
The contrast of textures and flavors – crunchy potatoes, tangy hot sauce, cool garlicky mayo – is absolutely addictive (Patatas Bravas Recipe – Fox and Briar).
This recipe smartly avoids deep-frying by using a special par-boiling trick with a bit of baking soda to rough up the potato surfaces, yielding extra crispness in the oven (Patatas Bravas Recipe – Fox and Briar). It’s a party in your mouth and brings a taste of Spain to your table.
Suitable For:
- Vegetarian: These spiced tapas potatoes contain no meat (just be sure your aioli or mayo is egg-free if you need it strictly vegetarian).
- Gluten-Free: Patatas bravas are naturally gluten-free – just potatoes and sauces (the traditional bravas sauce thickens with olive oil or a touch of cornstarch, not flour).
- Dairy-Free Option: The classic recipes don’t include dairy (aioli is egg-based), so it’s easy to keep dairy-free. Use vegan mayo for a completely plant-based version.
- Party Snacks & Appetizers: Perfect for a tapas night, potluck, or as an appetizer with drinks. Serve them toothpick-style and they’ll vanish fast!
Tips & Tricks:
- Crispy Secret – Parboil with Baking Soda: Boil the cut potatoes briefly in water with a pinch of baking soda (Patatas Bravas Recipe – Fox and Briar). The alkaline water helps break down the surface of the potato, creating a starchy slurry on the outside that bakes into a super crispy coating (Patatas Bravas Recipe – Fox and Briar). This technique (borrowed from America’s Test Kitchen) is a game-changer for oven fries.
- Use Smoked Paprika: For an authentic bravas sauce, use smoked Spanish paprika (pimentón) in the tomato sauce – it gives that signature smoky depth.
- Two Sauces, Two Textures: Drizzle the bravas (red) sauce over the potatoes and serve the garlic aioli on the side or artistically swirled on top. The combination of spicy and creamy in each bite is what makes this dish sing.
- Fresh Herbs: While not traditional, a sprinkle of chopped fresh parsley over the finished dish adds a pop of color and freshness against the rich sauces.
Possible Improvements:
- Add Chorizo: If you eat meat and want to make it more substantial, toss a few slices of Spanish chorizo in the pan to roast with the potatoes. The rendered spicy sausage oil will coat the potatoes – so indulgent!
- Bravas Brunch: Top these potatoes with a fried egg to turn it into a killer brunch dish (a bit like how Americans do home fries with eggs, but with a Spanish twist).
- Alternate Sauces: Try a smoky romesco sauce (roasted red pepper and almond sauce) instead of the bravas sauce for a Catalonian variation. Or for extra heat, a few drops of hot sauce or a pinch of cayenne in the bravas sauce will make fire-loving palates happy.
- Air Fryer Shortcut: These potatoes do wonderfully in an air fryer too – you can achieve that nice crisp in slightly less time and with less oil if you prefer.
Full Recipe: Patatas Bravas – Fox and Briar
5. Batata Harra (Lebanese Spicy Roasted Potatoes)
Why It’s Great: Translating to “spicy potatoes,” Batata Harra is a Middle Eastern favorite that’s full of bold flavor despite its simple ingredients. It features golden roasted potato cubes tossed in a zesty mix of garlic, cilantro, chili flakes, and lemon.

The potatoes are crispy-edged and tender, with a punch of spice and herbs – a real flavor upgrade from your usual roasties (Lebanese Spicy Potatoes (Batata Harra)) (Lebanese Spicy Potatoes (Batata Harra)).
It’s an easy recipe that requires no special ingredients, yet delivers a taste that’s bright, fiery, and addictively good. Served as part of a mezze spread or alongside grilled meats, Batata Harra brings a taste of Lebanon to your plate with minimal effort.
Suitable For:
- Vegan & Vegetarian: Completely plant-based – it’s basically potatoes, herbs, and spices sautéed in olive oil. No animal products at all.
- Gluten-Free: Naturally free of gluten, making it a safe side dish for those with celiac or gluten sensitivity.
- Nut-Free: No nuts in this recipe, and it’s easy to ensure any accompanying dishes (like tahini sauce) are nut-free too.
- Spice Lovers: Great for those who enjoy a bit of heat in their food. You can adjust the chili to your taste, but this dish is meant to have a nice kick.
Tips & Tricks:
- Parboil for Perfection: Parboil the potato cubes for a few minutes before roasting or pan-frying. This ensures the insides get tender without the outsides drying out, and helps achieve that perfect crisp outside, fluffy inside texture.
- Use Fresh Cilantro & Garlic: The hallmark of batata harra is the fresh garlic and cilantro (coriander leaves) coating (Lebanese Spicy Potatoes (Batata Harra)). Use fresh cloves (minced) and lots of chopped cilantro added at the end so the flavor stays vibrant.
- Don’t Skimp on Lemon: A squeeze of fresh lemon juice at the finish brightens everything and balances the heat (Lebanese Spicy Potatoes (Batata Harra)). It really wakes up the dish, so don’t skip it!
- Serve Immediately: For the best experience, serve batata harra right away while the potatoes are still crispy. If they sit too long, they can soften – though they’ll still be tasty, the texture won’t be as magical.
Possible Improvements:
- Add Veggies: Some versions include red or green bell peppers (capsicum) roasted alongside the potatoes for extra sweetness and color. You could also toss in some cauliflower florets to roast with the potatoes for a variation.
- Minty Yogurt Dip: Although batata harra is often served on its own or with other mezze, you can pair it with a cooling yogurt dip (like a mint or cucumber yogurt) to tame the spice for sensitive palates.
- Extra Crunch: Garnish with a sprinkle of toasted sesame seeds or pine nuts on top for a little nutty crunch contrast to the soft potatoes.
- Make it a Meal: Transform this side into a main by topping with fried eggs (for brunch), or tossing the spicy potatoes with chickpeas or white beans for a heartier dish.
Full Recipe: Lebanese Batata Harra – Feel Good Foodie
6. Classic Potato Latkes (Jewish Shredded Potato Pancakes)
Why It’s Great: Crispy, salty, and utterly satisfying, potato latkes are the quintessential Jewish potato pancake traditionally enjoyed during Hanukkah (and year-round by many!) (Crispy Classic Potato Latkes Recipe – Authentic Jewish Pancakes | Tori Avey).

These latkes fry up golden-brown and crunchy on the outside, with a fluffy, tender potato interior – truly hard to resist when served hot.
This recipe is a time-honored classic, often made just once a year as a special treat, which makes them all the more crave-worthy (Crispy Classic Potato Latkes Recipe – Authentic Jewish Pancakes | Tori Avey).
They’re amazing served with applesauce or sour cream. The beauty of latkes lies in their simplicity: just shredded potatoes and onion, lightly bound and fried to crispy perfection. When done right, everyone is reaching for seconds (and maybe thirds).
Suitable For:
- Vegetarian: Latkes contain no meat (just potato, onion, egg, etc.), so they’re perfectly vegetarian-friendly.
- Dairy-Free: The pancakes themselves are dairy-free. Just choose dairy-free toppings (use applesauce or a plant-based sour cream) to keep the whole dish dairy-free.
- Comfort Food / Holiday: Ideal for holiday celebrations like Hanukkah or as a cozy comfort food any time – they hit all the nostalgia notes.
- Kids & Family: Easy to eat and plain enough for picky eaters (it’s basically a hash brown!). Plus, kids can help mix or shape the latkes – with supervision for frying, of course.
Tips & Tricks:
- Grate and Squeeze: After shredding the potatoes (and a bit of onion for flavor), squeeze out as much water as possible from the shreds (Potato Latkes – Macrostax). Excess moisture is the enemy of crisp latkes. Use a cheesecloth or clean kitchen towel and wring those potatoes like your latke depends on it (because it does) (Crispy Classic Potato Latkes Recipe – Authentic Jewish Pancakes | Tori Avey).
- Don’t Skip the Binder: Traditional recipes use a little matzo meal or flour and an egg to bind the latkes. This helps them hold together during frying. If gluten-free, a spoon of potato starch or cornstarch works instead of flour.
- Right Oil Temperature: Fry in about 1/4-inch of oil that’s hot enough (around 350°F/175°C). If the oil is too cool, latkes will soak it up and turn greasy; too hot and they’ll burn outside before cooking through. A test: drop a shred of potato in – it should sizzle immediately but not smoke.
- Keep Warm (if needed): For serving a crowd, keep fried latkes warm on a baking sheet in a 250°F (120°C) oven. They will stay crisp for a while. But honestly, latkes are best enjoyed fresh out of the pan when possible.
Possible Improvements:
- Add Veggie Twists: You can jazz up the basic latke by mixing in other root veggies – try a bit of grated carrot or sweet potato for color, or zucchini (squeezed dry) for a lighter texture. There are even beet latkes out there for a vibrant twist.
- Herb or Spice: Add chopped chives, dill, or parsley to the latke batter for an herbaceous note. A pinch of garlic powder or paprika can also add a subtle flavor variation.
- Sauce it Up: Beyond the classic applesauce and sour cream, try topping latkes with smoked salmon and a dab of crème fraîche for a luxurious treat, or go sweet-and-savory with a drizzle of honey and a sprinkle of flaky salt (surprisingly delicious!).
- Baking Option: In a pinch, you can bake latkes (brush or spray patties with oil and bake at high heat, flipping once). They won’t be quite as crispy as fried, but it’s an option for a lighter version. Alternatively, an air fryer can crisp them with less oil.
Full Recipe: Crispy Potato Latkes – Tori Avey
7. Samosas with Spicy Potato Filling (Indian Snack Pastries)
Why It’s Great: Samosas are legendary Indian snacks – think of them as the ultimate savory hand pie.

These feature a flaky, golden fried pastry shell encasing a savory spiced potato and pea filling that’s bursting with flavor (Samosas with Spicy Potato Filling | All Ways Delicious) (Samosas with Spicy Potato Filling | All Ways Delicious).
They’re deep-fried to a heavenly crisp and are always a hit at any party or as an appetizer (Samosas with Spicy Potato Filling | All Ways Delicious).
What makes this recipe stand out is that it’s a classic vegetarian filling (just potatoes, peas, aromatics, and spices), yet it’s so hearty that even meat-eaters devour them without missing a thing (Samosas with Spicy Potato Filling | All Ways Delicious).
Samosas are great hot or at room temperature, and they pair perfectly with tangy tamarind chutney or cooling mint yogurt sauce.
Overall, these samosas turn humble potatoes into an irresistible, crowd-pleasing treat that’s worth the effort – you’ll get rave reviews (and probably requests for more) (Samosas with Spicy Potato Filling | All Ways Delicious).
Suitable For:
- Vegan/Vegetarian: This recipe is naturally vegan – the filling is all veggies and the dough typically uses oil instead of butter/ghee (check your specific recipe). No meat, no dairy.
- Dairy-Free: Yes – the pastry is usually just flour, water, oil, and the filling is dairy-free. Fry in vegetable oil and you’re set.
- Festive Occasions: Ideal for Diwali parties, Ramadan iftars, or really any celebration. They’re also fantastic as an everyday tea-time snack or lunchbox item (they travel well).
- Freezer-Friendly: Samosas can be made ahead and frozen (either fried and reheated, or freeze before frying). This makes them convenient for meal prep – fry a few whenever a craving hits.
Tips & Tricks:
- Proper Dough: A good samosa dough should be firm but pliable and not too soft. Adding a touch of oil or ghee into the dough (known as “moiyan”) creates a flaky crust. Be sure to rest the dough for 15–30 minutes so it hydrates and rolls out smoothly.
- Season Generously: The potato filling should be well-seasoned. Common spices include cumin, coriander, garam masala, turmeric, and chili. Don’t be shy with salt either – remember the pastry will mellow the filling. A properly spiced filling is what makes each bite sing.
- Folding Technique: When folding, press out any air pockets before sealing the samosa edges with water – this prevents them from bursting during frying. Use a fork or crimp well to ensure they’re sealed. It may take a couple tries to get the classic triangle shape down, but even the odd-shaped ones will taste amazing!
- Fry Low and Slow: Fry samosas at medium heat. If the oil is too hot, the pastry might brown too fast and the inside won’t fully crisp or cook. Frying at a slightly lower temperature ensures the samosas turn crispy and evenly golden. (You can also bake them at ~375°F/190°C brushing with oil, for a lighter version, though frying yields the best crunch.)
Possible Improvements:
- Baked Version: For a healthier twist, bake the samosas instead of frying. Brush them generously with oil or melted plant-based butter and bake until golden. They won’t be quite as shatteringly crisp, but still delicious. An air fryer also does a great job giving a crunchy result with much less oil.
- Alternate Fillings: Once you master the potato samosa, you can experiment – try adding paneer cheese to the potato filling, or switch it up entirely with lentil filling or chicken keema (for non-vegetarians). The samosa pastry is a canvas for all kinds of fillings.
- Mini Samosas: Make cocktail-sized samosas by using smaller dough rounds. These mini samosas are perfect bite-sized party appetizers (and fry up faster too).
- Storing & Re-crisping: To keep leftover samosas crisp, store them in a paper towel-lined container (to absorb moisture). Reheat in the oven or toaster oven to bring back the crunch. Avoid microwaving – they’ll turn soggy.
Full Recipe: Spicy Potato Samosas – All Ways Delicious
8. Pierogi Ruskie (Polish Potato & Cheese Dumplings)
Why It’s Great: Pierogi are the ultimate Eastern European comfort food – tender boiled dumplings filled with creamy mashed potatoes and cheese, then often pan-fried in butter until lightly crisp at the edges.

They are a bit of a project to make from scratch, but biting into a homemade pieróg is pure heaven: the dough is delicate and the savory potato-cheese filling is warm, soft, and deeply satisfying.
This authentic Polish version (Pierogi Ruskie) even sneaks in some caramelized onion and a touch of tangy farmer’s cheese in the filling, elevating the flavor (Authentic Polish Pierogi with Potatoes and Cheese (Pierogi Ruskie) – Eating European) (Authentic Polish Pierogi with Potatoes and Cheese (Pierogi Ruskie) – Eating European).
It’s the kind of dish that grandmas teach their grandchildren, a true labor of love. And once they’re made, you can freeze extras – making your own is so worth it because you get a stash of comfort in your freezer.
Top with a little butter or sautéed onions (and bacon, if you like) and you have a plate of pure Slavic soul food.
Suitable For:
- Vegetarian: The traditional potato-cheese pierogi have no meat (just be mindful of toppings – use sour cream or fried onions instead of bacon to keep it vegetarian).
- Family-Friendly: Kids usually adore pierogi – after all, they’re dumplings filled with mashed potatoes! Plus, making them can be a fun family activity, like a weekend cooking project.
- Freezer-Stocking/Make-Ahead: Pierogi are perfect for making in a big batch and freezing. They reheat from frozen beautifully (boil or pan-fry from frozen). This makes them great for meal prep and quick dinners later on.
- Comfort Food: Pierogi are gentle on the palate and tummy, making them great for those seeking mild, comfort flavors (think cozy winter evenings or recovering from a cold – pierogi will hug you from the inside).
Tips & Tricks:
- Mash Smooth: Make sure your potato and farmer’s cheese filling is smooth and lump-free. Boil the potatoes until very soft and use a potato ricer or masher while still warm. Mix in sautéed onions, cheese, salt, and pepper – the filling should be flavorful on its own (Authentic Polish Pierogi with Potatoes and Cheese (Pierogi Ruskie) – Eating European) (Authentic Polish Pierogi with Potatoes and Cheese (Pierogi Ruskie) – Eating European). A little crumbled blue cheese or cheddar is a secret trick some use to give extra oomph to the filling (Authentic Polish Pierogi with Potatoes and Cheese (Pierogi Ruskie) – Eating European).
- Dough Workability: Pierogi dough is typically just flour, water, salt, and a bit of egg or oil. Knead it until soft and elastic. If it feels too sticky, a touch more flour; if too dry, a sprinkle of water. Let it rest 20 minutes before rolling – this relaxes the gluten and makes rolling easier.
- Keep ’Em Covered: When assembling, keep the rolled dough circles and filled pierogi covered with a damp towel to prevent drying. Work in small batches, rolling out and filling a few at a time.
- Boil then Fry: After boiling the pierogi until they float (that’s when you know they’re done), pan-fry them in a bit of butter or oil until golden patches form on each side. This step is optional but highly recommended for that slight crisp and buttery flavor. Pierogi fried in a bit of butter are next-level delicious!
Possible Improvements:
- Caramelized Onion Love: Serve with extra caramelized onions on top (fry onions in butter low and slow until golden-brown and sweet). Pierogi tossed in browned butter and onions are traditional and for good reason – the flavor is fantastic.
- Bacon or Mushroom Topping: If not vegetarian, sprinkle crispy bacon bits over pierogi (common in some regions). For a veg-friendly umami, try a topping of sautéed mushrooms with a dash of thyme.
- Dipping Sauces: Traditionally, pierogi are served with sour cream on the side. You can jazz up the sour cream with a little dill and garlic for a sauce, or even serve with a light gravy. A cheddar cheese sauce can make a decadent American-fusion twist (pierogi cheese fries, anyone?).
- Sweet Pierogi Variation: Once you get the hang of the dough, you can use it to make sweet pierogi too – common fillings include sweetened farmers cheese or seasonal fruits like blueberries. They’re boiled and served with sweet cream or powdered sugar. Not an improvement to the potato-cheese pierogi per se, but a fun expansion!
Full Recipe: Authentic Potato & Cheese Pierogi – Eating European
9. Homemade Potato Gnocchi (Italian Potato Dumplings)
Why It’s Great: Soft, pillowy, and delicate – homemade potato gnocchi are like little clouds on a plate (Homemade Potato Gnocchi Recipe – Love and Lemons). These Italian dumplings have a melt-in-your-mouth quality that store-bought gnocchi can’t touch (Homemade Potato Gnocchi Recipe – Love and Lemons).

Made with just 4 ingredients (flour, potato, egg, salt) (Homemade Potato Gnocchi Recipe – Love and Lemons), the recipe is simple but rewarding. Tossed with your favorite sauce (pesto, marinara, or simply browned butter and sage), gnocchi make for a comforting yet elegant meal.
Yes, making gnocchi is a bit of a project – a perfect weekend or date-night cooking adventure – but it’s 100% worth the effort for the tender, fluffy results (Homemade Potato Gnocchi Recipe – Love and Lemons).
Plus, this recipe teaches you how to achieve that light texture (no dense, rubbery dumplings here!). Once you’ve tasted fresh gnocchi that are “soft, pillowy, and light” (Homemade Potato Gnocchi Recipe – Love and Lemons), you’ll be craving them all the time.
Suitable For:
- Vegetarian: The gnocchi themselves are vegetarian (contains egg, which lacto-ovo vegetarians allow). Pair with a vegetarian sauce and you have a lovely meatless meal.
- Can Be Vegan: Omit the egg (many gnocchi recipes can be made with just potato and flour) – though a bit trickier to handle, it is possible. And of course choose a vegan sauce.
- Kids & Picky Eaters: Gnocchi are basically pasta made of potatoes – usually a hit with kids! They’re fun to make and fun to eat. Great for family dinners.
- Freezer-Friendly: You can freeze the uncooked gnocchi on a tray and then bag them. Cook straight from frozen – super convenient for later quick meals.
Tips & Tricks:
- Choose Starchy Potatoes: Use Russets or other floury potatoes – they result in fluffier gnocchi because of lower moisture. Waxy potatoes can make the dough too sticky. Baking the potatoes instead of boiling can further reduce moisture (drier potatoes = less flour needed = lighter gnocchi).
- Use Light Touch with Flour: Add just enough flour to form a soft dough. The dough should be a bit tacky but not overly sticky. Too much flour makes gnocchi heavy. It’s often said that making gnocchi is an art – the less flour you can get away with, the better.
- Don’t Overwork: Mix and knead the dough gently and as little as possible – just until it comes together. Over-kneading will develop gluten and make gnocchi tough. It’s okay if the dough isn’t completely smooth; rustic is fine.
- Shape with a Fork (or Not): Rolling gnocchi off a fork or gnocchi board to create ridges helps sauce cling, but it’s optional. You can simply cut the ropes into pillow shapes. If the dough is soft, you might skip ridging to avoid squashing them. Either way, remember to dust with flour and keep the pieces from touching on the tray.
Possible Improvements:
- Sweet Potato Gnocchi: Once you’ve mastered classic gnocchi, try using sweet potatoes or a mix of sweet and regular potatoes for a colorful twist. They’ll have a slight sweetness that pairs well with sage butter or blue cheese sauces.
- Pan-Fry After Boiling: For extra texture, after boiling the gnocchi (they cook in just 2-3 minutes, floating when done), quickly sauté them in a hot skillet with a bit of olive oil or butter until lightly golden on the outside. This gives a fantastic crisp/soft dual texture.
- Loaded Gnocchi Bake: Place cooked gnocchi in a baking dish, toss with a savory tomato sauce or creamy sauce, sprinkle mozzarella or parmesan on top, and broil until bubbly. It’s like a gnocchi casserole – total comfort food.
- Herb-Infused Dough: Incorporate very finely chopped herbs (like chives or parsley) into the dough for a speckled look and subtle herb flavor in the gnocchi themselves. Also consider a pinch of nutmeg in the dough – it’s a traditional secret for enhancing the flavor of potato-based pastas.
Full Recipe: Homemade Potato Gnocchi – Love & Lemons
10. Shepherd’s Pie (Meat and Potato Casserole)
Why It’s Great: This classic casserole layers a savory meat and vegetable filling under a crown of creamy mashed potatoes, baked until bubbly and golden. It’s basically a hug in food form – “the ultimate comfort food… like a warm hug on a plate,” as one blogger put it (Homemade Shepherd’s Pie Recipe – Savory Nothings).

Shepherd’s pie brings together everything comforting: hearty protein (ground beef or traditional lamb), veggies, rich gravy, and that fluffy potato topping that soaks up all the goodness (Homemade Shepherd’s Pie Recipe – Savory Nothings).
It’s kid-approved (they won’t even mind the green stuff inside) and mom-loved because you’ve got a full meal in one dish (Homemade Shepherd’s Pie Recipe – Savory Nothings).
This recipe is also great for make-ahead: assemble it, stick it in the freezer or fridge, and bake when ready – a “total lifesaver for busy weeks” (Homemade Shepherd’s Pie Recipe – Savory Nothings).
It’s no wonder this dish has been a family favorite for generations, especially in the UK and Ireland.
Suitable For:
- Family Dinners: It’s packed with protein and veggies in one, so it’s a balanced meal for all ages. Plus, the mashed potato topping tends to win over even picky eaters.
- Gluten-Free Option: It can easily be made gluten-free by using a GF flour or cornstarch to thicken the gravy instead of flour. The rest (meat, potatoes, veggies) are naturally GF.
- Make-Ahead / Freezer Meal: As noted, you can assemble and not bake it. It freezes well. Perfect for meal prepping or gifting to someone in need of a homemade meal.
- Comfort Food Diets: It’s not low-cal, but it can fit into keto/paleo if modified (you’d use cauli mash for keto, for instance). The concept of meat under mash can be adapted to various dietary needs.
Tips & Tricks:
- Fluffy Mash: Use warm mashed potatoes for the topping so they’re easy to spread. Adding an egg yolk to the mash is a trick for a golden crust that also helps the potato firm up a bit (so it doesn’t slide around). Also, season the mash generously – bland mash can dull the overall dish. A bit of grated cheddar mixed into the potatoes or sprinkled on top makes a cheesy crust that’s to die for.
- Rich Gravy: Brown the meat well for flavor (if using lamb, it’s a Shepherd’s Pie; with beef it’s technically Cottage Pie). Sauté onions, carrots, celery – whatever veg you like – then add tomato paste, Worcestershire sauce, maybe a splash of red wine or broth to create a deeply flavored gravy (Homemade Shepherd’s Pie Recipe – Savory Nothings). Let it simmer until slightly thickened. The filling should be “savory, rich, and not too soupy” so the pie holds together.
- Prevent Overflow: Don’t overfill your baking dish; place it on a baking sheet to catch any bubbling over. To avoid a mess, you can also create a bit of a “seal” – spread the mash to touch the edges of the dish, leaving no gaps, which helps prevent filling from oozing out. Rough up the top of the potatoes with a fork to get those classic ridges that brown nicely.
- Rest Before Serving: Once baked, let the shepherd’s pie rest 10 minutes before serving. This helps it set up so you can scoop cleaner portions, and it won’t scorch any tongues!
Possible Improvements:
- Mixed Potato Topping: For a twist, use a 50/50 mix of regular potatoes and sweet potatoes for the mash. Or sneak in some cauliflower or parsnip into the potatoes when boiling and mash them together – adds nutrition and a slight flavor twist.
- Vegetarian Version: You can make a mean vegetarian shepherd’s pie by swapping the meat for lentils or a plant-based ground, and using vegetable broth. The rest of the process is the same. It’s equally hearty and satisfying.
- Individual Servings: Make it fancy (and decrease bake time) by portioning the meat filling into individual ramekins, piping or spooning mash on each, and baking mini shepherd’s pies. Everyone gets their own adorable portion.
- Extra Seasoning: Play with herbs in the filling – a bit of thyme, rosemary, or bay leaf can complement the hearty flavors. A dash of ground cinnamon or allspice is a secret ingredient in some recipes for an extra cozy aroma.
Full Recipe: Classic Shepherd’s Pie – Savory Nothings
11. Colcannon (Irish Mashed Potatoes with Greens)
Why It’s Great: Colcannon takes ordinary mashed potatoes and jazzes them up with cabbage (or kale) and green onions, creating a side dish that’s creamy yet packed with extra flavor and texture.

It’s buttery and fluffy as great mash should be (Colcannon (Irish Mashed Potatoes with Kale) | Gimme Some Oven), but the addition of sautéed greens and scallions means you’re getting pops of color and a subtle earthy bite in each spoonful.
It’s a delicious way to eat your greens – as one recipe says, “a delish way to get your greens!” (Colcannon Recipe: Irish Mashed Potatoes – Marie Bostwick).
Traditionally served in Ireland, especially around Halloween or St. Patrick’s Day, colcannon is fun and comforting – sometimes even hiding little trinkets in the bowl for fortune-telling! (Colcannon (Irish Mashed Potatoes with Kale) | Gimme Some Oven).
Above all, it’s easy: just fold a handful of basic ingredients into your mash and voilà – something special. Pair it with sausages or corned beef, and you have a hearty meal.
Suitable For:
- Vegetarian: Colcannon is typically vegetarian (just be sure any add-ins like bacon are omitted). It’s mostly veggies and dairy.
- Gluten-Free: Naturally gluten-free. It’s literally potatoes and cabbage with butter/cream – no flour involved.
- Budget-Friendly: Uses inexpensive staples (potatoes, cabbage), making it a great way to bulk out a meal nutritiously without spending much.
- St. Patrick’s Day Menus: A must-have side for an Irish-themed meal. It’s green-flecked and festive, perfect alongside corned beef or Guinness stew.
Tips & Tricks:
- Use Floury Potatoes: For the fluffiest colcannon, use a high-starch potato (like Yukon Gold or russets). They mash up light and smooth (Colcannon (Irish Mashed Potatoes with Kale) | Gimme Some Oven) (Colcannon (Irish Mashed Potatoes with Kale) | Gimme Some Oven). Some prefer the slight sweetness of yellow potatoes in colcannon.
- Cook Greens Separately: Briefly blanch or sauté the shredded cabbage or kale in a bit of butter until tender before folding into the mash (Colcannon (Irish Mashed Potatoes with Kale) | Gimme Some Oven). This ensures you don’t get any raw or overly crunchy bits, and it allows the greens to sweeten a bit. Also, drain off any liquid from the cooked greens to avoid watery mash.
- Green Onions (Scallions): Don’t skip the scallions – they add such a nice zing. Slice them thinly; you can either stir them in raw (for sharper flavor) or soften them in the warm milk/butter mixture to tame the bite. In any case, save some green onion for garnish on top – it makes the dish look inviting.
- Lots of Butter and a Bit of Cream: Colcannon is not diet food – it’s meant to be indulgent. Traditional recipes use plenty of butter (often a pat of butter is even served melting in a well on top of the colcannon!). Warm your milk or cream and butter together before mixing into the potatoes so you don’t cool down the mash. This yields a silkier texture.
Possible Improvements:
- Bacon Colcannon: If you’re not keeping it vegetarian, frying up a bit of bacon and mixing the crispy bits (and a spoon of bacon drippings) into the colcannon is absolutely heavenly. Bacon + potatoes + cabbage = win.
- Garlic Twist: Infuse the milk with a couple of garlic cloves while heating it (then discard) for a gentle garlic note in your colcannon. Garlic mashed potatoes + greens = next-level delicious.
- Cheesy Colcannon Cakes: Got leftovers? Form the cold colcannon into patties, maybe insert a little cube of cheddar in the middle, and pan-fry until golden on both sides. You’ll end up with colcannon cakes that are crispy outside and gooey-cheesy inside – an amazing reuse.
- More Greens: While cabbage or kale are most common, you can experiment with other greens. Try spinach (stir in at the end as it wilts instantly) or leeks (sautéed with the cabbage for a double-onion hit). Some even add chives or parsley for extra green flavor. Essentially, feel free to load it up with green veggies – the potatoes welcome it.
Full Recipe: Irish Colcannon Potatoes – Valerie’s Kitchen
12. Vegan Potato Salad with Dill Pickle & Mustard
Why It’s Great: This is potato salad like Grandma used to make – but completely vegan and maybe even more flavorful! It’s ultra-creamy, herb-infused, tangy, and crunchy in all the right ways (Easy Vegan Potato Salad • It Doesn’t Taste Like Chicken).

Tender boiled potatoes are tossed in a seasoned vegan mayo dressing that’s elevated with fresh dill, chopped dill pickles, a splash of apple cider vinegar, crisp celery, and red onion (Easy Vegan Potato Salad • It Doesn’t Taste Like Chicken).
The combination makes each bite sing with a perfect balance of creamy, tangy, and savory. You’d never guess it’s egg-free and dairy-free. This salad is basically the stuff of picnic and potluck dreams – “the stuff of side dish dreams!” as the recipe author says (Easy Vegan Potato Salad • It Doesn’t Taste Like Chicken).
It’s easy to make ahead (in fact, it gets better as it chills), and it will “get gobbled up in no time” (Easy Vegan Potato Salad • It Doesn’t Taste Like Chicken) by vegans and non-vegans alike.
Suitable For:
- Vegan & Plant-Based: Uses vegan mayonnaise (or you can make a cashew or tofu-based dressing). No eggs in the mayo, no dairy – truly vegan yet tastes like the classic.
- Gluten-Free: Naturally, since it’s just potatoes and veggies in dressing (most mayo is GF, but always double-check condiments).
- Allergy-Friendly: If you use a soy-free vegan mayo, this can be soy-free and nut-free as well. It’s a great dish to bring when you’re not sure of everyone’s dietary needs.
- BBQs and Potlucks: This is the side for barbecue fare, sandwiches, or really any gathering. It pairs with grilled veggies, veggie burgers, or as part of a salad spread. And because it’s egg-free, it’s a bit safer for outdoor events in warm weather (no raw egg mayo to spoil as quickly).
Tips & Tricks:
- Choose Waxy Potatoes: For potato salad, waxy or all-purpose potatoes (like red potatoes or Yukon golds) hold their shape better after boiling compared to very starchy russets. They also have a creamy texture that works well here. Leave skins on for boiling to prevent waterlogging; you can peel after cooking if desired, or leave skin on for more texture and nutrients.
- Season the Potato Water: Be sure to salt your boiling water for the potatoes, like you would pasta water. It’s your first chance to season the potatoes themselves. Also, don’t overboil – you want them just fork-tender so they don’t crumble when stirred.
- Mix Dressing Separately: Whisk your dressing ingredients (vegan mayo, mustard, vinegar, maybe a touch of sugar or maple syrup for balance, salt, pepper, dill) in a bowl first (Easy Vegan Potato Salad • It Doesn’t Taste Like Chicken). This ensures even distribution of flavors. Then pour it over the cooled potatoes and mix. Pro tip: toss the warm potatoes with the vinegar and a bit of pickle juice first and let them cool – they’ll absorb that tangy flavor throughout.
- Let it Chill: Potato salad is best after chilling for a few hours (or overnight). This allows the potatoes to really soak up the dressing and the flavors to meld. So, if you can make it ahead, do it! Give it a good stir before serving and maybe taste for salt/pepper – sometimes potatoes can soak up salt and you might need an extra pinch.
Possible Improvements:
- “Eggy” Flavor Trick: If you miss the egg flavor of traditional potato salad, sprinkle a little black salt (Kala Namak) into the dressing – this Indian volcanic salt has a sulphuric, egg-like taste and will make your vegan potato salad taste incredibly like the classic egg-mayo version (Easy Vegan Potato Salad • It Doesn’t Taste Like Chicken).
- Mayo-Free Option: Not into mayo, even vegan? You can make a vinaigrette potato salad (German style) with a mustardy oil and vinegar dressing. Or use mashed avocado as a base for a creamy dressing. Another idea: blend silken tofu or soaked cashews with seasonings to create a creamy dressing without processed mayo.
- Extra Add-Ins: Customize with other mix-ins: halved radishes for bite, capers for briny pop, or even chopped vegan “bacon” bits for a smoky element. A spoonful of horseradish in the dressing can give a nice heat. Play to your taste!
- Presentation: To dress it up, garnish the top of the salad with additional fresh dill, a sprinkle of paprika, and even some extra pickle slices on top. It gives that deli potato salad look that’s so inviting.
Full Recipe: Easy Vegan Potato Salad – It Doesn’t Taste Like Chicken
13. Potato Leek Soup (Comfort in a Bowl)
Why It’s Great: A bowl of potato leek soup is cozy, nourishing, and deceptively flavorful (Potato Leek Soup | Feasting At Home) despite its simple ingredients.
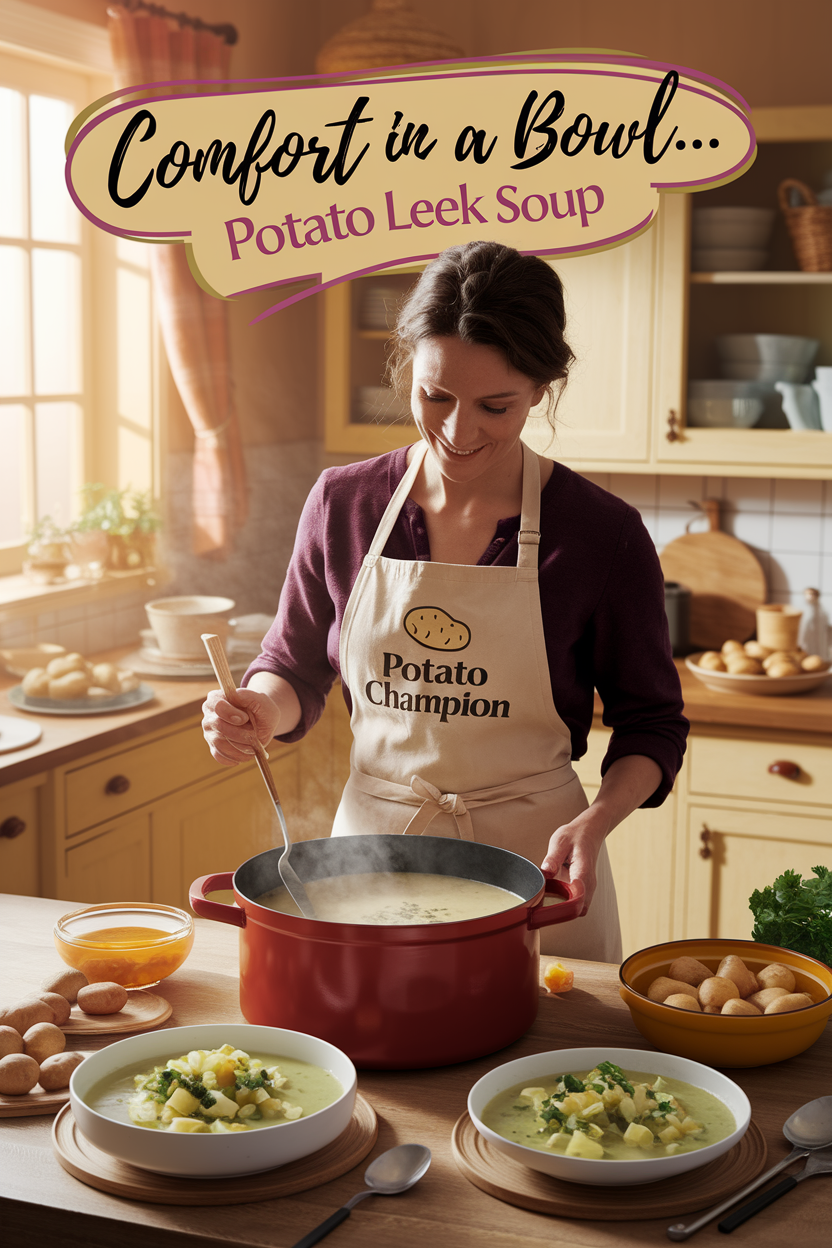
This recipe proves that with just potatoes, leeks, broth, and a touch of cream, you can create a soul-satisfying meal in under 30 minutes (Potato Leek Soup | Feasting At Home).
It’s warming without being heavy – rich and silky, yet light and healthy at the same time (Potato Leek Soup | Feasting At Home).
What sets this version apart is a couple of clever upgrades: a spoonful of sour cream or yogurt added for tanginess and richness (Potato Leek Soup | Feasting At Home), and a drizzle of homemade leek oil on top (using the green leek tops) for an extra boost of leek flavor and a gourmet touch (Potato Leek Soup | Feasting At Home).
The result is a soup that is “rich and flavorful, all the while staying light” (Potato Leek Soup | Feasting At Home) – truly the best of both worlds.
Serve it with crusty bread, and you’ve got the ultimate comfort food that’s elegant enough for a dinner party starter yet easy enough for a weeknight.
Suitable For:
- Vegetarian: As long as vegetable stock is used (and no bacon, which some recipes add – this one doesn’t by default), it’s vegetarian.
- Vegan Option: Swap dairy butter with olive oil, and use a plant-based milk or cream (or omit the cream). The soup itself can be made fully vegan and still be creamy if you purée it well or add a touch of cashew cream.
- Gluten-Free: Naturally GF – just potatoes and leeks in broth. No flour needed if you purée for thickness (some recipes use a roux, but this one relies on the potatoes for body).
- Low-Calorie: It’s relatively low in calories for a creamy soup, and you can control the fat by adjusting the amount of butter/cream. Yet it’s filling thanks to fiber from the potatoes.
Tips & Tricks:
- Clean Those Leeks: Leeks can be sandy. Slice them in half lengthwise and rinse well between the layers to remove grit. Use the white and light green parts for the soup; the dark green tops can be saved for making that lovely leek oil or for stock.
- Sweat, Don’t Brown: Cook the sliced leeks gently in butter or oil until they’re soft (they’ll smell amazing – kind of sweet oniony). Avoid browning them; you want that delicate flavor to stay pale and gentle. A pinch of salt during this step helps them soften.
- Cut Potatoes Small: Dice potatoes into small, even pieces so they cook quickly and uniformly. This soup is typically blended smooth (use an immersion blender or regular blender). If you like it chunkier, you can blend only part of it and leave some potato bits.
- Seasoning and Finish: Potatoes can be bland without salt – be sure to salt to taste. A bay leaf or a sprig of thyme added during simmering can subtly elevate the flavor (just remove before blending). When serving, a grind of black pepper, some chopped chives, or a drizzle of that vivid green leek oil take presentation up a notch.
Possible Improvements:
- Bacon or Ham Garnish: If you’re not vegetarian, topping the soup with some crispy bacon bits or diced ham (or pancetta) can add a smoky depth – kind of like a loaded baked potato vibe in soup form. Smoked paprika sprinkled on top can mimic that smoky hint for vegetarians.
- Cheesy Variation: Stir in a handful of shredded sharp cheddar or Gruyère cheese at the end for a richer, cheesy potato soup. Leeks + cheese = delicious. Just take care it doesn’t overwhelm the leek flavor completely.
- Green Boost: For a nutritiously boosted soup, throw in a handful of spinach or watercress at the end and blend it in. It will turn the soup a lovely light green and add vitamins (though it will resemble vichyssoise crossed with watercress soup).
- Serve Chilled: In warm weather, remember that potato leek soup has a famous cold version: Vichyssoise. You can chill this soup and serve it cold (just omit any bacon garnish obviously). It becomes a refreshing summer soup – garnish with a swirl of cream and fresh herbs. It’s surprisingly elegant served this way.
Full Recipe: Healthy Potato Leek Soup – Feasting at Home
14. Nikujaga (Japanese Meat & Potato Stew)
Why It’s Great: Nikujaga is Japan’s beloved home-style stew, a simmered one-pot dish of thinly sliced beef (or pork) and chunky potatoes in a slightly sweet soy sauce broth (Authentic Nikujaga (Japanese Meat & Potato Stew)).

It’s so warming and comforting, the Japanese equivalent of grandma’s stew.
What’s special about nikujaga is how quickly it comes together (thanks to the thin meat) yet it tastes like it’s been cooked for hours – the potatoes and carrots soak up the delicious umami broth, becoming soft and flavorful, and the meat turns tender almost instantly (Nikujaga: Japanese Beef Stew Recipe – i am a food blog).
Each bite is a perfect balance of salty-sweet-savory. It’s an everyday dish in Japan, often served with rice. This authentic recipe even shares a little secret: a touch of butter or the use of dashi (Japanese stock) in the braising liquid can subtly boost the flavor.
If you’ve never had it, nikujaga is like a lighter, soy-kissed version of a beef stew – pure Japanese comfort food that warms both body and soul.
Suitable For:
- Dairy-Free: Nikujaga doesn’t contain dairy (unless you finish with a tiny butter, which is optional and modern – traditionally it’s dairy-free).
- Gluten-Free Option: Use tamari or GF soy sauce to make it gluten-free. Everything else (meat, potato, veggies) is GF.
- Kid-Friendly: The flavors are gentle (a bit sweet, not spicy), and the ingredients are familiar (meat and potatoes!). Japanese kids love nikujaga, and Western kids likely will too.
- One-Pot Dinner: Great for busy nights – minimal chopping and only one pot to clean. Serve with a side of rice or even just as-is; it has protein, veg, and carbs all together.
Tips & Tricks:
- Thin Meat & Marbling: Use very thinly sliced beef or pork (like what’s used for sukiyaki or hot pot). If you can’t find pre-sliced, you can partially freeze a piece of meat and slice it thin yourself. A little bit of fat marbling on the meat will add flavor. And a pro tip: briefly sauté the meat and onions first until just colored – it adds depth before adding liquid (Authentic Nikujaga (Japanese Meat & Potato Stew)).
- Proper Simmer: Add potatoes and carrots, then your mixture of soy sauce, mirin (sweet rice wine), sake, and sugar along with dashi or water. The liquid shouldn’t fully cover the ingredients – this is a braise, not a soup. Keep a drop-lid (otoshibuta) or even a piece of foil pressed down on the stew as it simmers; this helps the flavors infuse and the liquid to circulate. Simmer gently so the potatoes don’t fall apart but just get tender and soak up flavor.
- Shirataki Noodles: Often, nikujaga includes shirataki (konnyaku) noodles, which are springy, zero-carb noodles that take on the flavor of the broth. If you have them, rinse and add them – they make the stew more filling and add a nice texture contrast. If not, no biggie, it’s optional.
- Finish with Green: Right at the end of cooking, many recipes toss in a handful of snow peas or green beans (briefly blanched) for a pop of color and freshness. It brightens the stew and adds a fresh crunch to an otherwise soft dish.
Possible Improvements:
- Egg Option: Some families add boiled eggs into the stew (think of soy sauce eggs) – the eggs absorb that tasty broth and become a great extra protein in the dish. They also look great cut in half when serving.
- Pressure Cooker Shortcut: If you want this even faster and meat ultra-tender, you can do nikujaga in a pressure cooker or Instant Pot. Because the beef is thin and potatoes quick-cooking, it only needs a short time (like 5 minutes at pressure, then quick release and add carrots later to avoid mush). It’s not necessary, but an option.
- Lean Protein or Meatless: To make it lighter, you could use chicken thigh instead of beef, or go meatless by using a hearty mushroom (like shiitake) and/or firm tofu in place of meat. The stew’s broth is flavorful enough to carry a vegetarian version (use kombu or shiitake dashi for depth).
- Serving Style: Serve nikujaga in small bowls as part of a Japanese meal with rice and miso soup, or make it a fusion meal by ladling it over buttered egg noodles or mashed potatoes (hey, why not – meat and potatoes on top of more potatoes!). You can also dip crusty bread into the broth for East-meets-West comfort.
Full Recipe: Authentic Nikujaga – Sudachi Recipes
15. Papa a la Huancaína (Peruvian Potatoes in Spicy Cheese Sauce)

Why It’s Great: This Peruvian appetizer is a showstopper of simplicity and flavor. Slices of tender boiled yellow potatoes are smothered in Huancaína sauce – a bold yellow sauce made from creamy queso fresco cheese, evaporated milk, and Peru’s famous aji amarillo chilies (Papa a la Huancaina – Caroline’s Cooking).
It’s unusual but incredibly tasty: the sauce is spicy, salty, and creamy, which transforms the mild potatoes into something exciting (Papa a la Huancaina – Caroline’s Cooking).
Typically served on a bed of lettuce and garnished with hard-boiled eggs and olives, papa a la huancaína hits all the flavor notes – rich from the cheese, a pleasant lingering heat from the chilis, and a slight crunch from the lettuce. It’s also easy to make and assemble.
If you’re not familiar with it, one bite will make it clear why it’s a classic – it’s comfort food and zesty snack rolled into one, and as one blog said, “the flavors are incredibly tasty and it’s easy too.” (Papa a la Huancaina – Caroline’s Cooking)
Suitable For:
- Vegetarian: Yes, it’s vegetarian (it’s basically cheese and peppers). Make sure to use a vegetarian-friendly cheese if needed.
- Gluten-Free: Naturally gluten-free – no wheat in sight, just potatoes and dairy.
- Spice Lover’s Appetizer: Great for those who like a little kick but can be toned down by using fewer chilies or a milder pepper if needed.
- Party Platter: Makes a great party appetizer or side. You can serve individual portions or let people spoon sauce over potato slices from a platter. The bright yellow color of the sauce is also a visual delight.
Tips & Tricks:
- Sourcing Aji Amarillo: The authentic recipe uses aji amarillo (a yellow Peruvian chili that’s medium-hot and fruity). If you can’t find fresh or frozen, look for aji amarillo paste in Latin markets (Classic Papa a la Huancaína Revisited – Peru Delights). In a pinch, you can substitute a different yellow chili or even a mix of yellow bell pepper (for color) and a bit of jalapeño or habanero (for heat) – it won’t be exactly the same, but it’ll be tasty.
- Blend Smooth: The sauce ingredients (peppers, queso fresco, evaporated milk, garlic, crackers for thickening) are blended until very smooth and creamy (Papas a la Huancaína, the quintessential Peruvian potatoes with …) (Papa a la Huancaina – Caroline’s Cooking). Traditionally, soda crackers or Saltines are blended in to thicken the sauce and give it body (Papas a la Huancaína, the quintessential Peruvian potatoes with …). If it gets too thick, thin with a little more milk; if too thin, add another cracker. The consistency should be like a pourable velvety dressing.
- Serve at Room Temp: This dish is typically served cold or at room temperature. You can boil the potatoes ahead and chill them. The sauce can also be made ahead and kept in the fridge (give it a stir; if it thickens too much when cold, thin with a splash of milk). Assemble it chilled – it’s very refreshing, especially in warm weather.
- Texture Contrast: Don’t forget the lettuce leaves underneath the potatoes – they aren’t just for looks; they add a fresh crunch that contrasts nicely with the soft potatoes and creamy sauce. Similarly, the slices of hard-boiled egg on top add a different texture and additional richness that complements the spicy sauce.
Possible Improvements:
- Try Different Cheeses: If you can’t find queso fresco, you can substitute feta cheese (common swap, but use a bit less as it’s saltier) or even ricotta plus a pinch of extra salt. Each will slightly change the sauce character but still be deliciously creamy and tangy.
- Make it a Main: While papa a la huancaína is an appetizer, you can turn these components into a more filling main dish. Some ideas: toss the sauce with pasta and cubed boiled potatoes for a Peruvian-inspired mac and cheese, or drizzle it over baked potatoes as an upscale topping. You can also grill the par-boiled potato slices for a slight char before saucing them.
- Add Protein (Non-Traditional): To make it more of a complete meal, you could serve grilled or roasted chicken alongside, using the huancaína sauce almost like a spicy cheese gravy. Not traditional, but cheese sauce on chicken and potatoes – hard to go wrong!
- Spicier or Milder: Adjust heat by adding a little fresh chili for more fire or using fewer aji peppers for less. Some people also add a touch of turmeric to enhance the yellow color if their peppers aren’t as bright. You can also experiment with a dash of cumin or black pepper in the sauce for a personal touch, but the classic is usually straightforward.
Full Recipe: Papa a la Huancaína – Caroline’s Cooking
16. Swiss Rösti (Crispy Skillet Potato Cake)
Why It’s Great: Rösti is like the ultimate giant hash brown – a beautifully golden potato cake that’s crispy on the outside and tender on the inside (Rösti).

Hailing from Switzerland, it was traditionally a farmer’s breakfast, but it’s now enjoyed anytime as a side or its own meal (Rösti). It’s just potatoes, salt, and some fat, yet the result is pure potato perfection: “golden and buttery crisp on the outside and tender (not mashed) in the middle,” as one recipe describes the ideal rösti (Rösti).
This recipe shares tips from a Swiss mom’s version, ensuring you get that texture just right (Rösti). It’s great because it takes humble potatoes and elevates them to something that feels rustic yet a little special.
Plus, you can top or mix it with so many things (cheese, herbs, fried eggs, smoked salmon) or just eat it plain with a touch of salt – it’s versatile and delicious no matter what.
Suitable For:
- Vegan (Base Recipe): The basic rösti is just potatoes, oil/butter, salt – which can be vegan if you use oil or plant-based butter.
- Gluten-Free: Yep, no flour or gluten at all. Just spuds!
- Any Meal of the Day: It’s a chameleon – serve it with eggs and coffee for breakfast, as a side to sausages or a roast at dinner, or with a fresh salad for lunch.
- Budget-Friendly & Simple: Only needs potatoes and pantry basics, and you don’t even need an oven – just a frying pan. Great for beginner cooks or cooking on a budget, yet yielding an impressive result.
Tips & Tricks:
- Parboil & Cool Potatoes: A classic rösti trick is to boil the potatoes whole with their skins on the day before (or at least several hours before), then cool them (often overnight in the fridge) (Rösti). Using pre-cooked, chilled potatoes makes them easier to grate and helps achieve that perfect non-mushy interior. Waxy potatoes are often preferred (like Yukon Gold) because they hold together well. If you’re short on time, you can grate raw, but parboiled is more foolproof for texture (Rösti).
- Patience = Crispiness: When frying, spread the grated potato in an even layer in a hot, well-greased skillet. Then press down and let it cook slowly on medium heat. Don’t fuss with it too much. It takes a little time to form that golden crust – as the Swiss say, the secret ingredient is geduld (patience) (Rösti). Once the bottom is nicely browned, use a plate or lid to flip it to cook the other side (or cut into sections and flip individually if that’s easier).
- Proper Fat: Using a mix of butter and oil (or clarified butter/ghee) gives best flavor and crispness (Potato Rosti – RecipeTin Eats). Butter for taste, oil for a higher frying point and crisp. Ensure the pan is well-coated so the rösti doesn’t stick. And don’t skimp on salt in the potato mix – potatoes need adequate salt to shine.
- Serving Hot: Rösti is best served immediately when it’s hot and crunchy. If you need to hold it, you can keep it warm in a low oven for a short while, but know that it may lose some crispness over time.
Possible Improvements:
- Add-On Ingredients: Purists might insist rösti is only potatoes, but you can find versions with a little shredded onion mixed in (for flavor) or with bits of cooked bacon or ham. Even shredded apples or cheese can be mixed into the potato for different occasions. A popular variation is to add a bit of melted raclette or gruyère cheese on top – making it Käse-rösti.
- Herb it Up: A sprinkle of fresh rosemary or thyme in the potatoes can add aroma. Chives or parsley can be sprinkled on after cooking for color.
- Make Mini Rösti: Instead of one big cake, you can form small individual rösti patties and fry them (like hash brown patties). Easier to flip, cook faster, and make for a fun appetizer-sized portion, maybe topped with a dab of sour cream and smoked salmon for a fancy bite.
- Egg on Top: A classic pairing is a fried egg on top of your rösti – when you break the yolk, it acts like a sauce over the crispy potatoes. Highly recommended for breakfast or brunch. Also, serving rösti alongside a hearty stew or chili and using it to mop up sauces is heavenly.
Full Recipe: Potatoes Rösti – RecipeTin Eats
17. Spudnuts (Yeast Potato Doughnuts)
Why It’s Great: Imagine a doughnut that’s even fluffier and softer than usual – that’s the magic of spudnuts, the famous potato doughnuts.

Adding mashed potatoes to the dough makes these doughnuts incredibly tender and moist (Spudnuts (Potato Doughnuts with Glaze) Recipe (Potato Doughnuts with Glaze) – Simply So Good).
In fact, you’d “never know they were made with potatoes” because you can’t taste potato, but you can tell they have an amazingly light texture (Spudnuts (Potato Doughnuts with Glaze) Recipe (Potato Doughnuts with Glaze) – Simply So Good).
This recipe is a classic, resulting in fried doughnuts that are pillow-soft inside with a slight crisp on the outside, perfect for soaking up a vanilla or chocolate glaze (Spudnuts (Potato Doughnuts with Glaze) Recipe (Potato Doughnuts with Glaze) – Simply So Good).
The dough is a joy to work with too – the potato keeps it soft and workable (Spudnuts (Potato Doughnuts with Glaze) Recipe (Potato Doughnuts with Glaze) – Simply So Good).
These spudnuts are sure to become a family favorite treat (if they aren’t already in your family cookbook). Whether you glaze them, dust with cinnamon sugar, or fill with jam, you’ll be thanking the secret ingredient – the humble potato – for the best doughnuts ever.
Suitable For:
- Vegetarian: The dough itself is typically vegetarian (flour, potatoes, yeast, sugar, etc., plus usually eggs and milk). As long as you fry in vegetable oil, there’s no meat. (Not vegan due to eggs/dairy, but one could experiment with substitutes).
- Festive Occasions & Breakfast Treats: Great for a weekend cooking project, holiday mornings, or making with loved ones. They do require frying, so it’s a fun treat when you have a bit of time.
- Use Leftover Potatoes: Conveniently, you can use leftover plain mashed potatoes for this recipe (just ensure they’re unseasoned or only lightly seasoned). It’s a creative and sweet way to avoid waste and turn leftovers into dessert.
- Sweet Tooth Satisfaction: These definitely are indulgent – perfect for satisfying doughnut cravings or impressing guests at a brunch. Lower calorie than some store doughnuts perhaps, but still a treat!
Tips & Tricks:
- Mashed Potato Prep: If using fresh potatoes, peel, boil, and mash them without adding butter or milk (you want plain mash). Cool it to lukewarm before mixing into dough so it doesn’t kill the yeast. About 1/2 cup of mashed potato is often used for a batch. Instant mashed potato flakes can also work in a pinch – they were historically used in some old recipes.
- Yeast Dough Fundamentals: This is a yeast-raised doughnut, meaning the dough needs to rise. Treat it like bread: use warm (not hot) liquids, proof the yeast if required, and knead until smooth and elastic. The dough will be soft and slightly sticky – that’s okay. You can refrigerate the dough overnight after the first rise if you want to fry in the morning.
- Fry at the Right Temp: Use a thermometer to keep oil around 350°F (175°C). If too cool, the doughnuts soak oil; too hot and they brown too fast. Fry a test doughnut hole first – it should sizzle and rise, turning golden in a couple minutes per side. Typically, 2–3 minutes per side yields a nice cook through for a thicker doughnut.
- Glaze While Warm: Have your glaze or sugar ready when the spudnuts come out of the oil. Let them drain and cool just enough to handle, then dip or roll them. A simple vanilla glaze (powdered sugar, a bit of hot water or milk, vanilla) works great, or chocolate glaze. They absorb the glaze best when warm. Alternatively, toss in cinnamon sugar or powdered sugar. Because these doughnuts are so tender (Spudnuts (Potato Doughnuts with Glaze) Recipe (Potato Doughnuts with Glaze) – Simply So Good), handle them gently.
Possible Improvements:
- Try Baked Spudnuts: If deep-frying isn’t your thing, some recipes adapt potato doughnuts for baking (they come out more like super soft buns or “bomboloni” doughnuts). You could bake at ~375°F until lightly golden then glaze. They won’t have the same fried flavor, but the potato will keep them moist.
- Flavors in Dough: Add a touch of nutmeg (common in doughnut dough) or cinnamon to the dough for extra flavor inside. You can also substitute part of the sugar with maple syrup and add a dash of maple extract for maple potato doughnuts.
- Filled Doughnuts: Potato doughnut dough is sturdy enough to make filled doughnuts. After frying (and cooling a bit), you can inject jam, custard, or chocolate ganache inside. The mash keeps them from drying out, so filled spudnuts stay soft.
- Longer Freshness: One big advantage – these stay soft longer than regular doughnuts (thank you potato!). Store in an airtight container and even the next day they’re not bad (if unglazed, you can briefly microwave to refresh). You can also freeze the fried, unglazed doughnuts and thaw/reheat later. So, improvement-wise: make a double batch and freeze some for easy doughnut fixes later!
Full Recipe: Potato Doughnuts (Spudnuts) – Simply So Good
18. Potatoes au Gratin (Creamy Cheesy Casserole)
Why It’s Great: Potatoes au gratin is the ultimate decadent potato side dish – think layers of thinly sliced potatoes blanketed in cream, garlic, and cheese, baked until bubbly and golden.

It’s rich, velvety, and utterly indulgent, with tender potatoes and a crispy cheesy crust on top (Potatoes Au Gratin – Spoon Fork Bacon).
This recipe prides itself on being “the only Potatoes Au Gratin recipe you’ll ever need!” and delivers exactly that: tender and creamy potatoes with a deliciously crispy, cheesy crust (Potatoes Au Gratin – Spoon Fork Bacon).
It’s a classic French-inspired dish (also known as potatoes Dauphinoise) that elevates any meal – holiday dinners, date nights, or Sunday family suppers.
It’s the best kind of carb-loaded comfort food that has everyone scraping the baking dish for the last bits of cheese. Plus, it’s surprisingly simple to put together, yet makes a big impression – both in looks and taste.
Suitable For:
- Vegetarian: Yes, as long as you’re okay with dairy (it’s full of milk/cream and cheese). No meat here, just potato goodness.
- Gluten-Free: Naturally, this gratin has no flour if made the traditional way (some recipes use a roux, but this one is just cream-based). So it can be gluten-free – double-check things like broths if you use any, but classic recipes usually skip broth.
- Make-Ahead Crowd: Great for feeding a crowd and can be assembled ahead of time (bake it when needed, or par-bake and finish later). Leftovers reheat well too.
- Indulgent Occasions: This isn’t light on calories, but perfect for holidays (Christmas, Easter) or any time you want a wow side dish. It pairs with roast beef, ham, turkey – you name it – or stands alone for a cozy vegetarian meal with a salad.
Tips & Tricks:
- Slice Potatoes Thin and Even: Use a mandoline if possible to get thin (about 1/8 inch) uniform slices (Potatoes Au Gratin – Spoon Fork Bacon). Even slices ensure the potatoes cook through at the same rate and give that classic layered look. You can use Russets or Yukon Golds; russets get softer and more “saucy,” Yukons hold shape a bit more.
- No Need to Pre-Cook: Raw slices are fine because they’ll cook in the cream. Layer them in the dish, slightly overlapping. Garlic – rub a cut clove around the baking dish and/or mince a bit into the cream for a subtle garlic infusion. Many recipes also have you heat the cream with garlic and herbs to infuse before pouring over. A pinch of nutmeg in the cream is a traditional French touch that accents the dairy nicely.
- Cheese Choices: Gruyère is classic for gratin (nutty and melts beautifully). Cheddar or Comté or even a mix can work too. Put some cheese between layers and definitely a generous amount on top for that “crispy and cheesy crust” (Potatoes Au Gratin – Spoon Fork Bacon). Cover with foil for the first part of baking so the top doesn’t brown too fast, then uncover to get that golden finish.
- Let it Rest: Once it’s out of the oven, let the gratin rest 10-15 minutes. This helps it set up (so it’s not liquidy when serving) and cools just enough so you don’t burn your tongue. It also allows the flavor to develop. Gratin often tastes even better after sitting a bit.
Possible Improvements:
- Add Herbs or Spice: While salt, pepper, garlic, and nutmeg are usually enough, you can layer in some fresh thyme or rosemary for an herbed note. A little bit of finely diced onion or leek sautéed and added between layers can also add depth. For a spicier twist, a few red pepper flakes or a dash of cayenne in the cream can give a subtle kick.
- Lighter Swap: If you want to lighten it (just a tad), you can do half milk, half cream, or even include some chicken or vegetable broth. The texture might be a bit less rich, but still good. Or use half-and-half instead of heavy cream. Some folks also sub a portion of potatoes with root veggies like parsnips or sweet potatoes for variety, but then it’s not classic gratin.
- Gratin Variations: Once you have the technique, you can make variations: e.g., layer thin slices of onion or ham with the potatoes for different flavor (scalloped potatoes with ham is an American classic). Or layer potatoes with other root vegetables (like turnip or rutabaga) for a mixed gratin. The possibilities for cheesy creamy veggies are endless.
- Individual Gratins: For a dinner party, consider baking the gratin in individual ramekins or gratin dishes. Reduce bake time accordingly. It makes for elegant presentation – everyone gets their own mini bubbling potato cheese heaven.
Full Recipe: Cheesy Garlic Potatoes Au Gratin – Spoon Fork Bacon
19. Authentic Canadian Poutine
Why It’s Great: Poutine is Canada’s most famous contribution to comfort food – a wonderful and delicious concoction of fries, gravy, and cheese curds (Authentic Canadian Poutine Recipe – Seasons and Suppers).

In one dish, you get everything: hot, crispy fries, melty squeaky cheese curds, and savory brown gravy to meld it all together. It’s indulgent, messy, and absolutely delightful.
This recipe sticks to the authentic basics (Authentic Canadian Poutine Recipe – Seasons and Suppers): hand-cut deep-fried fries (for that authentic taste), real white cheddar cheese curds, and a rich poutine gravy.
When the hot gravy hits the cheese curds and fries, some curds soften, some stay a bit bouncy, the fries sop up the flavor – it’s a textural and flavorful party.
It’s one of the most quintessential Canadian dishes for good reason (Authentic Canadian Poutine Recipe – Seasons and Suppers).
If you already know poutine, you’re probably drooling; if you haven’t tried it yet, prepare to become addicted to this heartwarming comfort food.
Suitable For:
- Gluten-Free Option: Use a gluten-free flour blend or cornstarch to thicken the gravy, and ensure your broth is GF. Then the poutine can be gluten-free (fries and cheese are GF).
- Indulgent Treat: Let’s face it, poutine is not diet food. It’s a treat-yourself, late-night, hangover-curing, or celebration dish. Great for those cheat days or when you just need a hearty pick-me-up.
- Crowd-Pleaser/Appetizer: Serve it as a fun appetizer in a get-together (you can do oven-baked fries to scale up, though deep-fried is classic). Or a poutine bar with various toppings for a party. But classic poutine itself is already a hit – perfect for game nights, etc.
- Vegetarian Adaptable: Use vegetable broth and a dash of soy sauce/miso for depth in the gravy to make a vegetarian poutine gravy. It won’t be authentically beefy, but it can still be very tasty and satisfy that poutine craving in a vegetarian way.
Tips & Tricks:
- The Fries: Russet potatoes are best for fries. Cut them medium-thick (about 1/2 inch). Soak the cut fries in cold water for at least 30 minutes (or up to overnight in fridge) to remove excess starch – this helps them fry up crisp. Fry twice: first at a lower temp (~325°F/160°C) to cook through without much color, then a second fry at higher temp (~375°F/190°C) to get them golden and crispy. This is key for crispy outside, fluffy inside fries. If you must bake, toss in oil and bake at high heat on a preheated pan for a decent result, but frying is gold-standard (Authentic Canadian Poutine Recipe – Seasons and Suppers).
- The Curds: Cheese curds can be found at specialty or farmers markets or some grocery stores (in the U.S., look for “cheese curds” often sold near specialty cheeses). They’re moist little lumps of young cheddar. If you absolutely can’t find them, torn bits of a young mozzarella or mild cheddar can substitute, but the authentic squeak of cheese curds is part of the experience. Have them at room temperature – cold curds won’t soften as nicely.
- The Gravy: A proper poutine gravy is a brown gravy – often made from a combination of beef and chicken stock for depth. Make a roux with butter and flour, cook it to a nice brown color for flavor, then whisk in warm stock until smooth and simmer until thickened. Season with pepper (and a touch of Worcestershire for oomph). It should be flavorful and on the slightly thinner side (so it can seep into the fries) but not too watery. Some recipes simplify by using store-bought gravy mix or canned gravy; you can do that in a pinch, but a quick homemade gravy is worth it. Keep it hot for serving – hot gravy is needed to partially melt the curds.
- Assembly: Traditional assembly: fries in a shallow bowl or plate, scatter cheese curds over, then ladle hot gravy generously on top. Don’t stir it up – let the gravy and curds naturally work their way around the fries. Serve immediately, as poutine is best hot when the fries are crisp and curds melty.
Possible Improvements:
- Loaded Poutine: While classic is best to start with, poutine is an experience you can riff on. Popular variations include adding toppings like smoked meat (Montreal-style), pulled pork, bacon, sautéed mushrooms and onions, or even a fried egg on top. You can get creative once you have the base. But know in Quebec, many stick their nose up at anything but the original trio of fries/curds/gravy!
- Different Gravy Styles: There’s a style called “Italian poutine” which uses marinara sauce instead of gravy – basically like disco fries or pasta meets poutine. And some make a “veg gravy” with mushroom stock to keep it vegetarian. These are fun to try if you want to switch it up.
- Crispier Fry Hack: To really keep fries crispy longer under gravy, some folks will lightly coat the fries in a bit of cornstarch before the second fry – it adds an extra shatter. Also, don’t drown the fries in gravy; a moderate ladle is good – you want some fries still poking out to retain crunch, and some soaking in gravy – that contrast is lovely.
- Serving Vessel: Use a wide bowl or even a cast-iron skillet for serving to help retain heat. Poutine that goes cold is not nearly as enjoyable (the gravy congeals and fries soften). If making a big batch, consider serving in smaller portions or warming the serving dishes.
Full Recipe: Authentic Canadian Poutine – Seasons and Suppers
20. Aloo Paratha (Indian Potato-Stuffed Flatbread)
Why It’s Great: Aloo Paratha is a beloved Indian flatbread that is crisp and golden on the outside, soft and spiced on the inside (Aloo Paratha Recipe – Ministry of Curry).

It’s essentially a whole wheat dough stuffed with a flavorful mashed potato mixture, then rolled out and pan-cooked to perfection. This results in a hearty, portable meal-in-one – you get bread and spiced potatoes together!
The potato filling (aloo) is typically seasoned with cumin, coriander, garam masala, green chilies, cilantro, etc., making each bite a burst of flavor.
It’s traditionally served piping hot with cool yogurt (dahi) or tangy pickle on the side (Aloo Paratha Recipe – Ministry of Curry).
Aloo paratha is comfort food and breakfast staple in many North Indian homes – truly “the most comforting breakfast, lunch, and dinner” when served with yogurt and pickles (Aloo Paratha Recipe – Ministry of Curry).
It’s also a great use of leftover potatoes. If you’ve never had one, imagine the best mashed potato filling wrapped in a warm, fresh chapati – it’s absolutely delightful and very satisfying.
Suitable For:
- Vegetarian: 100% vegetarian (and can be made vegan by omitting butter/ghee in the dough and frying).
- Kid-Friendly: Kids love these – they’re like soft stuffed sandwiches. You can adjust spices to be mild. Great for lunchboxes or on-the-go meals since they’re not messy.
- Budget-Friendly: Made from pantry basics (flour, potato, spices). Very inexpensive yet filling.
- Make-Ahead & Freezer: You can stuff and roll the parathas, layer them uncooked with parchment, and freeze. Then cook from frozen on the skillet when needed. Or cook and freeze, then reheat – though fresh is best.
Tips & Tricks:
- Dough: Paratha dough is similar to chapati/roti dough: atta (whole wheat flour), a pinch of salt, a bit of oil, and water to make a soft dough. Knead until smooth and let it rest 15-20 minutes (covered) for easier rolling. It should be pliable. If you don’t have Indian atta flour, you can use half whole wheat & half all-purpose for a closer texture.
- Potato Filling: Boil potatoes until very soft and mash them well – avoid lumps (they can tear the bread). Mix in your spices: common ones include cumin seeds, ajwain (carom seeds) for digestion and flavor, turmeric, red chili powder, garam masala, lots of fresh chopped cilantro, grated ginger, maybe minced green chili for heat, and salt (Aloo Paratha Recipe – Ministry of Curry). Also a touch of tang from amchur (dry mango powder) or a squeeze of lemon is nice. Make sure the filling is cool before stuffing, and not too wet. If it’s a bit sticky, you can mix in a tablespoon of bread crumbs or besan (chickpea flour) to absorb moisture (or even a bit of atta).
- Stuffing Technique: There are two main methods: (1) Roll a small dough ball out to a circle, place a ball of filling in the center, then bring the edges of dough up around it like a dumpling and pinch closed, then roll out again gently. (2) Or roll two small discs, spread filling on one, cover with the other and seal edges, then roll. The first method (dumpling style) is very common and effective (Aloo Paratha Recipe – Ministry of Curry). Key tip: when rolling the stuffed paratha, use gentle pressure and roll from center outwards, turning the paratha often, to distribute filling evenly without bursting. If a bit of filling does poke out, dust with flour and carry on – no big deal.
- Cooking: Cook on a hot tawa or skillet. Put the paratha on the dry pan first until light brown spots appear underside, flip and at this stage spread a little ghee or oil on the top. Flip again and apply oil on the second side. Keep flipping every 30 seconds or so, pressing gently, until both sides are golden with brown blisters. Using ghee (clarified butter) gives a wonderful flavor and the desired crispness. They should end up “crisp-golden on the outside and soft on the inside” (Aloo Paratha Recipe – Ministry of Curry). Serve immediately, or keep wrapped in a cloth in a container to stay warm.
Possible Improvements:
- Variations: Once you master aloo paratha, you can explore other fillings: gobi paratha (spiced grated cauliflower), paneer paratha (crumbled Indian cheese with spices), or mixes like potato+cheese, potato+peas, etc. The method remains the same. Even sweet fillings (like jaggery sugar) exist for dessert parathas.
- Green Boost: You can sneak in some finely chopped cooked spinach or methi (fenugreek leaves) into the potato filling to add greens. It becomes an “aloo palak paratha” (spinach-potato) which is extra nutritious. Kids won’t mind some greens if they’re wrapped in potato inside bread!
- Serve with Butter: Often, a hot paratha is topped with a pat of homemade butter that melts over it – absolutely heavenly (and adds calories, but worth it for taste). A dollop of butter plus yogurt and pickle on the side is how many enjoy it in Punjab.
- Leftover Uses: Parathas are quite filling on their own, but you can also use them as a wrap. For example, wrap a cooked paratha around some scrambled eggs or cooked chickpeas and make a quick “roll” for lunch. Or use pieces of paratha to scoop up curry. It’s a versatile bread beyond just eating alone.
Full Recipe: Aloo Paratha – Ministry of Curry
Key Takeaways from Our Potato Adventure
- Unmatched Versatility: From crispy appetizers (like potato skins and samosas) to hearty mains (shepherd’s pie, pierogi) and even desserts (potato candy, spudnut doughnuts), the humble potato truly wears many hats. It seamlessly fits into cuisines worldwide – Indian, Irish, Canadian, Japanese, Peruvian, you name it – proving to be a global culinary chameleon.
- Texture Triumphs: A recurring theme was using specific techniques to nail the perfect texture. We saw parboiling and double-frying employed for ultra-crispy fries (Crispy Oven Baked Potato Skins – Spend With Pennies) (Rösti), the addition of mashed potato yielding unbelievably soft doughnuts and breads (Spudnuts (Potato Doughnuts with Glaze) Recipe (Potato Doughnuts with Glaze) – Simply So Good), and careful simmering or baking to get that creamy interior vs. golden exterior contrast (think gratin or rösti) (Rösti) (Potatoes Au Gratin – Spoon Fork Bacon). Potatoes have a high starch content that we can harness in different ways to get silky soups, fluffy mash, or crunchy edges, depending on our goal.
- Flavor Sponges: Potatoes themselves have a mild flavor, which makes them the ideal base to soak up seasonings and sauces. Many recipes leveraged this “blank canvas” nature: the spices in aloo paratha’s filling (Aloo Paratha Recipe – Ministry of Curry), the garlicky, spicy sauces of batata harra and patatas bravas (Lebanese Spicy Potatoes (Batata Harra)) (Patatas Bravas Recipe – Fox and Briar), or the rich gravies and broths in poutine and nikujaga (Authentic Canadian Poutine Recipe – Seasons and Suppers) (Authentic Nikujaga (Japanese Meat & Potato Stew)). The takeaway? Don’t be shy with seasoning your potato dishes – a bit of acid, spice, or fat goes a long way to make those taters shine.
- Dietary Diversity: We achieved a beautiful balance of dishes for various diets. Need vegan or dairy-free? Try the vegan potato salad with herby vinaigrette and creamy vegan mayo (Easy Vegan Potato Salad • It Doesn’t Taste Like Chicken) or Aloo Gobi for a plant-based main (Aloo Gobi – Rainbow Plant Life). Gluten-free? Poutine, latkes, and many others are naturally GF. And while “keto potato” might be an oxymoron, one could swap cauliflower in certain recipes (like a cauliflower “potato” gratin) to cater to low-carb friends. Potatoes can be adapted to fit most dietary needs – or omitted in favor of stand-ins – but our journey showed that including them often adds nutrients (fiber, vitamins) and satiety to meals.
- Comfort is King: Nearly every recipe here is, in one way or another, comfort food. There’s something inherently satisfying about a potato dish – perhaps it’s the carb-fueled coziness or the childhood nostalgia many of us have. Dishes like colcannon, shepherd’s pie, and potato leek soup have been warming families for generations and continue to be beloved (Homemade Shepherd’s Pie Recipe – Savory Nothings) (Potato Leek Soup | Feasting At Home). Whether fried, baked, or mashed, potatoes tend to evoke that feeling of a warm hug in your belly (science might call it serotonin from carbs; we call it love).
In essence, our potato odyssey highlighted that with a few simple ingredients and techniques, the ordinary potato can create extraordinary culinary experiences. From street food snacks to elegant sides and everything in between, potatoes unite us through their universal appeal and adaptability.
Conclusion
From the spiced streets of India to the cheesy diners of Canada, we’ve trekked across continents and meal courses, all on the sturdy back of the potato. 🥔✨
This journey showcased how a single ingredient can be reinvented endlessly – fried, boiled, baked, and blended into creations as diverse as vegan salads, hearty stews, delicate pastries, and even candy. More importantly, it’s been a delicious reminder that comfort and creativity often go hand-in-hand in the kitchen.
I hope you’re inspired (and not too hungry after reading!) to try some of these recipes yourself. Whether you’re whipping up a cozy potato soup on a cold night, hosting friends with a fun poutine bar, or impressing your family with homemade gnocchi or aloo parathas, you really can’t go wrong – because at the end of the day, potatoes just make people happy.
So stock up on those spuds and let the experimenting begin. Here’s to many hearty, crispy, fluffy, and tasty potato-filled meals in your future. Happy cooking and bon appétit! 😋🥔💛