If you’re short on time but craving something sweet, these 15 easy 10-minute desserts are exactly what you need. Each recipe is simple, quick, and guaranteed to satisfy your sweet tooth without keeping you in the kitchen for long. From no-bake treats to microwave magic, these desserts let you whip up something delicious in a flash!
No-Bake Oreo Cheesecake Cups: A 10-Minute Dessert With Oreos, Cream Cheese, And Whipped Cream.

No-bake Oreo cheesecake cups are a delightful treat that packs all the flavors of traditional cheesecake without the oven fuss. These little cups are creamy, sweet, and have that perfect crunch from the Oreo cookie layers. They’re a fantastic dessert to whip up when you want something quick and satisfying.
With just a few ingredients, this recipe is incredibly easy to follow. Each bite combines the rich taste of cream cheese with the chocolatey goodness of Oreos, topped with fluffy whipped cream. Perfect for any occasion, these cheesecake cups are sure to impress and can be made in just 10 minutes!
Ingredients
- 1 package (15.35 oz) Oreo cookies
- 2 cups cream cheese, softened
- 1 cup powdered sugar
- 1 teaspoon vanilla extract
- 2 cups whipped cream
- Extra Oreos for topping
Instructions
- Crush the Oreos: In a large zip-top bag, crush 10-12 Oreos into fine crumbs. Set aside some of the crumbs for topping later.
- Make the Cream Cheese Mixture: In a bowl, beat the softened cream cheese with powdered sugar and vanilla extract until smooth and creamy.
- Add Whipped Cream: Gently fold in the whipped cream into the cream cheese mixture until well combined.
- Layer the Cups: In serving cups, start by adding a layer of crushed Oreos, followed by a layer of the cream cheese mixture. Repeat the layers until the cups are filled.
- Top and Chill: Finish with a dollop of whipped cream and sprinkle the reserved Oreo crumbs on top. Refrigerate for about 10 minutes before serving to let the flavors meld.
Quick Chocolate Mug Cake: A 10-Minute Dessert Using Flour, Cocoa Powder, And Sugar In A Mug.

This quick chocolate mug cake is the perfect treat for chocolate lovers who want something delicious in a flash! With just a few pantry staples like flour, cocoa powder, and sugar, you can whip up a rich and moist cake in just 10 minutes. It’s incredibly simple to make, and the best part is you can enjoy it straight from the mug!
The cake has a lovely chocolate flavor that’s both warm and comforting. Topped with a scoop of ice cream or a dollop of whipped cream, it becomes an irresistible dessert that’s sure to satisfy any sweet tooth. Plus, this mug cake recipe is flexible, allowing you to add nuts, chocolate chips, or even a splash of vanilla for extra flavor!
Ingredients
- 4 tablespoons all-purpose flour
- 4 tablespoons granulated sugar
- 2 tablespoons cocoa powder
- 1/8 teaspoon baking powder
- 1/8 teaspoon salt
- 3 tablespoons milk
- 2 tablespoons vegetable oil
- 1/4 teaspoon vanilla extract
Instructions
- Combine the Dry Ingredients: In a microwave-safe mug, mix together the flour, sugar, cocoa powder, baking powder, and salt until well combined.
- Add the Wet Ingredients: Pour in the milk, vegetable oil, and vanilla extract. Stir until the mixture is smooth and there are no lumps.
- Microwave the Cake: Place the mug in the microwave and cook on high for about 1 minute and 30 seconds, or until the cake has risen and is set in the middle. Cooking times may vary based on your microwave.
- Let it Cool: Allow the mug cake to cool for a minute before enjoying. You can top it with ice cream, whipped cream, or your favorite sauce for an extra touch!
10-Minute Strawberry Shortcake: Layer Store-Bought Sponge Cake, Whipped Cream, And Strawberries.

Strawberry shortcake is a classic dessert that’s both simple and delightful. With layers of soft sponge cake, fresh strawberries, and fluffy whipped cream, it’s a treat that bursts with flavor and texture. The sweetness of the strawberries pairs perfectly with the lightness of the whipped cream, making it a favorite for many.
This 10-minute dessert is perfect for last-minute gatherings or when you just want something sweet without all the fuss. The best part? You can create a stunning presentation with minimal effort. Just layer your ingredients, and you’re good to go!
Ingredients
- 1 store-bought sponge cake
- 2 cups fresh strawberries, sliced
- 1 cup heavy whipping cream
- 1/4 cup powdered sugar
- 1 teaspoon vanilla extract
Instructions
- Prepare the Whipped Cream: In a mixing bowl, combine heavy whipping cream, powdered sugar, and vanilla extract. Whip until soft peaks form.
- Layer the Cake: Slice the sponge cake into three even layers. Place one layer on a serving plate.
- Add Strawberries: Spread a layer of whipped cream over the sponge cake, followed by a layer of sliced strawberries.
- Repeat Layers: Add the second layer of sponge cake and repeat the process with whipped cream and strawberries. Add the final layer of cake on top.
- Finish: Top the last layer with more whipped cream and garnish with additional strawberries. Serve immediately and enjoy your quick, delicious strawberry shortcake!
Instant Banana Pudding Parfaits: A 10-Minute Dessert With Banana Slices, Pudding, And Cookies.
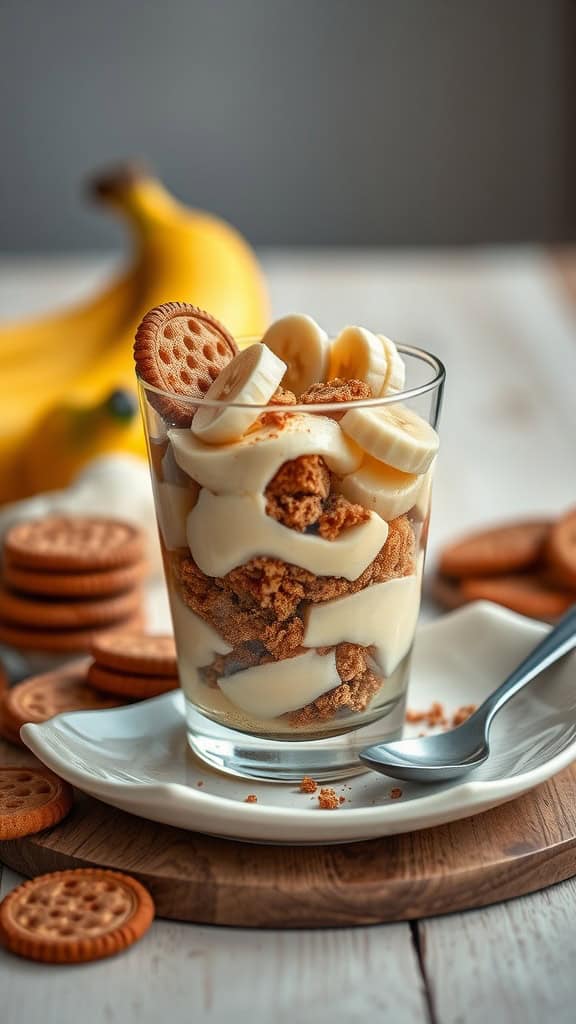
Instant Banana Pudding Parfaits are the perfect sweet treat for anyone looking for a quick dessert. This delightful concoction combines creamy pudding, fresh banana slices, and crunchy cookies. It’s a dessert that hits all the right notes—sweet, creamy, and a bit crunchy.
What’s great about this recipe is how simple it is to make. In just 10 minutes, you can layer these ingredients into beautiful parfaits that are sure to impress. Whether you’re hosting a gathering or just treating yourself, these parfaits are sure to satisfy your sweet tooth!
Ingredients
- 2 ripe bananas, sliced
- 1 box instant vanilla pudding mix
- 2 cups milk
- 1 cup whipped topping
- 1 cup crushed cookies (like vanilla wafers or graham crackers)
- Extra cookie for garnish (optional)
Instructions
- Prepare the Pudding: In a mixing bowl, whisk together the instant vanilla pudding mix and milk until well combined. Let it sit for about 5 minutes to thicken.
- Layer the Ingredients: In serving glasses or bowls, start by adding a layer of crushed cookies at the bottom. Then, add a layer of the prepared pudding, followed by a layer of banana slices.
- Repeat the Layers: Continue layering the crushed cookies, pudding, and banana slices until the glasses are filled, finishing with a layer of pudding on top.
- Top it Off: Dollop whipped topping on the final pudding layer and garnish with additional cookie crumbs or a whole cookie.
- Serve: Enjoy immediately, or chill for a few minutes before serving to allow the flavors to meld.
Fast Nutella Crepes: Thin Crepes Filled With Nutella, Topped With Powdered Sugar.

Nutella crepes are a deliciously simple dessert that you can whip up in no time. The thin, delicate crepes are filled with rich, creamy Nutella, creating a perfect balance of flavors and textures. Topped with a light dusting of powdered sugar, these crepes offer a sweet treat that’s sure to satisfy any chocolate lover.
Making these crepes is quick and easy, making them a great choice for a last-minute dessert or a fun breakfast. With just a few ingredients and a little bit of time, you can enjoy this delightful dish that’s both indulgent and comforting.
Ingredients
- 1 cup all-purpose flour
- 2 large eggs
- 1 1/4 cups milk
- 2 tablespoons melted butter
- 1 tablespoon sugar
- 1/2 teaspoon vanilla extract
- Nutella, for filling
- Powdered sugar, for topping
Instructions
- Make the Batter: In a bowl, whisk together flour, eggs, milk, melted butter, sugar, and vanilla until smooth.
- Cook the Crepes: Heat a non-stick skillet over medium heat. Pour a small amount of batter into the skillet, swirling to coat the bottom. Cook for about 1-2 minutes until the edges lift, then flip and cook for another 1-2 minutes.
- Fill the Crepes: Spread Nutella on one half of each crepe, then fold it over. You can fold it again if you like it more compact.
- Serve: Dust with powdered sugar and enjoy warm!
10-Minute Chocolate Dipped Pretzels: Dip Pretzels In Melted Chocolate And Add Sprinkles.

Chocolate dipped pretzels are a fun and delicious treat that combines the crunchy salty goodness of pretzels with the rich sweetness of chocolate. This recipe is incredibly simple, making it perfect for a quick snack or dessert. With just a few ingredients and minimal time, you can create a delightful treat that everyone will enjoy.
The combination of salty and sweet flavors, along with the colorful sprinkles, makes these pretzels visually appealing and tasty. They’re great for parties, movie nights, or just a fun activity with the kids. You can customize them with your favorite toppings, making each batch unique!
Ingredients
- 1 cup pretzel rods
- 1 cup semi-sweet chocolate chips
- 1 tablespoon coconut oil (optional, for smoother chocolate)
- Sprinkles (variety of colors)
Instructions
- Melt the Chocolate: In a microwave-safe bowl, combine the chocolate chips and coconut oil. Microwave in 30-second intervals, stirring in between, until fully melted and smooth.
- Dip the Pretzels: Hold a pretzel rod by one end and dip it into the melted chocolate, covering about two-thirds of the pretzel. Allow any excess chocolate to drip off.
- Add Sprinkles: While the chocolate is still wet, sprinkle your choice of sprinkles over the chocolate-dipped area.
- Set the Pretzels: Place the dipped pretzels on a baking sheet lined with parchment paper. Repeat with the remaining pretzels.
- Let Set: Once all pretzels are dipped, let them sit at room temperature or refrigerate for about 10 minutes until the chocolate hardens.
Berry Yogurt Parfaits: Layer Greek Yogurt, Granola, And Fresh Berries For A 10-Minute Dessert.

Berry yogurt parfaits are a delightful way to satisfy your sweet tooth without a lot of fuss. This simple dessert combines creamy Greek yogurt with crunchy granola and fresh berries, creating a fun and colorful treat. The blend of flavors and textures makes each bite a little celebration, perfect for breakfast or a quick snack.
Not only do these parfaits taste amazing, but they can be whipped up in just 10 minutes! You can customize them with your favorite fruits and granola for a personal touch. Serve them in individual glasses for a lovely presentation that will impress your family or guests.
Ingredients
- 2 cups Greek yogurt
- 1 cup granola
- 1 cup mixed fresh berries (strawberries, blueberries, raspberries)
- 1 tablespoon honey (optional)
- Fresh mint leaves (for garnish)
Instructions
- Prepare the Berries: Wash the fresh berries. If using strawberries, slice them into smaller pieces.
- Layer the Ingredients: In clear glasses or bowls, start with a layer of Greek yogurt at the bottom. Add a layer of granola followed by a layer of mixed berries.
- Repeat Layers: Continue the layering process until the glasses are filled, finishing with a layer of berries on top.
- Drizzle with Honey: If desired, drizzle honey over the top layer for added sweetness.
- Garnish: Add fresh mint leaves for a pop of color and flavor.
- Serve Immediately: Enjoy your berry yogurt parfaits right away, or chill them for a short time before serving.
Peanut Butter Chocolate Rice Krispies: Combine Cereal, Peanut Butter, And Melted Chocolate.
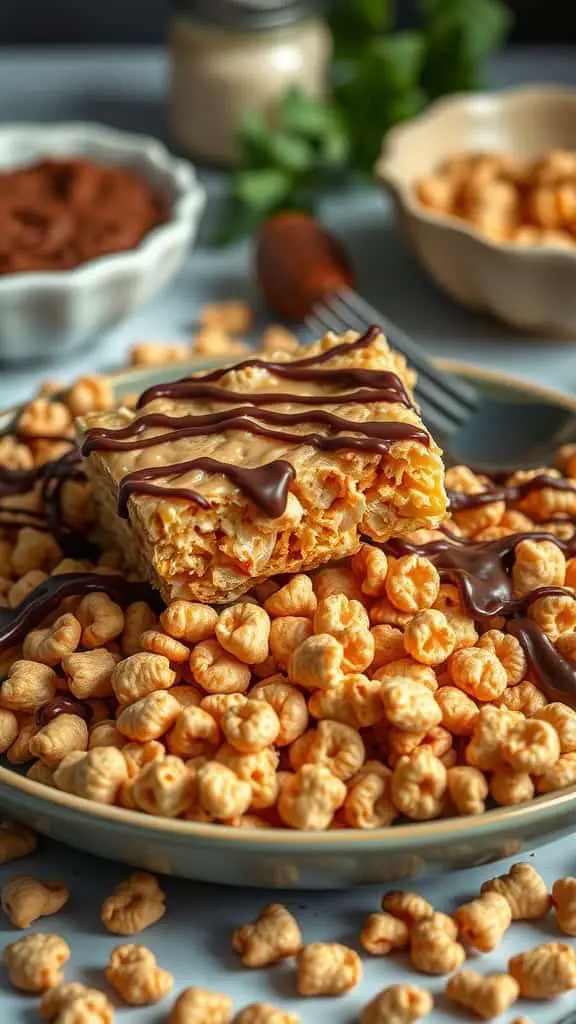
Peanut Butter Chocolate Rice Krispies are a delightfully easy treat that combines the crunch of Rice Krispies with the creamy richness of peanut butter and the sweetness of melted chocolate. The blend of flavors creates a satisfying dessert that is both sweet and savory, making it a favorite for kids and adults alike.
What makes this recipe even better is how simple it is to whip up! In just 10 minutes, you can have a batch of these delicious bars ready to enjoy. Perfect for a quick dessert or snack, they are sure to satisfy any craving!
Ingredients
- 4 cups Rice Krispies cereal
- 1 cup creamy peanut butter
- 1 cup chocolate chips
- 1/4 cup honey or corn syrup
- 1 teaspoon vanilla extract
Instructions
- Prepare a baking dish by lining it with parchment paper for easy removal.
- In a saucepan over low heat, combine peanut butter, honey (or corn syrup), and vanilla extract. Stir until smooth and melted.
- Remove the saucepan from the heat and add the Rice Krispies cereal. Mix gently until all the cereal is well coated.
- Press the mixture into the prepared baking dish evenly.
- In a microwave-safe bowl, melt the chocolate chips, stirring every 30 seconds until smooth. Pour the melted chocolate over the cereal mixture and spread evenly.
- Let it cool for about 30 minutes or until set. Cut into squares and enjoy!
10-Minute Ice Cream Sandwiches: Sandwich Ice Cream Between Two Cookies And Freeze.

Ice cream sandwiches are a fun and delicious treat that mix the rich flavor of cookies with creamy ice cream. They are super easy to make and can be customized to fit any taste. Perfect for a warm day or a quick dessert fix, these sandwiches are sure to please everyone!
With just a few ingredients and a little creativity, you can whip up these delightful desserts in no time. Use your favorite cookies, and feel free to mix and match the ice cream flavors for a personal touch. Here’s how you can make your own ice cream sandwiches!
Ingredients
- 1 package of cookies (chocolate chip, sugar, or your favorite)
- 2 cups ice cream (any flavor)
- Chocolate sauce (for drizzling)
- Sprinkles or nuts (optional, for topping)
Instructions
- Assemble the Sandwich: Take one cookie and add a scoop of ice cream on top. Place a second cookie on top of the ice cream and gently press down.
- Freeze: Place the assembled sandwiches on a baking sheet and freeze for about 1-2 hours, or until the ice cream is firm.
- Serve: Drizzle chocolate sauce over the top and sprinkle with nuts or sprinkles if desired. Enjoy your delicious treat!
Mini Fruit Tarts: Fill Premade Tart Shells With Custard And Top With Fresh Fruit.

Mini fruit tarts are a delightful and simple dessert that bring a burst of flavor and color to any table. With a crisp tart shell filled with creamy custard and topped with fresh, vibrant fruits, these tarts are not only visually appealing but also incredibly tasty. The blend of textures—crunchy crust, smooth custard, and juicy fruit—makes each bite satisfying and refreshing.
Making these mini tarts is straightforward, especially when you use premade tart shells. This recipe is perfect for anyone looking to whip up a quick dessert that impresses guests or satisfies a sweet tooth. The best part? You can customize them with seasonal fruits for a fresh twist!
Ingredients
- 12 premade mini tart shells
- 1 cup vanilla custard (store-bought or homemade)
- 1 cup mixed fresh fruit (strawberries, blueberries, raspberries, kiwi)
- Mint leaves for garnish (optional)
Instructions
- Prepare the Tart Shells: Arrange the premade tart shells on a serving platter.
- Fill with Custard: Spoon the vanilla custard evenly into each tart shell, filling them to the top.
- Add Fresh Fruit: Top each tart with a mix of fresh fruit. Feel free to get creative with the arrangement!
- Garnish: Add a mint leaf on top of each tart for a pop of color and freshness.
- Serve: Enjoy immediately or refrigerate until you’re ready to serve. These tarts are best enjoyed fresh!
10-Minute S’Mores Dip: Melt Chocolate And Marshmallows In A Pan, Serve With Graham Crackers.
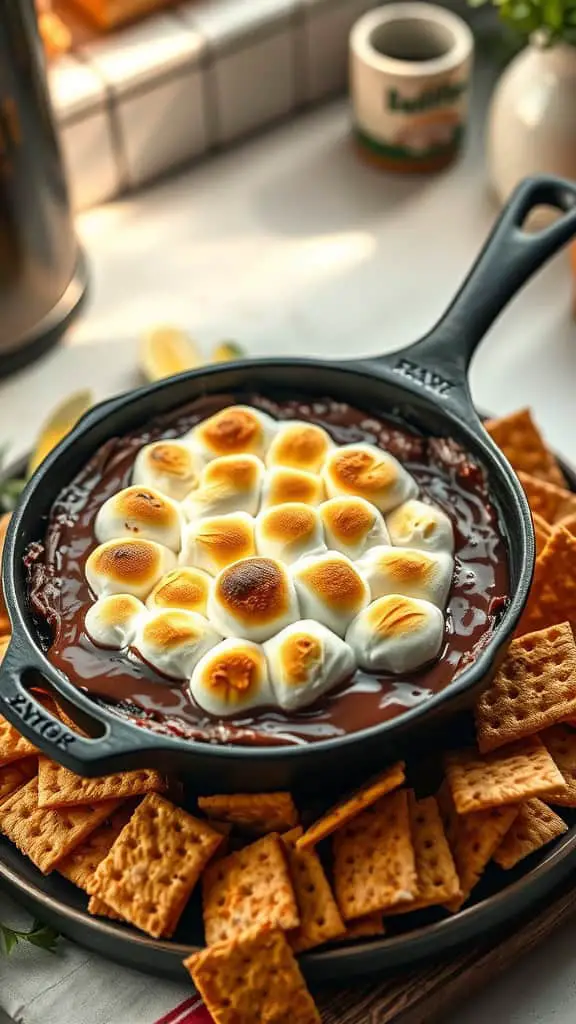
If you’re craving something sweet but short on time, this 10-minute S’mores dip is your go-to dessert! This delightful treat combines the rich flavors of melted chocolate and gooey marshmallows, all served alongside crispy graham crackers for that perfect crunch. It’s simple to whip up and is sure to impress family and friends at any gathering.
The warm, melty chocolate pairs beautifully with the toasted marshmallows on top, giving you all the classic S’mores flavors without the fuss of a campfire. Perfect for sharing, it’s a fun twist on a childhood favorite that can be enjoyed indoors or out!
Ingredients
- 1 cup semi-sweet chocolate chips
- 2 cups mini marshmallows
- 1 tablespoon unsalted butter
- 1/2 teaspoon vanilla extract
- Graham crackers for serving
Instructions
- Preheat your oven to 450°F (232°C).
- In a small oven-safe skillet, melt the butter over medium heat. Add the chocolate chips and stir until smooth.
- Once the chocolate is melted, remove from heat and stir in the vanilla extract.
- Evenly distribute the mini marshmallows on top of the melted chocolate.
- Place the skillet in the oven for 2-3 minutes, or until the marshmallows are golden brown. Keep an eye on them to prevent burning.
- Remove from the oven and let it cool for a minute. Serve warm with graham crackers for dipping!
Quick Apple Nachos: Drizzle Apple Slices With Caramel And Sprinkle With Nuts.
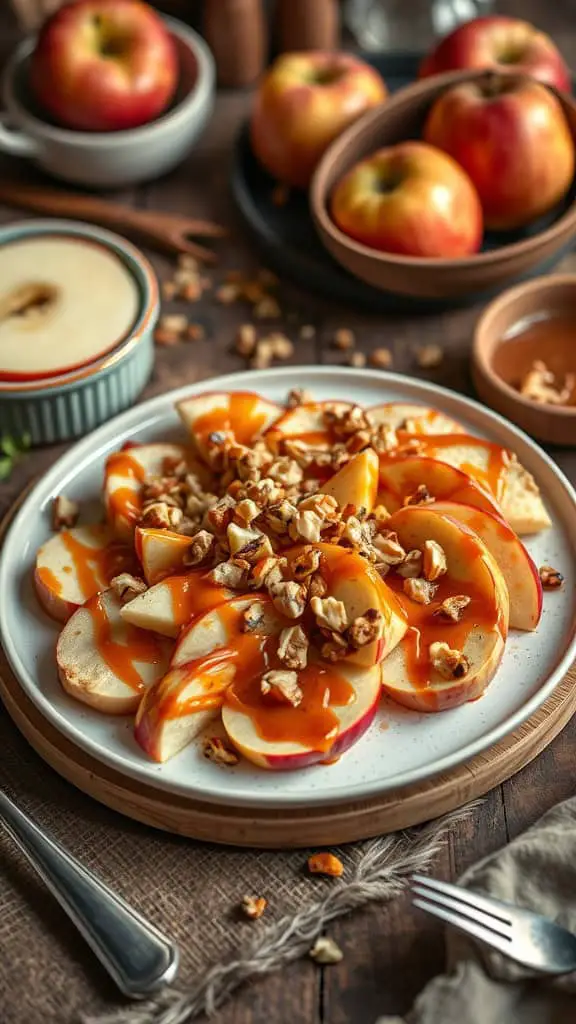
Quick Apple Nachos are a delightful and simple dessert that brings a fun twist to traditional nachos. This sweet treat combines crisp apple slices with a rich caramel drizzle and crunchy nuts, creating a balanced mix of flavors and textures. Perfect for satisfying cravings in a hurry, this recipe is easy to whip up in just a few minutes!
Whether you’re hosting a casual gathering or enjoying a cozy night in, these apple nachos are a hit. The sweetness of the caramel perfectly complements the tartness of the apples, while the nuts add a satisfying crunch. You can customize them with your favorite toppings, making this dessert as versatile as it is delicious!
Ingredients
- 2 large apples, sliced
- 1/2 cup caramel sauce
- 1/4 cup chopped nuts (such as walnuts or pecans)
- Optional: a sprinkle of cinnamon or chocolate chips
Instructions
- Start by washing and slicing the apples into thin wedges.
- Arrange the apple slices on a plate in a circular pattern.
- Drizzle caramel sauce generously over the apple slices.
- Sprinkle the chopped nuts on top, and add any optional toppings if desired.
- Serve immediately and enjoy your delicious Quick Apple Nachos!
10-Minute Lemon Mousse: Mix Whipped Cream, Lemon Curd, And Zest For A Tangy Treat.

Lemon mousse is a delightful dessert that combines the tangy brightness of lemons with the lightness of whipped cream. This recipe is super simple and can be made in just 10 minutes, making it perfect for a quick sweet fix. The creamy texture and zesty flavor create a refreshing treat that’s sure to impress anyone who tries it.
With only three main ingredients—whipped cream, lemon curd, and a sprinkle of lemon zest—you can whip up this mousse in no time. It’s a wonderful balance of sweet and tart, offering a light finish to any meal. Plus, it looks beautiful when served, making it a great choice for gatherings or just a little indulgence at home.
Ingredients
- 1 cup heavy whipping cream
- 1/2 cup lemon curd
- 1 tablespoon lemon zest
- Fresh mint leaves for garnish
Instructions
- In a mixing bowl, beat the heavy whipping cream using an electric mixer until stiff peaks form.
- Gently fold in the lemon curd and lemon zest until well combined.
- Divide the mixture into serving cups or bowls.
- Chill in the refrigerator for 5-10 minutes for a refreshing treat.
- Garnish with fresh mint leaves before serving and enjoy your lemon mousse!
Easy Chocolate Covered Strawberries: A Classic 10-Minute Dessert With Melted Chocolate.

Chocolate covered strawberries are a delightful treat that combines the freshness of ripe strawberries with the richness of melted chocolate. This dessert is perfect for celebrating special occasions or simply enjoying a sweet moment at home. Plus, it’s so easy to make that you’ll wonder why you haven’t tried it before!
In just a few minutes, you can create a visually stunning and tasty dessert. The combination of sweet fruit and smooth chocolate is irresistible. Let’s dive into the simple steps to whip up these delicious chocolate-covered strawberries!
Ingredients
- 1 pound fresh strawberries, washed and dried
- 8 ounces semi-sweet chocolate, chopped
- 4 ounces white chocolate, chopped (optional, for drizzling)
- Wax paper or parchment paper
Instructions
- Melt the Chocolate: In a microwave-safe bowl, combine the semi-sweet chocolate. Microwave in 30-second intervals, stirring between each, until fully melted and smooth.
- Dip the Strawberries: Hold each strawberry by the stem and dip it into the melted chocolate. Let the excess chocolate drip off.
- Set on Wax Paper: Place the dipped strawberries onto a sheet of wax paper or parchment paper to cool and set.
- Optional Drizzle: If using white chocolate, melt it the same way as the semi-sweet chocolate. Drizzle it over the set strawberries for a decorative touch.
- Cool and Serve: Allow the strawberries to cool completely until the chocolate hardens. Enjoy your delicious chocolate covered strawberries!
10-Minute Tiramisu Cups: Layer Coffee-Soaked Ladyfingers, Mascarpone, And Cocoa Powder.

Tiramisu cups are a delightful and quick dessert that brings together the rich flavors of coffee, creamy mascarpone, and a hint of cocoa. This treat is perfect for anyone who loves a touch of indulgence without the lengthy preparation time. Each spoonful offers a harmonious blend of textures and tastes that will satisfy your sweet cravings.
Making these tiramisu cups is incredibly simple. You’ll layer coffee-soaked ladyfingers with creamy mascarpone and finish with a dusting of cocoa powder. This dessert is not just quick; it’s a showstopper that’s sure to impress your guests or add a sweet end to a casual meal.
Ingredients
- 1 cup strong brewed coffee, cooled
- 2 tablespoons coffee liqueur (optional)
- 12-14 ladyfingers
- 1 cup mascarpone cheese
- 1/2 cup heavy whipping cream
- 1/4 cup granulated sugar
- 1 teaspoon vanilla extract
- Cocoa powder for dusting
Instructions
- Mix Coffee: In a shallow dish, combine the cooled coffee and coffee liqueur if using.
- Soak Ladyfingers: Dip each ladyfinger into the coffee mixture for just a second, ensuring they don’t get too soggy.
- Prepare Mascarpone Mixture: In a bowl, beat together the mascarpone cheese, whipping cream, sugar, and vanilla extract until smooth.
- Layer Ingredients: In serving glasses, start with a layer of coffee-soaked ladyfingers, followed by a layer of the mascarpone mixture. Repeat until the glasses are filled.
- Finish and Chill: Dust the top layer with cocoa powder and refrigerate for at least 10 minutes before serving to allow the flavors to meld.