
Rice is one of the most versatile grains on the planet. From hearty dinner casseroles to creamy desserts and even refreshing drinks, rice finds its way into every meal of the day. It’s naturally gluten-free, budget-friendly, and beloved across the globe – no wonder food bloggers love getting creative with rice recipes.
Whether you’re cooking for special diets like vegan or gluten-free, whipping up a quick weeknight dinner, or exploring new international flavors, rice can do it all. Below, we’ve curated 20 unique rice-based recipes from different food blogs.
Each dish highlights how rice can be comforting or exotic, simple or sophisticated – but always delicious.
Get ready to travel the world from your kitchen with these breakfast, lunch, dinner, snack, dessert, and even drink ideas that all start with a humble bowl of rice.

Key Takeaways: Trends in Food Bloggers’ Rice Creations
From these diverse recipes, a few clear trends emerge: food bloggers love to reinvent rice in every way imaginable.
One common theme is global inspiration – bloggers are showcasing rice dishes from all over the world, from Asian street food to African one-pots to European classics.
They aren’t just sticking to plain white rice as a side; instead, rice becomes the star, carrying bold regional flavors (think Thai basil, Cajun spices, or Persian saffron) and often turning into a one-pan meal.
This global approach keeps things exciting and introduces readers to new ingredients and techniques.
Another trend is health-conscious adaptations without sacrificing taste. Many recipes emphasize that rice is naturally gluten-free, and we saw several vegan or vegetarian friendly options (like veggie biryani, mujadara, rice salad) that still burst with flavor.
Brown rice is frequently used to boost whole grain content, and veggies find their way into even traditionally indulgent dishes (broccoli in casseroles, chickpeas in stuffed peppers).
Bloggers are clearly leveraging rice’s versatility to fit various diets – whether it’s a light grain salad for summer or a hearty fiber-rich lentil pilaf, there’s a rice dish for every lifestyle.
Ease and convenience also stand out. Busy-night casseroles and one-pot recipes are popular, showing that rice is an ally for simple cooking.
The fried rice and casserole recipes highlight quick prep or use of leftovers, proving that with a few tricks (like day-old rice or dump-and-bake methods) you can get great results with minimal effort.
Even traditionally labor-intensive dishes like paella or risotto are demystified by bloggers with step-by-step guidance, making them accessible to the home cook.
Finally, food bloggers inject creativity and modern twists into classic rice recipes. For instance, turning leftover risotto into crispy arancini or elevating childhood rice krispie treats with brown butter and gourmet mix-ins.
They honor the authenticity of traditional recipes (many shared personal or cultural stories), but aren’t afraid to experiment – fusing techniques, adding new textures, or adjusting for today’s palates (less sugar, more spice, etc.).
All in all, the trends show that rice is more than a staple – it’s a canvas. Whether it’s used to create comfort food casseroles, nutritious grain bowls, or exotic celebratory dishes, bloggers embrace rice for its adaptability, affordability, and ability to deliver flavor.
From breakfast congee to dessert pudding, they prove there are endless unique ways to enjoy this global grain.
1. Spicy Thai Basil Fried Rice

Description: This Thai fried rice is tossed in a savory chili-garlic sauce with fresh Thai basil, giving you takeout-level flavor in just 20 minutes (Thai Basil Fried Rice | Table for Two® by Julie Chiou).
Fragrant jasmine rice is stir-fried with bell peppers, onions, and a hint of fish sauce for umami. Each bite bursts with spicy basil goodness, making it an irresistible weeknight meal that’s faster (and tastier) than delivery.
Why It’s Great:
- Fast & Easy – Ready in about 20 minutes for a no-fuss dinner (Thai Basil Fried Rice | Table for Two® by Julie Chiou).
- Bold Thai Flavors – Aromatic Thai basil and chili paste create a mouthwatering, restaurant-quality taste (Thai Basil Fried Rice | Table for Two® by Julie Chiou).
- Versatile – Enjoy it as a main dish or a flavorful side (Thai Basil Fried Rice | Table for Two® by Julie Chiou).
- Naturally Dairy-Free – No dairy here, and easily gluten-free if you use tamari instead of soy sauce.
Suitable For:
- Busy families needing dinner in a hurry.
- Spice lovers craving a kick in their fried rice.
- Home cooks looking for a takeout alternative that’s healthier and customizable.
- Dairy or gluten-sensitive eaters (just swap soy sauce for a GF version).
Tips & Tricks:
- Use day-old cooked rice – it’s drier and fries up better (no clumps) (Thai Basil Fried Rice | Table for Two® by Julie Chiou).
- Stir-fry on high heat with an oil that has a high smoke point (like avocado oil) to get that authentic wok-seared flavor (Thai Basil Fried Rice | Table for Two® by Julie Chiou).
- Add your protein of choice (shrimp, chicken, or tofu all work) to make it even heartier.
- Prep all ingredients before you start – this dish cooks fast!
Possible Improvements:
- Toss in a handful of cashews or peanuts for extra crunch and protein.
- Swap out Thai chili paste for sriracha or dried chili flakes to adjust the heat level to your liking.
- For a vegan version, omit the fish sauce (add a dash of soy sauce and lime for saltiness and tang).
- Sneak in extra veggies like broccoli or carrots to boost the nutrition.
Read the Full Recipe Here: Thai Basil Fried Rice by Table for Two (Thai Basil Fried Rice | Table for Two® by Julie Chiou)
2. Cozy Breakfast Congee – Savory Rice Porridge (Vegan-Friendly)

Description: Congee is a creamy Asian rice porridge that makes a warm, comforting breakfast.
This version simmers rice with broth until velvety, then gets loaded with toppings like crispy mushrooms, avocado, fried eggs, and chili oil (Simple Congee Recipe (Rice Porridge) – What’s Gaby Cooking).
It’s an ultra-flexible dish found across China, Korea, and beyond – customize it to your taste. Each spoonful is soothing, hearty, and perfect for a cold morning when you need a hug in a bowl.
Why It’s Great:
- Ultimate Comfort Food – Creamy, savory, and gentle on the stomach; great for cozy mornings or recovery days (Simple Congee Recipe (Rice Porridge) – What’s Gaby Cooking).
- Highly Customizable – Top it with anything: veggies, herbs, hot sauce, or keep it simple and plain (Simple Congee Recipe (Rice Porridge) – What’s Gaby Cooking).
- Quick & Easy – With an Instant Pot, it’s ready in ~25 minutes (Simple Congee Recipe (Rice Porridge) – What’s Gaby Cooking). Minimal effort for maximum reward.
- Nutrient-Rich – Whole grain rice plus optional toppings (like eggs or avocado) offer fiber, protein, and healthy fats in one bowl.
Suitable For:
- Vegan or vegetarian diets (use vegetable stock; skip egg) seeking a hearty breakfast.
- Those needing soft, gentle foods – ideal for post-illness or even as a post-pregnancy meal (Simple Congee Recipe (Rice Porridge) – What’s Gaby Cooking).
- Gluten-free eaters – completely gluten-free by nature (rice-based).
- Anyone bored with oatmeal and looking for a new morning routine.
Tips & Tricks:
- For the creamiest congee, use a bit more liquid and stir frequently as it cooks to break down the rice.
- Instant Pot method: Pressure cook the rice and broth to save time (15 minutes high pressure yields a perfectly silky porridge) (Simple Congee Recipe (Rice Porridge) – What’s Gaby Cooking).
- Adjust thickness by adding a splash of hot water or broth if it gets too thick; congee thickens as it cools.
- Don’t skimp on the caramelized topping like fried garlic, chili oil, or soy drizzle – they elevate the flavor immensely.
Possible Improvements:
- Stir in a dash of grated ginger and garlic while cooking for extra aroma and immune-boosting benefits.
- Use brown rice for added fiber (you’ll need to cook it longer, or use a pressure cooker).
- Sweet tooth? Try a sweet congee with coconut milk, a bit of sugar, and top with fruit and nuts for a rice pudding vibe.
- Make it a full meal by topping with shredded chicken or tofu for more protein.
Read the Full Recipe Here: Simple Congee (Rice Porridge) by What’s Gaby Cooking (Simple Congee Recipe (Rice Porridge) – What’s Gaby Cooking)
3. Authentic Mexican Horchata – Creamy Cinnamon Rice Drink

Description: Horchata is a refreshing rice-based drink that’s popular in Mexico and throughout Latin America. It’s made by blending soaked rice with cinnamon, almonds, milk, and vanilla to create a smooth, milky beverage speckled with warm spice.
Served ice-cold, it’s sweet, silky, and lightly spiced – the perfect companion to a spicy meal or a summer treat on its own (How To Make Truly Authentic Mexican Horchata At Home). This dairy-free delight shows rice’s ability to shine even in a glass!
Why It’s Great:
- Refreshing & Sweet – Rich, smooth texture with just the right sweetness makes it super satisfying on a hot day (How To Make Truly Authentic Mexican Horchata At Home).
- Easy to Make – Blend and strain; it just requires a bit of planning to soak the rice for maximum flavor (How To Make Truly Authentic Mexican Horchata At Home).
- All-natural ingredients – No artificial mixes here, just rice, cinnamon, nuts, milk (or plant milk), sugar, and water.
- Festive Flair – Often made for celebrations like Cinco de Mayo, but also wonderful for everyday indulgence (How To Make Truly Authentic Mexican Horchata At Home).
Suitable For:
- Lactose-intolerant or dairy-free folks (use almond milk or coconut milk – traditional horchata is dairy-free or can be made with evaporated milk if tolerated).
- Kids and adults who want a non-alcoholic party drink with a unique twist.
- Vegan diets – easily vegan if you use plant-based milk or just water (many authentic recipes are naturally vegan).
- Anyone looking for a dessert-like drink to cool down with (think of it as liquid rice pudding!).
Tips & Tricks:
- Soak overnight: Soaking rice, cinnamon sticks, and almonds in water overnight yields the best flavor (How To Make Truly Authentic Mexican Horchata At Home) – don’t skip this step.
- After blending, strain thoroughly through a fine mesh or cheesecloth to get that smooth, grit-free texture (How To Make Truly Authentic Mexican Horchata At Home).
- Serve over ice and stir well (spices can settle at the bottom). A pinch of ground cinnamon on top makes a nice presentation.
- If it thickens up in the fridge, just thin with a little extra cold water or milk before serving.
Possible Improvements:
- Try adding a couple of tablespoons of shredded coconut into the soak for a subtle tropical flavor (some regional variations do this) (How To Make Truly Authentic Mexican Horchata At Home).
- Swap white sugar for sweetened condensed milk for a richer, creamier horchata (though it will add dairy).
- Experiment with different nuts: almonds are classic, but some recipes use tiger nuts or cashews for a twist.
- Make a fun cocktail by adding a splash of rum – adults-only horchata cocktail for your next fiesta.
Read the Full Recipe Here: Mexican Horchata by My Latina Table (How To Make Truly Authentic Mexican Horchata At Home)
4. Creamy Mushroom Risotto – Elegant Vegetarian Main Dish

Description: This Italian-style risotto features tender Arborio rice slowly cooked in broth and white wine until luxuriously creamy. It’s studded with sautéed mixed mushrooms, fresh thyme, and finished with parmesan cheese for richness (Mushroom Risotto Recipe – Love and Lemons).
Each bite is velvety and deeply flavorful. Despite its gourmet reputation, this mushroom risotto is quite simple to prepare, making it a fantastic option for a cozy date night or meatless dinner that feels special.
Why It’s Great:
- Luxuriously Creamy – Achieves a rich, creamy texture without any cream – the starch from Arborio rice creates a decadent sauce naturally (Mushroom Risotto Recipe – Love and Lemons) (Mushroom Risotto Recipe – Love and Lemons).
- Packed with Umami – Mushrooms, parmesan, and a splash of wine infuse tons of savory flavor for an elegant taste.
- Vegetarian Comfort Food – Hearty and satisfying enough to please vegetarians and omnivores alike, with chewy mushrooms giving a “meaty” bite.
- Customizable & Inclusive – Easily made vegan by omitting cheese (or using a vegan substitute) (Mushroom Risotto Recipe – Love and Lemons), and it’s naturally gluten-free.
Suitable For:
- Vegetarian diets or Meatless Monday menus – it’s filling and flavorful without any meat.
- Dinner parties or date nights – an impressive dish that looks and tastes gourmet.
- Gluten-free guests – rice-based and wheat-free.
- Home cooks wanting to practice a fun technique (the gentle stirring of risotto) with rewarding results.
Tips & Tricks:
- Use warm broth and add it gradually, stirring often – this coaxes the starch out for a creamy consistency (Mushroom Risotto Recipe – Love and Lemons). Patience is key!
- Sauté the mushrooms separately first until browned and add them near the end (Mushroom Risotto Recipe – Love and Lemons) – this keeps their texture and deep flavor.
- Keep the heat moderate; a gentle simmer is better than a rapid boil to cook the rice evenly and avoid it getting mushy or sticking.
- Finish with a pat of butter and extra parmesan for a glossy, restaurant-like finish (optional but delicious).
Possible Improvements:
- Mix in a handful of peas or asparagus tips in the last few minutes of cooking for a pop of color and extra veggies.
- Drizzle with a bit of truffle oil before serving to amplify the mushroom aroma and wow truffle fans.
- Swap half the mushrooms for another vegetable (like butternut squash or zucchini) to change up the flavor profile seasonally.
- Love protein? Serve as a side to grilled steak, or stir in shredded roasted chicken at the end for a non-vegetarian twist.
Read the Full Recipe Here: Mushroom Risotto by Love & Lemons (Mushroom Risotto Recipe – Love and Lemons)
5. Aromatic Vegetable Biryani – One-Pot Indian Vegan Feast

Description: This vegetable biryani is a fragrant Indian rice dish that layers long-grain basmati rice with mixed vegetables, chickpeas, and a bouquet of spices. Gently simmered, the rice absorbs flavors of cumin, cardamom, cinnamon, and turmeric, emerging golden and aromatic.
It’s garnished with fresh herbs and a spoon of chutney for an authentic touch (Vegetable Biryani | Feasting At Home).
With minimal hands-on time (just 15 minutes prep), this recipe delivers an impressive, wholesome meal that’s vegan, gluten-free, and absolutely loaded with flavor (Vegetable Biryani | Feasting At Home).
Why It’s Great:
- Bursting with Flavor – Infused with warm Indian spices and herbs in every bite, yet not overly spicy (more fragrant and aromatic) (Vegetable Biryani | Feasting At Home).
- Healthy & Satisfying – Packed with veggies and chickpeas for protein, it’s a balanced one-pot meal that’s hearty without any meat (Vegetable Biryani | Feasting At Home).
- Reader-Favorite – This recipe boasts 100+ five-star reviews and is a proven hit (Vegetable Biryani | Feasting At Home), so you can trust the delicious outcome.
- Hands-Off Cooking – Only ~15 minutes of prep, then it simmers on the stove, developing incredible depth while you relax (Vegetable Biryani | Feasting At Home).
Suitable For:
- Vegan and vegetarian diets – completely plant-based but very substantial.
- Gluten-free eaters – naturally free of gluten (just rice, veggies, spices).
- Families or individuals meal-prepping – biryani makes great leftovers as the flavors get even better next day.
- Anyone craving Indian takeout flavor at home, in a healthier and lighter way.
Tips & Tricks:
- Use basmati rice for the fluffiest, most aromatic result (Vegetable Biryani | Feasting At Home). Rinse it well to remove excess starch and prevent clumping.
- Lightly caramelize the onions at the start – it adds a touch of sweetness and depth to the biryani base (many biryani recipes consider fried onions essential).
- If your pan has a tight lid, use it! Trapping steam is key to tender rice. You can also seal the pot with a layer of foil under the lid for a true “dum” cooking effect.
- Serve with cool raita (yogurt sauce) or the suggested cilantro-mint chutney to complement the spices (Vegetable Biryani | Feasting At Home).
Possible Improvements:
- Add toasted nuts or raisins on top for texture – cashews or almonds and golden raisins are often used as finishing touches in biryani.
- Vary the veggies to your taste – green beans, cauliflower, or potatoes can be great additions or substitutes in the vegetable mix.
- For a richer flavor, you can stir in a few tablespoons of coconut milk or a dollop of vegan butter just before serving.
- If you prefer some protein, this recipe is a great base for adding baked tofu or a hard-boiled egg (for non-vegans) as garnish.
Read the Full Recipe Here: Vegetable Biryani by Feasting At Home (Vegetable Biryani | Feasting At Home)
6. Japanese Onigiri Rice Balls – Portable & Fun Snack

Description: Onigiri are Japanese rice balls – think of them as the original convenience food of Japan. Steamed short-grain rice is formed into triangles or rounds, often wrapped in nori seaweed, and stuffed with tasty fillings like tuna salad, pickled plum, or salmon.
They’re tender, lightly salted, and endlessly customizable (Onigiri (Japanese Rice Balls) • Just One Cookbook).
Onigiri make a great lunchbox item or on-the-go snack, providing an easy way to enjoy sushi-like flavors without the fuss. Plus, they’re as fun to make as they are to eat!
Why It’s Great:
- Ultra-Portable – A handheld snack or lunch that travels well – they’re basically the Japanese answer to sandwiches (Onigiri (Japanese Rice Balls) おにぎり • Just One Cookbook) (Onigiri (Japanese Rice Balls) おにぎり • Just One Cookbook).
- Versatile Fillings – You can stuff them with anything: tuna mayo, avocado, teriyaki chicken, even leftover curry – it’s a fantastic use of leftovers.
- Comforting – Loved by all ages in Japan; they’re nostalgic and comforting, often made by moms for kids (true Japanese comfort food for picnics and school lunches) (Onigiri (Japanese Rice Balls) • Just One Cookbook) (Onigiri (Japanese Rice Balls) おにぎり • Just One Cookbook).
- Naturally Gluten-Free – Made with rice and simple fillings, it’s easy to ensure they’re gluten-free (just watch out for soy sauce in some fillings).
Suitable For:
- Kids and picky eaters – Onigiri are mild, customizable, and fun to eat; perfect for lunchboxes.
- Busy people – Meal prep a batch and wrap them up for grab-and-go snacks throughout the week.
- Hikers, travelers, and picnickers – these were invented as energy food for travelers and still shine as a hearty snack on the move (Onigiri (Japanese Rice Balls) • Just One Cookbook).
- Those exploring Japanese cuisine in a simple way, no special tools or rolling mats needed.
Tips & Tricks:
- Use Japanese short-grain rice (sushi rice) – its sticky texture is crucial for onigiri to hold together (Onigiri (Japanese Rice Balls) • Just One Cookbook). Other rice won’t bind properly.
- Wet your hands and sprinkle with salt when shaping the rice balls. This seasons the rice lightly and prevents it from sticking to your hands.
- Wrap nori seaweed around the rice just before eating if you like it crisp. If you wrap it too early, it’ll soften (which some people enjoy, others don’t).
- Keep a bowl of water nearby to re-moisten hands between making each onigiri – it makes handling the rice much easier.
Possible Improvements:
- Mix some furikake seasoning into the rice for extra flavor and visual appeal (furikake is a Japanese seasoning blend of seaweed, sesame, etc.).
- Grill them! Yaki onigiri (grilled rice balls) brushed with a bit of soy sauce develop a crispy crust and smoky flavor – a delicious variation (Crispy Yaki Onigiri Recipe (Grilled Rice Balls)).
- For a fusion twist, try filling onigiri with unconventional fillings like ham & cheese or curry chicken – it’s non-traditional but tasty.
- If you want additional nutrients, you can incorporate a bit of minced veggie (like spinach or edamame) into the rice before shaping.
Read the Full Recipe Here: Onigiri (Japanese Rice Balls) by Just One Cookbook (Onigiri (Japanese Rice Balls) • Just One Cookbook)
7. Cajun Chicken & Sausage Jambalaya – Hearty One-Pot Comfort

Description: Jambalaya is a Louisiana Creole classic – a one-pot rice dish brimming with chicken, smoky andouille sausage, shrimp, and the “holy trinity” of Cajun cooking (onions, bell peppers, celery).
The rice cooks in a spiced tomato broth, absorbing all those bold flavors. This recipe is surprisingly easy, yet delivers big, zesty Cajun taste that will transport you straight to New Orleans (Jambalaya Recipe | Gimme Some Oven).
Each spoonful is warm, smoky, and a little spicy. It’s comfort food that feeds a crowd and leaves everyone wanting seconds.
Why It’s Great:
- Big on Flavor – Bold Cajun spices, garlic, and smoky sausage make every bite exciting and full of depth (Jambalaya Recipe | Gimme Some Oven).
- Complete Meal in One Pot – You’ve got protein, veggies, and starch all together, making it super satisfying and convenient.
- Customizable Proteins – You can easily swap or add proteins (like ham, pork, or omit meat for a veggie version) – it’s a flexible template (Jambalaya Recipe | Gimme Some Oven).
- Crowd-Pleaser – Perfect for gatherings, game days, or family dinner – it’s rustic, hearty, and universally loved for its comforting taste.
Suitable For:
- Meat lovers – Loaded with chicken, sausage, and shrimp (but you can tailor the mix to your preference).
- Gluten-free diets – Naturally gluten-free comfort food, no flour or wheat in sight.
- Busy cooks who want leftovers – Jambalaya reheats well and might taste even better the next day as flavors meld.
- Anyone craving a taste of the South or something to spice up their usual dinner rotation.
Tips & Tricks:
- Sear the meat first to develop extra flavor (those browned bits at the bottom of the pot will enrich the rice as it cooks).
- Use a good quality Cajun seasoning or make your own blend (paprika, thyme, oregano, cayenne, black pepper, garlic & onion powder) for an authentic taste.
- Once you add the rice, avoid excessive stirring – stir just once, then let it simmer with the lid on. This helps prevent the rice from getting gummy or breaking apart.
- If you like a bit of crispy texture, allow the jambalaya to sit for a few minutes after cooking – the bottom may form a slightly toasted crust (similar to paella’s socarrat).
Possible Improvements:
- Add a dash of hot sauce or a pinch of cayenne at the end if you prefer more heat, or serve with hot sauce on the side so everyone can adjust spice to taste.
- Stir in a handful of chopped green onions and parsley right before serving for fresh color and flavor contrast.
- For a seafood jambalaya, increase the shrimp and add crawfish or crab meat, omitting the chicken – just be careful to add seafood towards the end of cooking to avoid overcooking.
- Make it a “dirty rice” style (another Cajun favorite) by using chicken livers/gizzards finely chopped – it amps up the richness (for the adventurous eaters).
Read the Full Recipe Here: Cajun Jambalaya by Gimme Some Oven (Jambalaya Recipe | Gimme Some Oven)
8. Greek Brown Rice Salad – Light & Zesty Whole-Grain Side
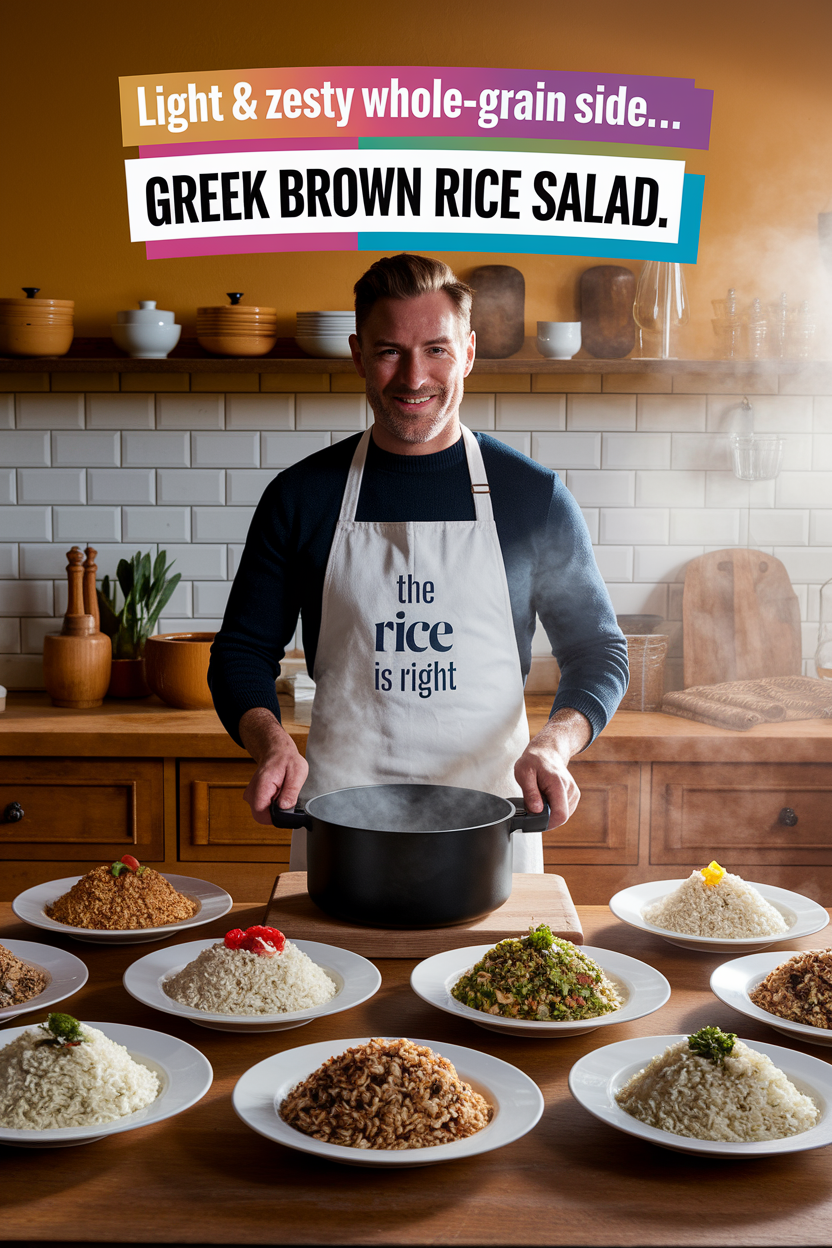
Description: This Mediterranean-inspired rice salad tosses chewy brown rice with crisp cucumbers, juicy cherry tomatoes, briny Kalamata olives, and creamy feta cheese (Greek Brown Rice Salad (with video) – The Lemon Bowl®).
A tangy dressing of lemon and olive oil ties it all together. It’s like a classic Greek salad reinvented with whole-grain rice for extra substance.
The result is a colorful, flavorful side dish (or vegetarian main) that’s high in fiber and nutrients, yet bright and refreshing.
Why It’s Great:
- Wholesome & Healthy – Loaded with vegetables and brown rice, it offers fiber, vitamins, and protein (from chickpeas and feta) in each bite (Greek Brown Rice Salad (with video) – The Lemon Bowl®) (Greek Brown Rice Salad (with video) – The Lemon Bowl®).
- Texture Paradise – You get crunchy cucumber and corn, juicy tomatoes, hearty rice, and creamy feta – a satisfying mix of textures in one bowl (Greek Brown Rice Salad (with video) – The Lemon Bowl®) (Greek Brown Rice Salad (with video) – The Lemon Bowl®).
- Make-Ahead Friendly – Stays good in the fridge for a couple of days, making it perfect for meal prep or parties (the flavors actually improve as they meld) (Greek Brown Rice Salad (with video) – The Lemon Bowl®).
- Gluten-Free & Easily Vegan – Naturally gluten-free grain salad. Omit the feta (or use a plant-based feta) to make it vegan without sacrificing much flavor (Greek Brown Rice Salad (with video) – The Lemon Bowl®).
Suitable For:
- Potlucks, picnics, and barbecues – a mayo-free salad that can sit out and still taste great, and it complements grilled foods perfectly.
- Meal preppers – pack it for healthy office lunches or quick dinners; it’s filling but not heavy.
- Those following a Mediterranean diet – it’s got all the hallmarks: olive oil, whole grains, veggies, and olives.
- Vegetarians – a balanced meatless dish (chickpeas in it add extra protein) that can stand alone as a light main course.
Tips & Tricks:
- Cook the brown rice in advance and let it cool (or use leftover rice). Chilled or room-temp rice will absorb the dressing better without getting mushy.
- Use the best quality extra-virgin olive oil and fresh lemons for the dressing – since it’s simple, these flavors shine through.
- Don’t add the fresh herbs (if using parsley or dill) until serving time if making ahead; it keeps their color and punch.
- Feel free to toss in other veggies you have on hand – bell peppers, chopped spinach, or even avocado can work nicely in this salad.
Possible Improvements:
- Make it a complete meal by adding a protein: grilled chicken, shrimp, or tofu would be great tossed in. Even a couple of boiled eggs on top for a vegetarian boost.
- Swap brown rice with other whole grains occasionally (quinoa or farro) for a different texture – the Mediterranean flavors will still complement them.
- For extra tang, add a splash of red wine vinegar or a sprinkle of crumbled goat cheese in addition to feta.
- If you like a bit of heat, throw in a few pepperoncini (pickled Greek peppers) or a pinch of chili flakes to give a subtle kick.
Read the Full Recipe Here: Greek Brown Rice Salad by The Lemon Bowl (Greek Brown Rice Salad (with video) – The Lemon Bowl®)
9. Spanish Seafood Paella – Festive Saffron Rice Pan
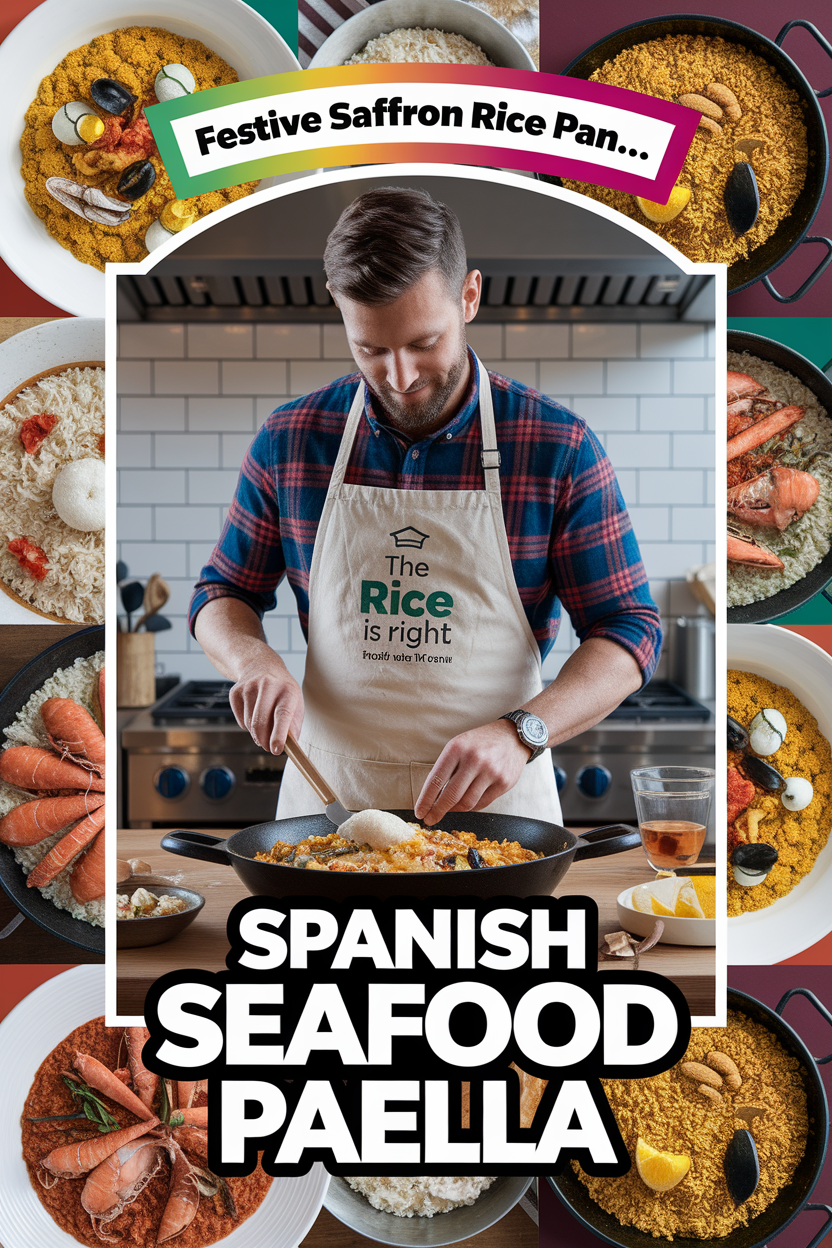
Description: Paella is Spain’s signature rice dish, and this seafood paella is as authentic as it gets. Golden saffron-infused rice is cooked with a flavorful sofrito (garlic, tomatoes, paprika) and loaded with shrimp, mussels, and calamari.
It’s all done in one wide pan until the rice is tender and the bottom forms a coveted crispy socarrat crust.
Brimming with Spanish flavors yet surprisingly straightforward to make, this paella is a show-stopping centerpiece that brings everyone to the table (Authentic Spanish Seafood Paella Recipe – Spain on a Fork).
Why It’s Great:
- Authentic Taste of Spain – Fragrant saffron, smoked paprika, and fresh seafood create a genuine Valencia-style paella that’s bursting with Spanish flavor (Authentic Spanish Seafood Paella Recipe – Spain on a Fork).
- Entertaining-Friendly – It’s designed to feed a group and is visually impressive with its array of seafood on top – perfect for dinner parties or celebrations.
- Surprisingly Easy – Despite its reputation, paella is essentially a one-pan bake on the stovetop; this recipe is beginner-friendly (no constant stirring like risotto) (Authentic Spanish Seafood Paella Recipe – Spain on a Fork).
- Gluten-Free & One-Pot – All ingredients are naturally gluten-free and it all cooks in one pan, simplifying cooking and cleanup.
Suitable For:
- Seafood lovers – packed with shrimp, mussels, etc. (you can also include clams, fish, or scallops as desired).
- Home cooks looking to expand their culinary repertoire with a famous international dish.
- Family gatherings – paella traditionally brings people together; it’s ideal for a communal meal.
- Anyone eating gluten-free who wants an exciting, grain-based dish that’s not just plain rice.
Tips & Tricks:
- Use the right rice: Spanish Bomba or Calasparra rice is ideal as it absorbs liquid without turning mushy (Authentic Spanish Seafood Paella Recipe – Spain on a Fork). Arborio can work in a pinch, but authentic short-grain paella rice yields the best texture.
- Do not stir once you add the broth to the rice – you want the rice to cook in a thin layer undisturbed to develop the socarrat (the crispy bottom) (Authentic Spanish Seafood Paella Recipe – Spain on a Fork).
- Arrange and lightly press the seafood into the rice during the last part of cooking. As soon as mussels open and shrimp turn pink, remove from heat to avoid overcooking.
- Let the paella rest for 5-10 minutes off heat before serving. This helps the rice finish cooking and allows flavors to meld (and guests to admire it in the pan!).
Possible Improvements:
- If you don’t have a traditional paella pan, use the widest skillet you have so the rice layer stays thin. In a pinch, you can even split the recipe between two pans.
- Add other proteins if desired: Spanish chorizo slices or chicken thighs (for a mixed paella) add different flavors and make it even heartier. Brown them first for extra flavor.
- For presentation and taste, serve with fresh lemon wedges – a squeeze of lemon on each serving brightens the rich flavors.
- Leftovers tip: use remaining paella to make paella fritters or arancini-like croquettes the next day – they fry up into a delicious snack.
Read the Full Recipe Here: Spanish Seafood Paella by Spain on a Fork (Authentic Spanish Seafood Paella Recipe – Spain on a Fork)
10. West African Jollof Rice – Spicy Tomato One-Pot

Description: Jollof rice is a legendary West African dish, and this version lives up to the hype. It’s a one-pot rice meal cooked in a rich, spicy tomato and red pepper sauce until the grains are stained orange and soaked with flavor (Jollof Rice).
Often cooked with chicken or beef (though it can be vegetarian), jollof is smoky, savory, and a little spicy – think “Spanish rice on steroids” with African spices.
Naturally gluten-free and utterly addictive, it’s a comforting staple from Nigeria to Ghana that will liven up your dinner table.
Why It’s Great:
- Packed with Flavor – Curry powder, thyme, ginger, garlic, and scotch bonnet pepper (optional) give jollof its unmistakable kick and depth (Jollof Rice). Every bite is robust and hearty.
- One-Pot Simplicity – Everything cooks together, meaning the rice absorbs all the wonderful flavors and you have minimal cleanup. Easy and relatively quick for such a flavorful result (Jollof Rice).
- Versatile Meal – Can be enjoyed as a vegetarian main (the spiced tomato-lentil stew stands on its own) or paired with your protein of choice (grilled chicken, goat meat, etc.).
- Crowd-Sized – Jollof recipes typically make a big batch – great for parties, potlucks, or multiple meals through the week.
Suitable For:
- Spice enthusiasts – it has a warm spiciness (you can adjust heat by how much chili you use).
- Gluten-free diets – all ingredients are naturally gluten-free, making it a safe comfort food for those avoiding wheat.
- Budget-conscious cooks – made mostly from rice, canned tomatoes, and spices, it’s inexpensive yet feeds many.
- Fans of world cuisine looking to try a famous African dish that’s both approachable and exotic.
Tips & Tricks:
- Blend fresh tomatoes, red bell peppers, onions, and habanero (or scotch bonnet) to make the base stew – this fresh blend is key to authentic jollof flavor.
- Let the rice at the bottom catch a little (lightly burn) – in West Africa, many love the caramelized “party rice” crust at the bottom of the pot for its smoky flavor. Just be careful not to truly burn it.
- Cook on low heat once the rice is in and keep the pot covered to trap steam, stirring only occasionally to prevent sticking. This ensures the rice cooks evenly.
- For extra smoky aroma, some recipes add a tiny bit of smoked paprika or even cook over fire. A simpler hack: use smoked turkey or smoked salt if you have it.
Possible Improvements:
- Add vegetables like peas, carrots, or green beans toward the end of cooking for a pop of color and extra nutrients (though not traditional, it’s a common adaptation).
- Serve with cooling sides to balance the spice – a simple cucumber salad or coleslaw, and fried plantains are popular accompaniments.
- Try it with brown rice for a healthier twist – you’ll need to extend the cooking time and add a bit more liquid.
- If you prefer a meatier profile and aren’t vegetarian, cook the rice in chicken broth and stir in some browned chicken pieces to make a more substantial one-pot meal.
Read the Full Recipe Here: Jollof Rice by Feel Good Foodie (Jollof Rice)
11. Jamaican Rice and Peas – Creamy Coconut Bean Side

Description: In Jamaican cuisine, “rice and peas” refers to red beans and rice cooked in creamy coconut milk – a staple side dish that’s hearty enough to be a meal.
Fragrant with thyme, garlic, and a whole scotch bonnet pepper for flavor, this dish has a subtle island spice. The rice absorbs the rich coconut milk, and the kidney beans (called “peas” locally) add protein and color.
It’s an easy, one-pot recipe that’s packed with flavor from herbs and the gentle kick of chili (Jamaican Rice and Peas | Jessica in the Kitchen).
A true taste of the Caribbean, it brings “island vibes” to any table (Jamaican Rice and Peas | Jessica in the Kitchen).
Why It’s Great:
- Comforting & Creamy – Cooking rice in coconut milk makes it luscious and creamy, with a hint of natural sweetness – pure comfort in every bite (Jamaican Rice and Peas | Jessica in the Kitchen).
- Herb-Infused – Fresh thyme and allspice berries typically simmer along, infusing an earthy depth that screams “Caribbean home cooking.”
- One-Pot Convenience – The beans cook with the rice, so you have a flavorful side dish with minimal effort and cleanup.
- Vegan and Gluten-Free – Completely plant-based and wheat-free, yet still high in protein and fiber thanks to the kidney beans.
Suitable For:
- Vegans/Vegetarians – provides protein from beans, and tons of flavor without any animal products.
- Gluten-free diets – a great grain side that everyone can enjoy safely.
- Fans of Caribbean cuisine or anyone looking to expand their side dish repertoire beyond plain rice.
- Busy weeknight cooks – it pairs well with simple mains (grilled fish, jerk tofu, roasted veggies, etc.) to complete a meal.
Tips & Tricks:
- If using dry kidney beans, soak and pre-cook them until just tender before adding to the rice (or use canned beans for convenience, drained and rinsed).
- Don’t skip the whole Scotch bonnet pepper – surprisingly, it won’t make the dish very spicy if left whole; it imparts a subtle fruity heat. Just remember not to burst it (unless you do want it spicy!) (Jamaican Rice and Peas | Jessica in the Kitchen).
- Use full-fat coconut milk for the creamiest texture and authentic richness. Stir the coconut milk well (it separates in the can) before measuring.
- Let the rice rest off heat for about 10 minutes after cooking, with the lid on. This steaming period finishes cooking the rice gently and makes it fluffier (Jamaican Rice and Peas | Jessica in the Kitchen).
Possible Improvements:
- “Rice and peas” is quite flexible: some cooks add a small knob of ginger or scallion while simmering for extra aroma – feel free to experiment.
- If you want a bit more kick, you can stir in a little of that Scotch bonnet (minced) after cooking, or a dash of Caribbean hot sauce.
- Serve with fresh lime wedges to squeeze on top – a little lime juice brightens the creamy coconut and is a great contrast.
- Leftovers transform well into a quick Jamaican bowl – just add sautéed greens and a protein on top of reheated rice and peas for lunch.
Read the Full Recipe Here: Jamaican Rice and Peas by Jessica in the Kitchen (Jamaican Rice and Peas | Jessica in the Kitchen)
12. Greek Stuffed Peppers (Gemista) – Flavor-Packed & Gluten-Free

Description: These Greek-style stuffed bell peppers are filled with a savory mixture of rice, ground meat, chickpeas, and herbs (Greek Stuffed Peppers (Dairy and Gluten Free) | The Mediterranean Dish).
Baked until the peppers are tender, each pepper becomes a self-contained meal bursting with Mediterranean flavors. The filling includes garlic, tomatoes, and warm spices like allspice and paprika, making it aromatic and satisfying.
Naturally dairy-free and gluten-free (and with a vegan option included), this recipe takes the classic comfort of stuffed peppers and gives it a healthy Greek twist (Greek Stuffed Peppers (Dairy and Gluten Free) | The Mediterranean Dish).
Why It’s Great:
- All-in-One Meal – You get protein, veggies, and grains in each pepper. It’s well-balanced and comforting, yet healthy.
- Diet-Friendly – Naturally gluten-free and dairy-free as prepared (Greek Stuffed Peppers (Dairy and Gluten Free) | The Mediterranean Dish) (Greek Stuffed Peppers (Dairy and Gluten Free) | The Mediterranean Dish). It even offers a vegetarian/vegan option by omitting the meat and doubling the chickpeas.
- Meal Prep Magic – You can prepare them ahead of time and bake when ready (Greek Stuffed Peppers (Dairy and Gluten Free) | The Mediterranean Dish), or make a big batch to reheat for easy lunches/dinners (they reheat very well).
- Bursting with Herbs – Fresh parsley and possibly mint or dill in the filling give a pop of freshness that sets these apart from heavier American-style stuffed peppers.
Suitable For:
- Gluten-sensitive or Celiac folks – a hearty dinner with absolutely no wheat (rice and chickpea based filling).
- Family dinners – familiar enough for picky eaters, but with a fun Mediterranean flavor that adults will love too.
- Meal preppers and freezer stash builders – stuffed peppers freeze nicely; make extra for later.
- Anyone looking to eat more veggies – it’s a fun way to enjoy bell peppers and can be a vehicle for sneaking in other diced vegetables in the filling.
Tips & Tricks:
- Use an assortment of pepper colors (red, yellow, green) for a pretty presentation and slight differences in sweetness. Red and yellow are sweeter, while green are more robust.
- Pre-bake or parboil peppers for a few minutes if you like them very soft. If you prefer a little firmness (so they hold shape), you can skip pre-cooking – just extend bake time until rice is fully done.
- Cook the filling mixture on the stovetop first (especially if using ground meat) to let excess moisture evaporate and ensure the rice is nearly cooked. This prevents soggy or underdone peppers later (Greek Stuffed Peppers (Dairy and Gluten Free) | The Mediterranean Dish).
- Place stuffed peppers snugly in the baking dish; this helps them stay upright. Add a bit of water or tomato juice to the pan and cover while baking to steam the rice to perfection, then uncover at the end to brown the tops.
Possible Improvements:
- Top with a crumble of feta cheese or dairy-free cheese on the last 10 minutes of baking for a melty, salty finish (unless keeping it dairy-free).
- Swap the ground beef for ground turkey or lamb for a different flavor profile – lamb plus mint in the filling would give it a very Greek village feel.
- Serve with a side of tzatziki sauce (yogurt, cucumber, garlic dip) for dipping each bite – it adds a cool, creamy element that complements the peppers (or a vegan yogurt sauce if dairy-free).
- If you have extra filling and no peppers, stuff it in tomato halves or zucchini boats and bake – equally delicious! The blog even mentions stuffed tomatoes and other veggies as part of the Greek tradition (Greek Stuffed Peppers (Dairy and Gluten Free) | The Mediterranean Dish).
Read the Full Recipe Here: Greek Stuffed Peppers by The Mediterranean Dish (Greek Stuffed Peppers (Dairy and Gluten Free) | The Mediterranean Dish)
13. Indian Rice Kheer – Cardamom & Rose Infused Pudding
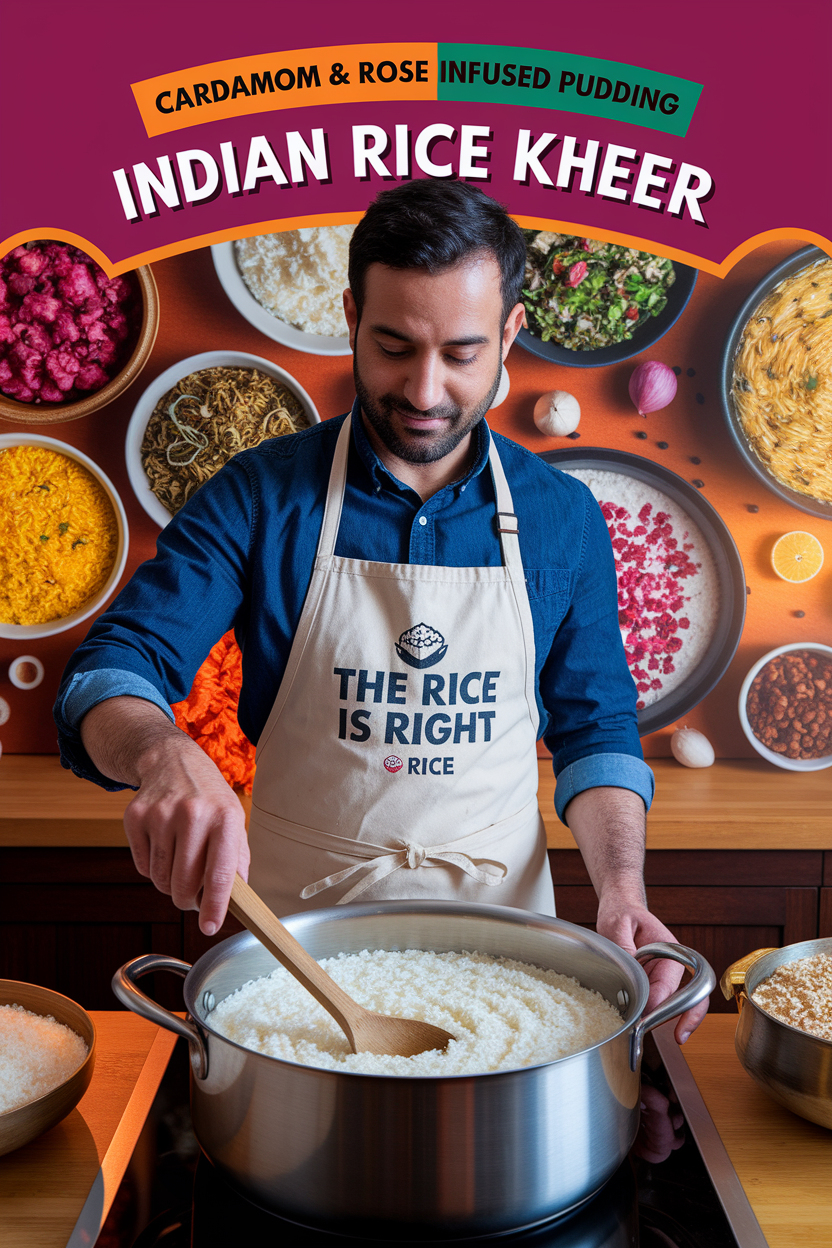
Description: Kheer is a creamy Indian rice pudding made by simmering rice, milk, and sugar until thick and luscious (Rice Kheer (Indian Rice Pudding) – Cook With Manali).
Flavored with fragrant cardamom and often topped with nuts and rose water, it’s an elegant yet easy dessert that’s served at festivals and celebrations. This kheer comes out rich, aromatic, and not overly sweet.
Imagine silky pudding textured with soft rice grains, studded with golden raisins or pistachios. It’s the perfect sweet finish to any meal, whether served warm or chilled.
Why It’s Great:
- Minimal Ingredients, Maximum Flavor – Just rice, milk, and sugar form the base (Rice Kheer (Indian Rice Pudding) – Cook With Manali), but the addition of cardamom, nuts, and a splash of rose water makes it taste exotic and luxurious (Rice Kheer (Indian Rice Pudding) – Cook With Manali).
- Comforting Tradition – Every Indian family has a version of kheer; it’s soul-soothing and nostalgic, yet universally appealing (who doesn’t like creamy pudding?).
- Gluten-Free Dessert – It’s naturally gluten-free and egg-free, relying on rice for its creamy body, so it suits many dietary needs.
- Make-Ahead Friendly – Kheer thickens and gets even more flavorful as it sits. You can make it ahead and chill – it tastes wonderful cold, like an ice cream-yogurt crossover.
Suitable For:
- Vegetarians – no gelatin or eggs, just dairy and rice. (Vegan possible with plant milk, though best texture comes from whole milk).
- Gluten-free sweet tooths – one of the most delightful wheat-free desserts out there.
- Those who enjoy chai spices and aromatic flavors – the cardamom and rose will be a treat for your senses.
- Anyone looking for a not-too-heavy dessert after a spicy meal – kheer cools and comforts the palate.
Tips & Tricks:
- Use a heavy-bottomed pot and stir often while simmering to prevent the milk and rice from sticking or burning at the bottom. Low and slow is the way to go for ultra-creamy kheer.
- Pre-soak the rice for 20-30 minutes before cooking. This helps the grains break down more and lends a creamier texture faster. Some even lightly crush the rice after soaking for an even silkier pudding.
- Sweeten to taste towards the end of cooking. Kheer can be adjusted – some like it very sweet, others mild. Remember the raisins (if added) will also lend sweetness as they plump.
- Kheer thickens significantly as it cools. If it becomes too thick, you can always stir in a bit more warm milk to loosen it to your desired consistency.
Possible Improvements:
- Toast the nuts (almonds, cashews, pistachios) in a bit of ghee (clarified butter) and also sauté some raisins until they puff – stir these in at the end or use as garnish for extra flavor.
- Add a few strands of saffron while cooking for a royal touch – saffron gives a lovely golden hue and a delicate aroma that pairs beautifully with cardamom (Rice Kheer (Indian Rice Pudding) – Cook With Manali).
- For a vegan version, use creamy almond milk or full-fat coconut milk. The flavor will differ (coconut kheer is its own delicious variant), but it will still be delightful.
- Serve it chilled in the summer or warm in the winter. You can even freeze kheer into popsicles for an Indian-inspired frozen treat!
Read the Full Recipe Here: Rice Kheer by Cook With Manali (Rice Kheer (Indian Rice Pudding) – Cook With Manali)
14. Thai Mango Sticky Rice – Tropical Dessert Classic

Description: A beloved Thai street dessert, mango sticky rice pairs sweet coconut-infused sticky rice with ripe juicy mangoes for a magical flavor combo.
The glutinous rice is steamed then soaked in sweetened coconut milk, making it sticky and rich. It’s served alongside sliced mango and drizzled with a little salted coconut sauce.
The result is an addictive mix of sweet, salty, and fruity flavors – the rice is creamy and slightly chewy, the mango bright and refreshing (Mango Sticky Rice Recipe – Hot Thai Kitchen) (Mango Sticky Rice Recipe – Hot Thai Kitchen).
This dessert is simple yet somehow greater than the sum of its parts, and it’s loved the world over (for good reason!).
Why It’s Great:
- World-Famous Flavor – This dish is arguably Thailand’s most famous dessert, adored by locals and travelers alike (Mango Sticky Rice Recipe – Hot Thai Kitchen). The contrast of rich coconut rice and fresh mango is pure bliss.
- Naturally Dairy-Free & Gluten-Free – It’s vegan friendly (made with coconut milk) and uses glutinous rice, which despite the name contains no gluten. Great for those with dietary restrictions who still want a decadent dessert.
- Few Ingredients – Just sticky rice, coconut milk, sugar, salt, and mango. A short ingredient list but the result is truly special and mind-blowing if you’ve never had it (Mango Sticky Rice Recipe – Hot Thai Kitchen).
- Elegant Yet Easy – It looks beautiful and feels exotic, but making it is straightforward. If you can cook rice, you can make mango sticky rice.
Suitable For:
- Vegans and lactose intolerant dessert lovers – all the creaminess with zero dairy.
- Summer gatherings – an excellent BBQ or picnic dessert when mangoes are in season; it’s served at room temp or cool, which is perfect for warm weather.
- Anyone wanting to experience Thai cuisine beyond the usual curries and noodles – this is a must-try sweet treat.
- Those who prefer less-baked desserts – no oven needed, just a bit of stove (or rice cooker/steamer) action.
Tips & Tricks:
- Use proper glutinous rice (sweet rice), often labeled as sticky rice. Other rice types won’t give the same stickiness. Soak it for at least 30 minutes (or up to 4 hours) to ensure even cooking.
- Steam the rice traditionally if possible (in a bamboo steamer or cheesecloth over boiling water) – it gives the best texture. If you don’t have a setup, a rice cooker or stove pot can work; just be gentle so it doesn’t turn mushy.
- Choose ripe mangoes – ideally the sweet yellow Asian mangoes (like Ataulfo or Nam Dok Mai variety) for authentic flavor. They should be fragrant and yielding to the touch.
- Don’t skip the pinch of salt in the coconut sauce and rice. That tiny bit of saltiness really elevates the sweetness and makes the flavor pop (it’s the secret that makes it addictive!). (Mango Sticky Rice Recipe – Hot Thai Kitchen)
Possible Improvements:
- If mangoes aren’t available, sticky rice is also great with other fruits like sliced peaches or strawberries – not traditional, but still tasty.
- Serve with a sprinkle of toasted mung beans or sesame seeds on top of the rice. In Thailand, crunchy mung beans are often sprinkled for a bit of texture contrast.
- Infuse the coconut milk with a few pandan leaves while heating it for an extra floral aroma (pandan is commonly used in Thai desserts). Just remove the leaves before mixing with rice.
- For presentation, mold the sticky rice into a mound or use a small bowl as a mold, then place the mango slices alongside – it makes it look restaurant-worthy.
Read the Full Recipe Here: Thai Mango Sticky Rice by Hot Thai Kitchen (Mango Sticky Rice Recipe – Hot Thai Kitchen)
15. Korean Bibimbap – Vibrant Mixed Rice Bowl
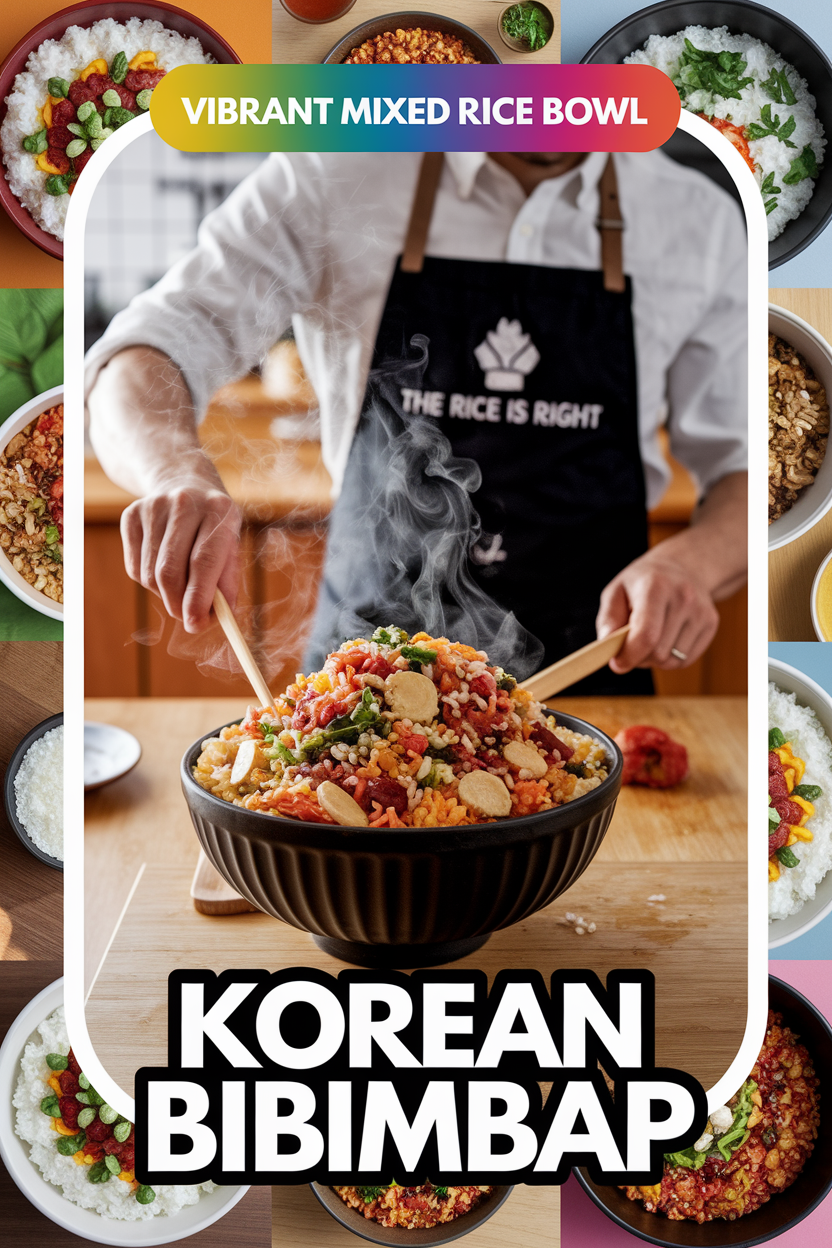
Description: Bibimbap literally means “mixed rice,” and it’s a Korean rice bowl that’s a feast for both the eyes and the taste buds.
A bowl of warm white rice is artfully topped with an assortment of sautéed vegetables, seasoned beef (or other protein), a fried egg, and a dollop of spicy-sweet gochujang sauce.
To eat, you mix everything together, so each bite has a bit of everything – crunchy veggies, savory meat, rich egg yolk, and flavorful sauce.
It’s colorful, nutritious, and absolutely delicious, often called the ultimate Korean comfort food (Bibimbap (Korean Mixed Rice with Meat and Assorted Vegetables) – My Korean Kitchen).
Why It’s Great:
- Balanced Meal – You’ve got protein, carbs, veggies, and healthy fats all in one bowl. It’s extremely satisfying and can be tailored to be as healthy as you like.
- Customizable & Fun – Use whatever veggies or proteins you have – common ones include carrots, spinach, bean sprouts, zucchini, mushrooms, bulgogi beef, etc. It’s a great way to use up leftover veggies (which is how bibimbap started) (Bibimbap (Korean Mixed Rice with Meat and Assorted Vegetables) – My Korean Kitchen).
- Interactive Eating – The presentation is beautiful, and everyone can mix their bowl to their preference. Add more sauce for spice, break the yolk and watch it coat the rice – it’s an experience!
- Bursting with Flavor and Textures – Hot, cold, crunchy, soft, spicy, savory – bibimbap has it all. No two bites are exactly the same, which keeps it exciting till the last spoonful.
Suitable For:
- Varied diets – Easily made vegetarian or vegan (skip meat and egg, use tofu or extra mushrooms). Already gluten-free if you use a GF gochujang or similar chili paste.
- Family meals – It’s like a DIY rice bowl bar if you set out all the toppings for people to assemble as they like.
- Meal preppers – you can prep all components in advance (various sautéed veggies keep in the fridge a few days) and assemble bowls on demand for quick lunches or dinners.
- Anyone who loves bowl meals like burrito bowls or Buddha bowls – this is a Korean twist with deeper flavors.
Tips & Tricks:
- Use day-old or cooled rice if possible – it’s a bit firmer and mixes better without getting mushy. In Korea, bibimbap is often made with fresh rice, but if yours is too sticky it can clump when mixing.
- Prep ingredients separately to keep flavors distinct. Sauté each vegetable type on its own with a pinch of salt or soy until just tender, then set aside. It may seem like extra work, but it ensures each topping is perfectly cooked and seasoned.
- A dolsot (hot stone bowl) is traditional for serving – it makes the rice touching the bowl crispy. If you have one, heat it and scoop rice in to form a crust. If not, you can mimic this by crisping some rice in a skillet and adding it to your bowl for texture.
- The gochujang sauce can be simply gochujang straight from the jar, or you can mellow it by mixing with a bit of sesame oil, sugar, and vinegar for a smoother mixing sauce. Adjust to your spice level preference.
Possible Improvements:
- Swap white rice for brown rice or quinoa for added fiber – unconventional but still tasty with the bibimbap treatment.
- If you like extra fermented flavor, add a bit of kimchi on top – it adds tang and crunch that pair well with everything (plus probiotics!).
- Top with nori (seaweed) strips or a sprinkle of sesame seeds to amplify the umami and add another layer of taste.
- For a saucier mix, also drizzle a touch of sesame oil and soy sauce over the rice before adding toppings; it gives the rice itself a seasoning boost once everything is mixed together.
Read the Full Recipe Here: Bibimbap (Korean Mixed Rice Bowl) by My Korean Kitchen (Bibimbap (Korean Mixed Rice with Meat and Assorted Vegetables) – My Korean Kitchen)
16. Sicilian Arancini – Crispy Fried Risotto Balls
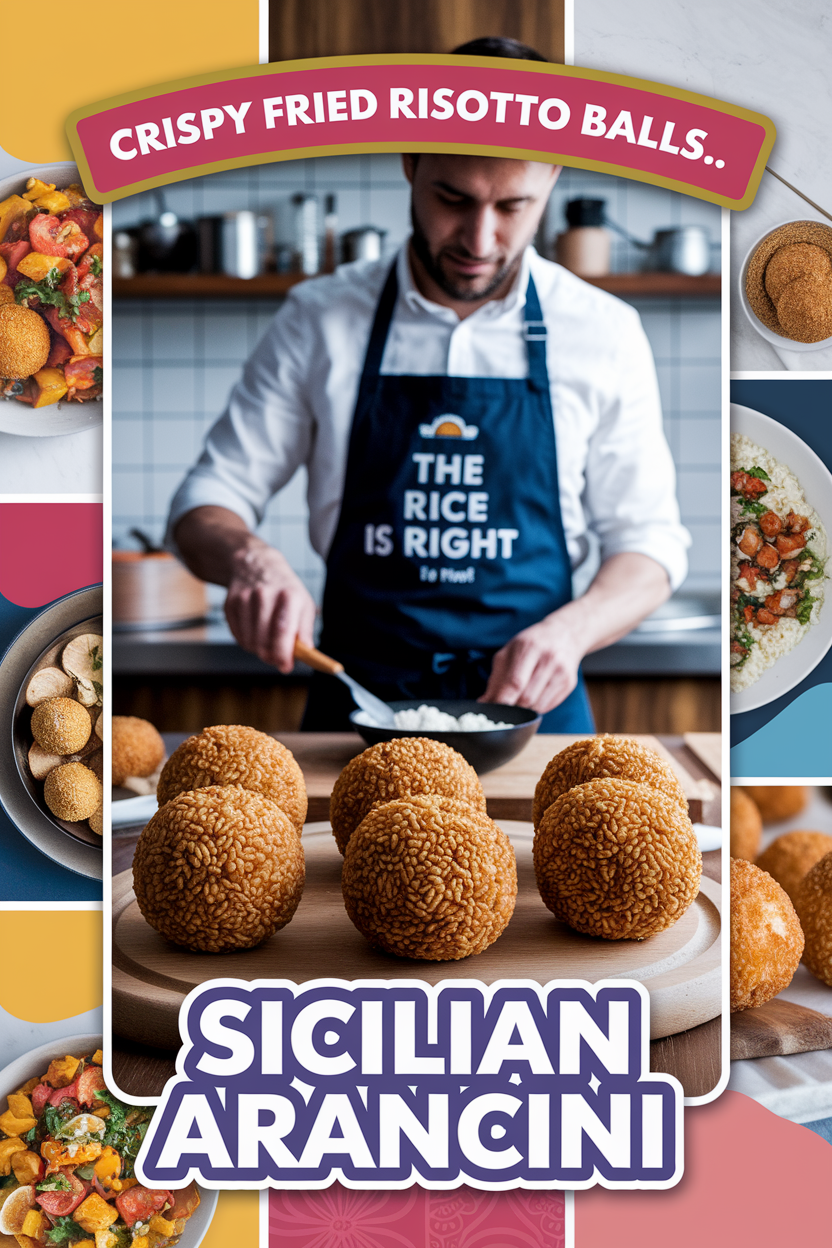
Description: Arancini are golden fried rice balls from Italy, famously from Sicily.
They start with a creamy risotto (often leftover from last night’s dinner), which is cooled, stuffed with a bit of mozzarella or meat ragù, rolled in breadcrumbs, and deep fried until crunchy on the outside and gooey-cheesy inside (arancini (fried Italian rice balls) | With Spice).
These arancini have a decadent mix of parmesan risotto and smoky mozzarella within, delivering pure comfort in every bite. They’re the ultimate savory snack or appetizer – like sophisticated mozzarella sticks with an Italian twist!
Why It’s Great:
- Indulgent & Irresistible – Crunchy, creamy, oozy cheese… need we say more? It’s a luxurious treat that feels like restaurant-quality Italian street food (arancini (fried Italian rice balls) | With Spice).
- Innovative Leftover Makeover – Got leftover risotto or rice? Arancini reinvent it into something arguably even more delicious, proving no rice need go to waste (arancini (fried Italian rice balls) | With Spice).
- Customizable Filling – While this recipe keeps it simple with mozzarella and parmesan (arancini (fried Italian rice balls) | With Spice), arancini can be filled with anything from meat sauce to peas. You can modify to your taste or use what you have.
- Crowd-Pleaser – These are fantastic party appetizers; people grab them and swoon at that first melty bite. Bet you can’t eat just one!
Suitable For:
- Party appetizers or game-day snacks – Great finger food that will disappear quickly.
- Kids and adults alike – Who wouldn’t like a fried cheesy rice ball? It appeals to all ages (just serve kids a marinara dip and they’re sold).
- Those following a gluten-free diet (with adaptations) – use gluten-free breadcrumbs and you have a totally GF indulgence.
- Vegetarian friendly – this recipe is veggie (just cheese), though you can also include meat in some versions.
Tips & Tricks:
- It’s easier to work with cold risotto – chill it for a couple of hours or overnight so it’s firm. This makes shaping the balls around the filling much simpler.
- When forming, keep your hands slightly damp to prevent the rice from sticking to you instead of itself.
- Make sure the cheese cubes for the center are well-chilled or even frozen for 10 minutes. This helps them stay in the center and not ooze out before the coating crisps up.
- Fry at the right oil temperature (around 350°F / 175°C). Too low and they’ll absorb oil and fall apart; too high and they’ll brown too fast before heating through. A few minutes until golden all around is usually perfect.
Possible Improvements:
- Try different flavor variations as suggested by the blogger (arancini (fried Italian rice balls) | With Spice): e.g., stir in some pumpkin puree for butternut squash arancini with smoked cheese, or peas and ham with Fontina – the possibilities are endless.
- Serve with a simple marinara or pesto dipping sauce to accent the flavors, though they’re great on their own too.
- Bake or air-fry for a lighter version. Brush or spray with oil and bake at 400°F, turning once, until golden. They won’t be quite as uniformly crunchy, but you’ll still get a nice crisp exterior.
- Make mini arancini and stick a toothpick in each for a bite-sized hors d’oeuvre spin – adorable and even easier to munch.
Read the Full Recipe Here: Arancini (Fried Italian Rice Balls) by With Spice (arancini (fried Italian rice balls) | With Spice)
17. Cheesy Chicken Broccoli Rice Casserole – Easy Comfort Classic

Description: This is American comfort food at its best – a creamy, cheesy casserole that marries tender chicken, broccoli florets, and rice in a one-dish bake.
Using rotisserie chicken and simple pantry ingredients, it’s the ultimate weeknight hero: just mix everything in a dish and bake until bubbly (Cheesy Chicken Broccoli and Rice Casserole -Mom On Timeout).
The result is a crowd-pleasing dinner with melty cheddar cheese throughout and atop, hearty bites of chicken, and sneaky veggies. It’s the kind of dish both kids and adults devour happily, and it couldn’t be easier to make.
Why It’s Great:
- Ridiculously Easy – This “dump-and-bake” recipe takes about 10 minutes of prep and no extra pots (Dump-and-Bake Chicken Broccoli Rice Casserole). The oven does all the work while you tend to other things.
- Family Favorite – Creamy, cheesy rice with broccoli and chicken is a tried-and-true combination that even picky eaters love (Cheesy Chicken Broccoli and Rice Casserole -Mom On Timeout). It’s comfort in every bite, sure to become a regular request.
- One-Dish Meal – You have protein, starch, and veggie in one casserole, so dinner is truly complete without needing multiple sides.
- Make-Ahead & Freezer Friendly – Assemble it earlier in the day (or freeze for later) and just bake when ready. Great for busy nights when you want something home-cooked.
Suitable For:
- Busy weeknights – when you need dinner on the table with minimal effort and maximal yum.
- Kids and fussy eaters – creamy rice and cheese help the broccoli go down easy; it’s a hit with young palates.
- Meal trains or potlucks – travels well, reheats well, and tastes like a warm hug – perfect for sharing with neighbors or a family in need of a comforting meal.
- Those who prefer gluten-free casseroles – unlike many, this recipe doesn’t rely on canned soup (can be made with a homemade sauce or GF cream soup), and rice is the base, so it’s easy to ensure it’s GF.
Tips & Tricks:
- If you’re in a rush, use microwave steam-in-bag broccoli or frozen broccoli florets (thawed) – they’ll cook through in the casserole and saves time on chopping.
- Opt for whole grain brown rice for extra fiber if you’d like, but precook it first. The recipe timing assumes cooked or at least parboiled rice (some versions even use instant rice to skip pre-cooking).
- Stir a little garlic powder or mustard powder into the mix for an extra flavor boost. A pinch of chili flakes can also balance the richness with a hint of heat.
- Let the casserole rest for 5–10 minutes after baking. This helps it set a bit so serving is cleaner (and prevents mouth burns from molten cheese!).
Possible Improvements:
- Top with something crunchy for contrast – a layer of buttered bread crumbs or crushed Ritz crackers in the last 10 minutes of baking creates a delightful crispy topping.
- Swap cheddar for other cheeses like Monterey Jack or a bit of Parmesan for a different cheese profile. Pepper Jack can add a little kick.
- No chicken? No problem – turn it into a vegetarian casserole by doubling the broccoli, adding some sautéed mushrooms, or tossing in chickpeas for protein.
- If you want to avoid canned soup entirely, make a quick homemade cheese sauce (butter, flour, milk, cheese) and use that – it might take a few more minutes but gives you control over ingredients.
- Many bloggers note it’s “the easiest meal… sure to become a new family favorite” for good reason! (Cheesy Chicken Broccoli and Rice Casserole -Mom On Timeout).
Read the Full Recipe Here: Chicken Broccoli Rice Casserole by Mom On Timeout (Cheesy Chicken Broccoli and Rice Casserole -Mom On Timeout)
18. Middle Eastern Mujadara – Lentils and Rice with Caramelized Onions

Description: Mujadara (or Mujaddara) is a humble yet deeply flavorful dish of spiced lentils and rice topped with sweet caramelized onions. A staple throughout the Middle East, it combines pantry basics into something downright addictive.
The rice and lentils are cooked together with cumin, garlic, and bay leaf, then piled high with onions that have been slow-cooked until golden brown and jammy.
Served with a side of yogurt or a fresh salad, mujadara is comfort food that’s wholesome and vegan (Mujadara (Lentils and Rice with Caramelized Onions) – Cookie and Kate).
It turns simple ingredients into a fragrant pilaf that’s satisfying and nutritious.
Why It’s Great:
- Economical & Accessible – Made from kitchen staples (dry lentils, rice, onions, spices) – it’s very budget-friendly yet yields a big pot of delicious food.
- High in Protein & Fiber – The combo of lentils and rice provides complete protein and plenty of fiber, keeping you full and energized with purely plant-based ingredients.
- Deeply Satisfying Flavor – The long-cooked onions add an almost smoky sweetness that transforms the modest lentils and rice into something crave-worthy. Warm spices like cumin add earthy depth (Mujadara (Lentils and Rice with Caramelized Onions) – Cookie and Kate).
- One-Pot Cooking – Everything (except the onion topping) cooks in one pot, and even the onion can be done in the same pot beforehand. It’s straightforward and hearty.
Suitable For:
- Vegans and vegetarians – it’s a protein-rich main dish that doesn’t rely on any animal products.
- Healthy eaters – nutrient-dense and made with whole foods, mujadara is great for those focused on balanced eating (it’s even appropriate for many weight-loss or diabetic meal plans because of the high fiber).
- Gluten-free diets – naturally gluten-free and grain-based.
- Anyone exploring global cuisines with gentle flavors – it’s not spicy-hot, just warmly spiced and comforting, so even cautious eaters will enjoy it.
Tips & Tricks:
- Use brown or green lentils, not red lentils. Red lentils turn to mush (they’re great for soups, not for pilaf). Brown/green lentils hold their shape and have a nice bite that pairs well with rice (Mujadara (Lentils and Rice with Caramelized Onions) – Cookie and Kate).
- Start with more water/broth than you think, especially if using brown rice. You can always drain excess liquid at the end if needed, but the lentils need enough liquid to get tender when cooking alongside rice.
- Cook the onions slowly. Caramelized onions can take 20-30 minutes – but they are the heart of mujadara’s flavor. Stir frequently and be patient until they turn a deep amber brown (Mujadara (Lentils and Rice with Caramelized Onions) – Cookie and Kate). Make extra; you won’t regret it!
- Don’t skip the yogurt or lemony salad on the side (even the recipe suggests yogurt’s creamy tang to unite the pilaf and onions (Mujadara (Lentils and Rice with Caramelized Onions) – Cookie and Kate)). That acidity or creaminess really balances the dish and elevates the eating experience.
Possible Improvements:
- Top each serving with some fried shallots (store-bought or homemade) if you want even more crunch besides the soft caramelized onions.
- Serve with a refreshingly tart side, like cucumber-tomato salad or tzatziki. The contrast of bright and rich makes the meal exciting.
- If you have leftovers, form them into little patties and pan-fry – believe it or not, mujadara cakes with a bit of za’atar spice on top are fantastic (as one commenter noted, they made leftover mujadara into crispy little patties and loved it) (Mujadara (Lentils and Rice with Caramelized Onions) – Cookie and Kate) (Mujadara (Lentils and Rice with Caramelized Onions) – Cookie and Kate).
- For a greener take, stir in a handful of spinach or chopped cilantro at the end for a pop of color and freshness against the earthiness of the dish.
Read the Full Recipe Here: Mujadara (Lentils and Rice) by Cookie & Kate (Mujadara (Lentils and Rice with Caramelized Onions) – Cookie and Kate)
19. Persian Jeweled Rice – Festive Fruity Pilaf
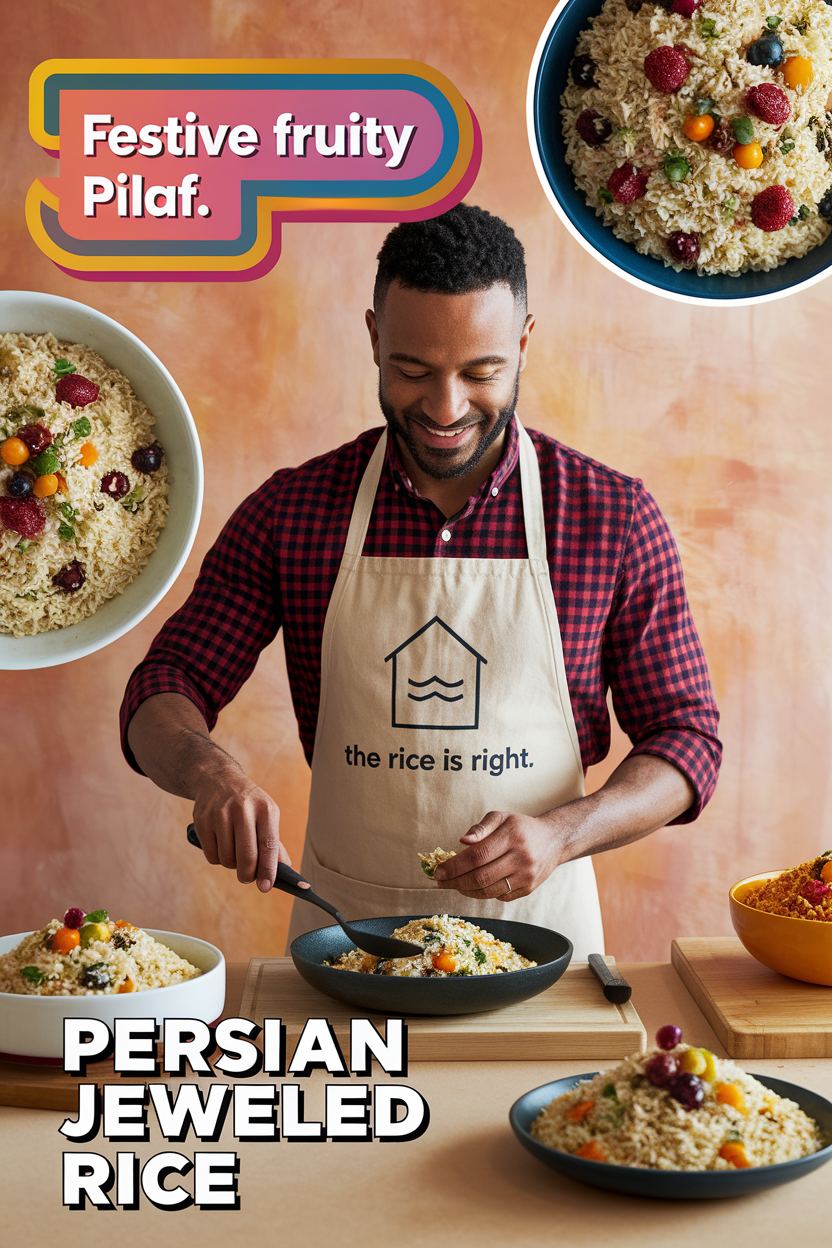
Description: Persian Jeweled Rice, known as Javaher Polow, is an absolutely show-stopping rice pilaf that lives up to its name.
Basmati rice is cooked until fluffy and then mixed with a dazzling array of “jewels”: candied orange peel, dried apricots, pistachios, almonds, raisins or barberries, and often pomegranate seeds.
Flavored with fragrant spices like saffron, cardamom, and cumin, the rice comes out sweet, savory, and aromatic.
It’s gluten-free, vegan, and incredibly delicious – a true celebration on the plate (Persian Jeweled Rice • Show Stopping!). Often served at weddings and holidays, this dish turns any meal into a special occasion.
Why It’s Great:
- Visually Stunning – Studded with colorful fruits and bright green nuts, it looks like a treasure chest of gems was tossed into your rice (Persian Jeweled Rice • Show Stopping!). It will be the prettiest dish on the table, guaranteed.
- Complex Flavors – The mix of sweet (from dried fruits), savory (spices and rice), and a touch of tart (often from barberries or pomegranate) creates an unforgettable flavor profile that’s festive and exotic.
- Holiday-Worthy – As the blog says, it’s a “show stopping side for Thanksgiving and Christmas” (Persian Jeweled Rice • Show Stopping!). It can elevate a simple roast chicken or turkey to a feast.
- Naturally Vegan & GF – It accommodates guests with dietary restrictions gracefully, without feeling like any kind of compromise (everyone will love it).
Suitable For:
- Special occasions – weddings, anniversaries, holiday dinners, or whenever you want to impress guests with a unique dish.
- Vegetarian/Vegan diets – it’s hearty and satisfying as a main or side, and pairs beautifully with other vegetarian dishes or meats.
- Persian cuisine enthusiasts – if you enjoy dishes like tahdig (crispy rice) or pilafs, this is a must-try iconic recipe.
- Cooks who love a project – this recipe has a few steps (candying orange peel, etc.) but is worth the effort for the reward in both presentation and taste.
Tips & Tricks:
- Parboil and steam the rice: Persian rice is often parboiled then drained and steamed with butter/oil to get individual grains that are fluffy. Don’t skip rinsing and parboiling basmati – it ensures the rice doesn’t clump and each grain stays separate.
- For the classic touch, create a tahdig (crispy bottom). Add a bit of oil/butter and maybe a layer of thin flatbread or potato slices at the bottom of your pot when steaming the rice. The resulting golden crust is a prized part of the dish.
- Soak the dried fruits in a little hot water or orange juice to plump them up before cooking; this keeps them soft and juicy in the rice.
- Use real saffron if possible. Steep a pinch of saffron in hot water and drizzle it over parts of the rice to create beautiful golden patches and that unmistakable floral aroma.
Possible Improvements:
- If you can’t find barberries (sour little berries), use dried cranberries or tart cherries as a substitute for that tangy note.
- Add some protein to make it a full meal – chickpeas can be mixed in for a vegan protein boost, or sautéed chicken bits for a non-veg option (though it may stray from tradition).
- Control the sweetness by adjusting the amount of sugar used in candying and the quantity of dried fruit. It should be pleasantly sweet-scented, not dessert-like.
- Garnish with fresh pomegranate seeds on top just before serving (if in season) – they add an extra burst of color and fresh tartness that complements the cooked fruits. It truly looks like jewels!
Read the Full Recipe Here: Persian Jeweled Rice by The View from Great Island (Persian Jeweled Rice • Show Stopping!)
20. Brown Butter Rice Krispie Treats – Upgraded Childhood Snack

Description: This recipe takes the classic Rice Krispie treats you loved as a kid and gives them a gourmet upgrade.
By browning the butter and adding chocolatey toffee bits, these treats become extra gooey, nutty, and decadent (Brown Butter Rice Krispie Treats | Butternut Bakery).
They’re still as easy as ever – a no-bake mix of puffed rice cereal and marshmallows – but the brown butter imparts a deep caramel flavor and a sprinkle of sea salt makes them utterly crave-worthy.
In short, it’s everything a traditional Rice Krispie treat should be, only better (Brown Butter Rice Krispie Treats | Butternut Bakery)!
Why It’s Great:
- Super Easy & No-Bake – Just a stovetop melt-and-mix, then let them set. You get a big payoff in flavor with very little actual cooking time or skill needed.
- Next-Level Flavor – Browning the butter brings out a rich, nutty aroma that transforms these bars from simple to superb (Brown Butter Rice Krispie Treats | Butternut Bakery). The added toffee and a touch of salt create that salty-sweet bliss that keeps you coming back for more.
- Extra Gooey Perfection – This recipe fine-tunes the ratios for maximum gooeyness (Brown Butter Rice Krispie Treats | Butternut Bakery), ensuring the treats are soft and chewy (no dry, brick-like squares here).
- Crowd Favorite – Nostalgic for adults and delightful for kids, these treats win over everyone at potlucks, parties, or as an after-school snack. They disappear fast!
Suitable For:
- Busy schedules – need dessert in a pinch? These come together in about 10 minutes (plus cooling time).
- No oven required – great for hot days or dorm kitchens, or baking with kids safely.
- Kids’ events and bake sales – beloved by kids, but with a gourmet twist that intrigues adults too.
- Gluten-free sweet tooths – most rice cereals and marshmallows are GF (always double-check labels), so you can easily make this treat celiac-friendly.
Tips & Tricks:
- Low and slow when melting the butter to brown it – stir and watch carefully; butter goes from browned to burnt quickly. As soon as it smells nutty and has amber-brown bits, turn off the heat and proceed with marshmallows.
- Use fresh marshmallows. Stale marshmallows don’t melt as nicely and can yield dry bars. Same goes for the cereal – fresh, crispy rice cereal is key for the ideal texture.
- Don’t over-pack the mixture into the pan. Press it in gently with buttered hands or a spatula. If you compact it too much, the treats can become dense.
- For clean cuts, let the treats cool completely (you can refrigerate briefly) and use a sharp knife greased with a bit of butter or cooking spray.
Possible Improvements:
- The recipe adds toffee and a drizzle of chocolate – you can play with mix-ins: try M&M’s, peanut butter cups, or dried fruit and nuts for different themes.
- Sprinkle flaky sea salt on top of the treats after pressing them in the pan for that gourmet sweet-salt contrast in each bite (if you love sweet & salty).
- Make them festive by adding food coloring to the marshmallow mix (orange for Halloween, green and red candies for Christmas, etc.) or topping with sprinkles for birthdays.
- If you want an even gooier experience, reserve a handful of mini marshmallows and stir them in at the last moment before pressing the mixture into the pan – they’ll stay partially intact, giving pockets of marshmallow in the finished treats.
Read the Full Recipe Here: Brown Butter Rice Krispie Treats by Butternut Bakery (Brown Butter Rice Krispie Treats | Butternut Bakery)
Conclusion
It’s clear that rice truly is a culinary chameleon. As these 20 recipes illustrate, rice can be creamy or crispy, savory or sweet, humble or elevated.
Its versatility crosses boundaries of meal type and cuisine: you can start your morning with a soul-warming porridge, crunch on a rice snack at midday, savor a spiced rice entrée for dinner, and even sip a sweet rice drink or indulge in a rice-based dessert.
Food bloggers have embraced this flexibility, crafting inventive recipes that make the most of rice’s blank-slate nature while infusing it with exciting flavors and textures.
Next time you peer into your pantry and see a bag of rice, remember that you’re holding the key to a world of dishes – from the comforting to the exotic. We hope this list inspires you to try something new, be it a cuisine you haven’t cooked before or a fresh twist on an old favorite.
With rice as your starting point, you can’t go wrong. So go ahead – experiment with that recipe you’ve never made, mix up your own unique rice bowl, or put a creative spin on a classic. The possibilities are endless, and deliciousness is guaranteed. Happy cooking and enjoy your rice adventures!