
Bananas are one of the most versatile fruits in cooking and baking. Naturally sweet and packed with nutrients, they seamlessly fit into every meal of the day – from wholesome breakfasts to decadent desserts.
Home cooks love bananas for their ability to add moisture in baked goods, creaminess in smoothies, and natural sweetness as a healthier sugar substitute. Moreover, bananas cater to a variety of dietary needs: they can replace eggs in vegan baking, bring fiber to gluten-free recipes, or add indulgence to a paleo or keto treat in moderation.
It’s no surprise that banana recipes are gaining popularity across different diets – they’re comforting, flavorful, and adaptable. Below you’ll find 19 unique banana recipes spanning vegan, gluten-free, high-protein, keto-friendly, dairy-free options and more.
We’ve included sweet and savory dishes, baked goods, frozen treats, and even drinks. Each recipe comes from a different source and has been loved by home cooks (many boast numerous 5-star reviews!), ensuring you get tried-and-true favorites.
Enjoy this banana-infused journey and get ready to be inspired by the fruit’s incredible versatility!
1. Vegan Banana Bread
Brief Overview: This vegan banana bread is a moist, tender loaf made without eggs or dairy. Ripe mashed bananas, brown sugar, and a splash of vanilla give it classic sweetness, while coconut oil (or vegetable oil) adds richness. A touch of cinnamon enhances the banana flavor.
The preparation is simple: mix wet ingredients (bananas, sugar, oil, non-dairy milk, vanilla) with dry ingredients (flour, baking soda, salt, spice) in one bowl, fold in optional walnuts or vegan chocolate chips, then bake.
The result is a golden-brown banana bread that’s fluffy yet hearty – perfect for breakfast or an anytime snack.
Nutritional Profile: (per slice, with mix-ins)
| Calories | Protein | Fat | Carbs |
|---|---|---|---|
| 207 kcal | 2.5 g | 7.3 g | 38.4 g |
Why It’s Great: This recipe proves you don’t need eggs or butter for amazing banana bread. It’s 100% plant-based and still incredibly flavorful and soft. The bananas act as a binder and sweetener, yielding a loaf that “practically melts in your mouth” rainbowplantlife.com.
It has the nostalgic taste of traditional banana bread, so even non-vegans rave about it. Plus, it’s a one-bowl recipe – easy cleanup and perfect for beginner bakers. With hundreds of positive comments from readers, it’s a crowd-pleaser that no one will guess is vegan.
Who Benefits: Ideal for vegans and dairy-free eaters looking for a classic treat. It’s also great for families (kids love it!) and meal preppers – bake a loaf and enjoy slices through the week. Health-conscious folks appreciate that it uses heart-healthy oils and zero animal fats.
Possible Variations: You can customize it by stirring in chopped pecans, dairy-free chocolate chips, or even blueberries for a twist. Swap half the all-purpose flour with whole wheat flour for extra fiber.
If you prefer refined-sugar-free, replace brown sugar with coconut sugar or maple syrup (the texture may be slightly denser). For a gluten-free version, use a 1:1 gluten-free flour blend.
Cooking Tips: Use overripe bananas (lots of brown spots) for the sweetest, most moist bread. Don’t overmix the batter – combine just until you no longer see dry flour to avoid a tough texture. If adding mix-ins like nuts, toss them in a bit of flour first; this prevents sinking. Finally, let the bread cool before slicing for the best structure.
Link to Source: Read the full recipe here: https://www.ambitiouskitchen.com/vegan-banana-bread/
2. Banana Oatmeal Cookies Gluten-Free & Vegan

Brief Overview: These banana oatmeal cookies are soft, chewy treats made with just a handful of wholesome ingredients. They feature mashed bananas, rolled oats, and coconut oil as the base, creating a naturally gluten-free and egg-free cookie.
A bit of brown sugar (or coconut sugar) sweetens the dough, and vanilla plus cinnamon add cozy flavor. Everything mixes in one bowl – no mixer needed.
Fold in dark chocolate chips or raisins, then drop spoonfuls of dough onto a baking sheet. In about 12–15 minutes of baking, you’ll have golden-brown oatmeal cookies that taste like banana bread in cookie form!
Nutritional Profile: (per cookie)
| Calories | Protein | Fat | Carbs |
|---|---|---|---|
| 171 kcal | 2 g | 6 g | 27 g |
Why It’s Great: With no flour, butter, or eggs, these cookies are a clean-eating delight that still satisfy a sweet tooth. They’re naturally vegan, dairy-free, and gluten-free, making them friendly to many diets.
The ripe bananas keep them moist and tender (and act as an egg replacer), while oats provide fiber. Each bite bursts with real banana flavor and a hint of cinnamon.
They’re also very easy to make – perfect for when you have overripe bananas but want something other than banana bread. Kids and adults alike give these cookies a thumbs up for their soft, cake-like texture and wholesome sweetness.
Who Benefits: Gluten-sensitive and vegan bakers will love this recipe as a tasty treat that meets their needs. It’s also great for kids’ snacks, since it’s free of common allergens (just use certified gluten-free oats). Fitness enthusiasts can appreciate the energizing carbs and minimal added sugar – an ideal pre-workout bite or healthy dessert.
Possible Variations: Mix in chopped nuts (walnuts or almonds work well) or seeds for crunch and healthy fats. You can replace the chocolate chips with dried cranberries or coconut flakes for a different twist.
For a refined sugar-free version, use maple syrup in the dough instead of brown sugar, or make them entirely sugar-free if your bananas are ultra-sweet. You could even turn this recipe into breakfast bars by pressing the dough into a pan and slicing into bars after baking.
Cooking Tips: If you prefer a firmer cookie, refrigerate the dough for 30 minutes before baking – this helps them hold their shape. Use really ripe bananas (the ones with lots of brown spots) for maximum natural sweetness and banana flavor.
When baking, look for the cookie edges to turn lightly golden; the centers may look slightly underdone but will set as they cool, yielding a soft texture. Store leftover cookies in an airtight container – they actually stay soft and get more flavorful the next day!
Link to Source: Read the full recipe here: https://www.mamaknowsglutenfree.com/banana-oatmeal-cookies/
3. 2-Ingredient Banana Pancakes Gluten-Free

Brief Overview: This genius recipe turns just 1 ripe banana and 2 eggs into fluffy little pancakes – no flour needed! To make them, mash a banana in a bowl, whisk in two eggs until you have a batter, and cook small pancakes on a griddle or nonstick pan. That’s it!
Despite the short ingredient list, these pancakes turn out sweet (thanks to the banana) and lightly custardy on the inside with a golden exterior. They cook up in minutes and are perfect for busy mornings. You can top them like traditional pancakes – think fresh fruit, a drizzle of maple syrup, or peanut butter.
Nutritional Profile: (per small pancake, yield ~8)
| Calories | Protein | Fat | Carbs |
|---|---|---|---|
| 93 kcal | 6 g | 6 g | 7 g |
Why It’s Great: These 2-ingredient banana pancakes are incredibly simple and wholesome. They pack protein from the eggs and potassium from the banana, making them a light yet satisfying breakfast. With no refined flour or sugar, they fit perfectly into paleo or gluten-free diets.
The texture is tender – almost like a cross between French toast and a pancake simplyrecipes.com, simplyrecipes.com. They’re also a fantastic way to use up an overripe banana in a pinch.
Home cooks love how quick and easy this recipe is (ready in ~10 minutes) and that it yields such yummy results from pantry staples.
Who Benefits: These pancakes are a dream come true for fitness enthusiasts or anyone watching their carbs, since they are low-carb and high-protein. Busy individuals (students, parents, etc.) will appreciate the minimal prep and cleanup.
They’re also great for kids, including toddlers – a fun finger food that sneaks in fruit and protein (popular on sites for young eaters yummytoddlerfood.com). Additionally, if you follow a gluten-free or grain-free diet, this recipe gives you a pancake breakfast without special flours.
Possible Variations: While delicious plain, you can jazz them up by stirring a pinch of baking powder into the batter for extra fluffiness, or a dash of cinnamon or vanilla for flavor.
Try mixing in a spoonful of peanut butter or cocoa powder to the batter for a twist (e.g., chocolate banana pancakes!).
You can also sprinkle add-ins onto each pancake as it cooks – like fresh blueberries, chopped pecans, or even a few chocolate chips – before flipping. For an extra indulgence, top your stack with Greek yogurt and honey or a dollop of almond butter and sliced bananas.
Cooking Tips: Keep them small (silver-dollar size) – about 2 tablespoons of batter per pancake – as they can be delicate when flipping without flour simplyrecipes.com. Cook on medium heat and be patient; let the first side set fully and turn golden before attempting to flip (about 1–2 minutes).
A thin, flexible spatula works best to gently flip these pancakes simplyrecipes.com. If the batter seems too runny, you can blend in a tablespoon of oats or almond flour, but most find it works great as-is. Serve the pancakes warm; they’re best fresh off the pan when the edges are slightly crisp.
Link to Source: Read the full recipe here: https://www.simplyrecipes.com/two-ingredient-banana-pancakes-recipe-8761574
4. Banana Nice Cream Dairy-Free Frozen Dessert
Brief Overview: “Nice cream” is the magical healthy ice cream made from just frozen bananas. This recipe shows you how to blend sliced, frozen bananas into a creamy, soft-serve-like ice cream base – no dairy or added sugar required!
A splash of vanilla and a few tablespoons of non-dairy milk help the bananas blend smoothly. You can enjoy the banana nice cream as-is (it tastes like a sweet vanilla-banana gelato), or get creative with mix-ins.
The source recipe even provides 4 flavor variations: vanilla, chocolate (with cocoa powder), strawberry (with frozen berries), and peanut butter feelgoodfoodie.net. Once blended, you can eat it immediately for a soft-serve texture or freeze it an hour for a firmer scoop.
Nutritional Profile: (per serving, vanilla flavor)
| Calories | Protein | Fat | Carbs |
|---|---|---|---|
| 121 kcal | 2 g | 1 g | 30 g |
Why It’s Great: This dessert is a game-changer for those who want a sweet treat without guilt. It’s vegan, dairy-free, and has no added sugars – all the sweetness comes from ripe bananas.
Yet it truly feels like ice cream: thick, creamy, and cold. Bananas are rich in fiber and potassium, so you’re getting nutrients while indulging. The recipe is also extremely easy (just blend!) and budget-friendly.
It has a 5-star rating from dozens of users feelgoodfoodie.net, many amazed that something so simple can taste so good. It’s a wonderful way to satisfy ice cream cravings on a hot day or post-workout, using just natural ingredients.
Who Benefits: Vegans, lactose-intolerant folks, and anyone cutting back on refined sugar will adore this. Weight watchers or those on a clean-eating plan can enjoy “ice cream” with no cream at all. It’s also kid-friendly – children love the sweetness and fun of nice cream (and parents love that it’s just fruit!).
If you’re following a paleo or whole-food diet, this fits perfectly as a dessert or even a quick energy snack.
Possible Variations: The flavor options are endless. For chocolate nice cream, blend in a spoonful of cocoa powder (and a few dairy-free chocolate chips for texture). For strawberry, add a handful of frozen strawberries.
Peanut butter nice cream simply needs a tablespoon or two of peanut butter. You can also make mint-chocolate chip by blending in a few mint leaves or mint extract and stirring in chopped dark chocolate.
Another idea: swirl in some coconut cream and pineapple for a “banana colada” vibe. Feel free to top your nice cream with chopped nuts, granola, or a drizzle of chocolate syrup when serving.
Cooking Tips: Use very ripe bananas before freezing – the riper they are, the sweeter your nice cream. Slice the bananas and freeze the pieces on a tray so they don’t clump, for at least 4-6 hours (or overnight).
When blending, a powerful blender or food processor works best; if it’s struggling, add a splash more non-dairy milk gradually. Scrape down the sides of the blender as needed.
Blend until just smooth – over-blending can melt it. If the nice cream is too soft, pop it in the freezer for 30 minutes to firm up. Because it’s free of preservatives, homemade nice cream is best eaten fresh or within a day of freezing (it can get very hard if left too long – just thaw a bit and re-blend).
Link to Source: Read the full recipe here: https://feelgoodfoodie.net/recipe/nice-cream/
5. Low-Carb Keto Banana Bread
Brief Overview: This clever banana bread uses almond flour, eggs, and a touch of real banana to deliver a low-carb loaf that tastes like the classic. It’s naturally gluten-free and grain-free.
The batter mixes almond flour with baking powder, a little sweetener (like erythritol or stevia for keto), and is enriched with eggs and melted butter (or coconut oil).
Instead of multiple bananas, this recipe uses just ½ cup of mashed banana in the entire loaf for flavor sugarfreelondoner.com, sugarfreelondoner.com – that’s about one large banana, keeping net carbs low but still providing authentic banana taste and moisture.
The result is a moist, slightly dense bread with a sweet banana aroma and nutty richness from the almond flour. Each slice satisfies banana bread cravings without spiking blood sugar.
Nutritional Profile: (per slice, 1/10 of loaf)
| Calories | Protein | Fat | Carbs (Net) |
|---|---|---|---|
| 205 kcal | 8 g | 17.2 g | 6.4 g (4.4 g net) |
Why It’s Great: Banana on keto? Yes, it’s possible – this recipe has cracked the code! By using just enough banana for flavor and relying on almond flour and eggs, it keeps the carb count keto-friendly (about 4g net carbs per slice sugarfreelondoner.com, indianhealthyrecipes.com).
It has received tons of 5-star reviews from low-carb bakers who “can’t believe how close to real banana bread this tastes” sugarfreelondoner.com. The bread is sweet, fragrant, and moist – everything you want in banana bread, just without the sugar rush.
It’s also high in healthy fats and protein, making it quite filling. Whether you’re on keto, diabetic, or just cutting sugar, this treat lets you join in on banana bread nostalgia guilt-free.
Who Benefits: Obviously, keto dieters and those managing carbs will benefit – finally a banana bread they can enjoy. It’s also great for paleo or grain-free eaters (just use a paleo-approved sweetener or a bit of honey if not strictly keto).
Anyone who wants to reduce refined flour intake can try this as a nutrient-dense alternative. It’s a smart choice for diabetics since it won’t spike blood sugar like traditional banana bread. And families trying to lower sugar consumption will find this a kid-approved breakfast or snack.
Possible Variations: Stir in chopped walnuts or pecans for a banana-nut bread (they add very few extra carbs). A dash of cinnamon or nutmeg can give a warming spice twist.
If you truly want zero banana (for even fewer carbs), some bakers replace the banana with pumpkin puree or zucchini – but then you might add a banana extract for the flavor. You can also bake this batter as muffins; just adjust the baking time (about 20–25 minutes for standard muffins).
Cooking Tips: Use finely ground almond flour (not almond meal) for the best texture – this ensures the bread isn’t grainy. Do not skip the small amount of mashed banana; it’s key for flavor and moistness (each slice only has about one bite of banana in it, carb-wise!).
Line your loaf pan with parchment or grease it well, as almond flour breads can stick. Let the bread cool completely before slicing, as grain-free breads are tender when hot. If you prefer a bit sweeter, serve the slices with a smear of butter and a sprinkle of cinnamon “sugar” (stevia blend) on top – heavenly!
Link to Source: Read the full recipe here: https://sugarfreelondoner.com/low-carb-sugar-free-banana-bread/
6. Chocolate Banana Protein Shake
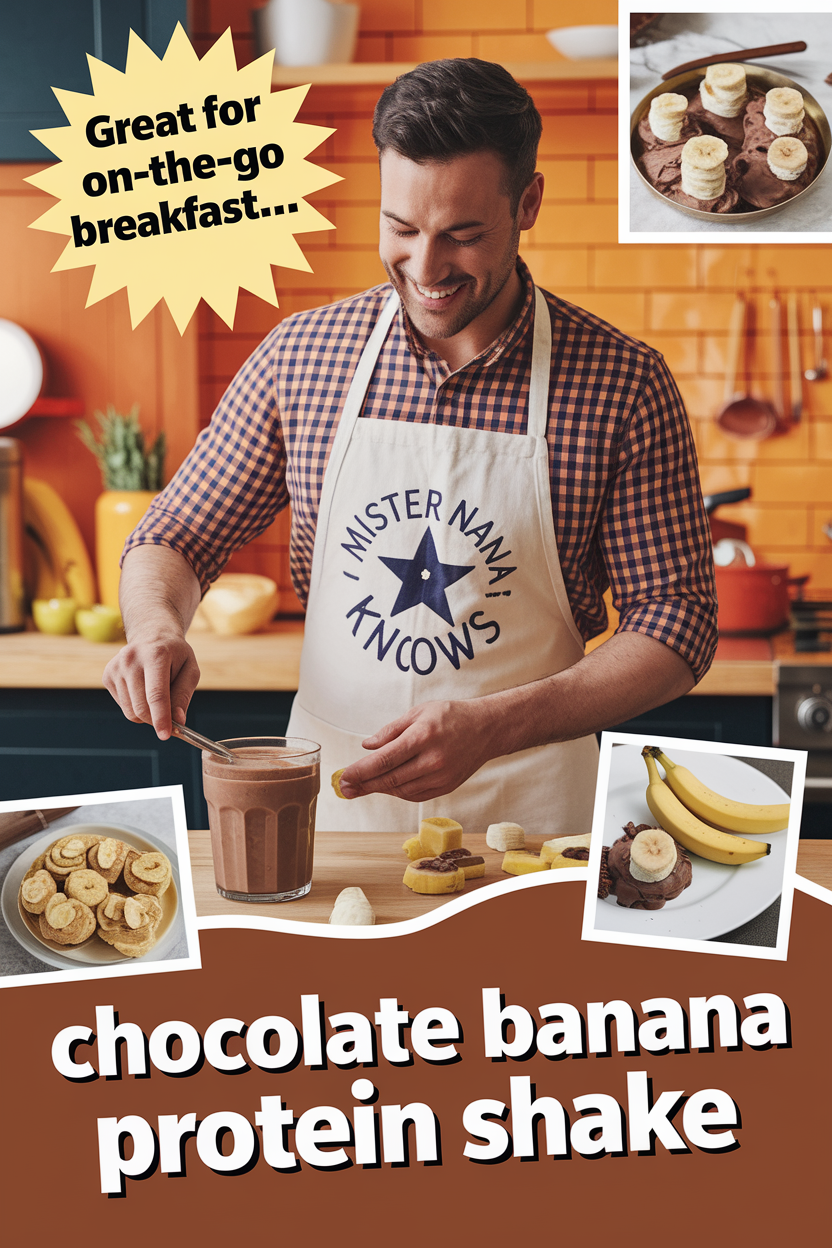
Brief Overview: This thick, frosty shake tastes like a chocolate-peanut butter milkshake but is secretly a protein-packed powerhouse. It blends banana, milk, chocolate protein powder, peanut butter, honey, and cocoa powder with ice.
In 10 seconds of blending, you get a creamy shake that’s chocolaty and sweet with a hint of banana. One serving delivers over 30 grams of protein allrecipes.com, making it perfect as a post-workout drink or meal replacement.
The banana provides carbs to replenish energy, while peanut butter and milk add richness and protein. It’s as easy as: add all ingredients to a blender and whiz until smooth. Pour into a tall glass and enjoy immediately.
Nutritional Profile: (per 1 large shake)
| Calories | Protein | Fat | Carbs |
|---|---|---|---|
| 561 kcal | 31 g | 23 g | 67 g |
Why It’s Great: When you’re craving something sweet and chocolatey but want to stay on track with your nutrition, this shake is ideal. It genuinely tastes like a dessert (some call it an “adult milkshake” allrecipes.com), yet it’s loaded with protein and nutrients.
The combination of banana, peanut butter, and chocolate is universally loved – flavor-wise, it’s like a peanut butter cup in smoothie form. It’s also very customizable (you can adjust thickness and sweetness easily).
Home cooks have made this recipe over 200 times allrecipes.com, often giving it glowing reviews as a satisfying, energizing drink that keeps them full. It’s particularly popular with fitness enthusiasts for muscle recovery and with busy people who need a quick nutritious breakfast.
Who Benefits: Athletes and gym-goers will benefit from the high protein content for muscle repair. It’s also great for on-the-go breakfast skippers – in one glass you get a balance of protein, healthy fats, and carbs.
Those who find it hard to eat enough protein (like some vegetarians) can use this shake as a delicious solution. And if you’re recovering from an illness or have a small appetite, this shake packs a lot of nourishment into an easy-to-drink format.
Possible Variations: You can swap the dairy milk for almond or oat milk to make it dairy-free (using a plant-based protein powder as well). For an extra protein boost, add Greek yogurt or silken tofu.
If you want lower sugar, skip the honey – a ripe banana often provides enough sweetness, or use a sugar-free sweetener. Turn it into a green protein smoothie by throwing in a handful of spinach (you won’t taste it over the peanut butter and cocoa).
For a mocha flavor, add a bit of instant coffee. And for a lighter, frothier shake, use frozen banana slices and skip the ice.
Cooking Tips: Use a frozen banana if possible – it makes the shake colder and thicker, almost like a smoothie bowl consistency. If your protein powder is very sweet, taste the shake before adding honey; you might not need the extra sweetness.
Blend the ice and milk first for a smoother texture, then add the other ingredients. If the shake is too thick to blend, splash in a bit more milk. Conversely, if you want it thicker, use less milk or more ice.
Serve immediately after blending, as the ingredients can separate on sitting (give it a stir if that happens). Enjoy it cold for the best experience.
Link to Source: Read the full recipe here: https://www.allrecipes.com/recipe/244959/chocolate-banana-peanut-butter-protein-shake/
7. Spinach Banana Smoothie – Green Protein Smoothie
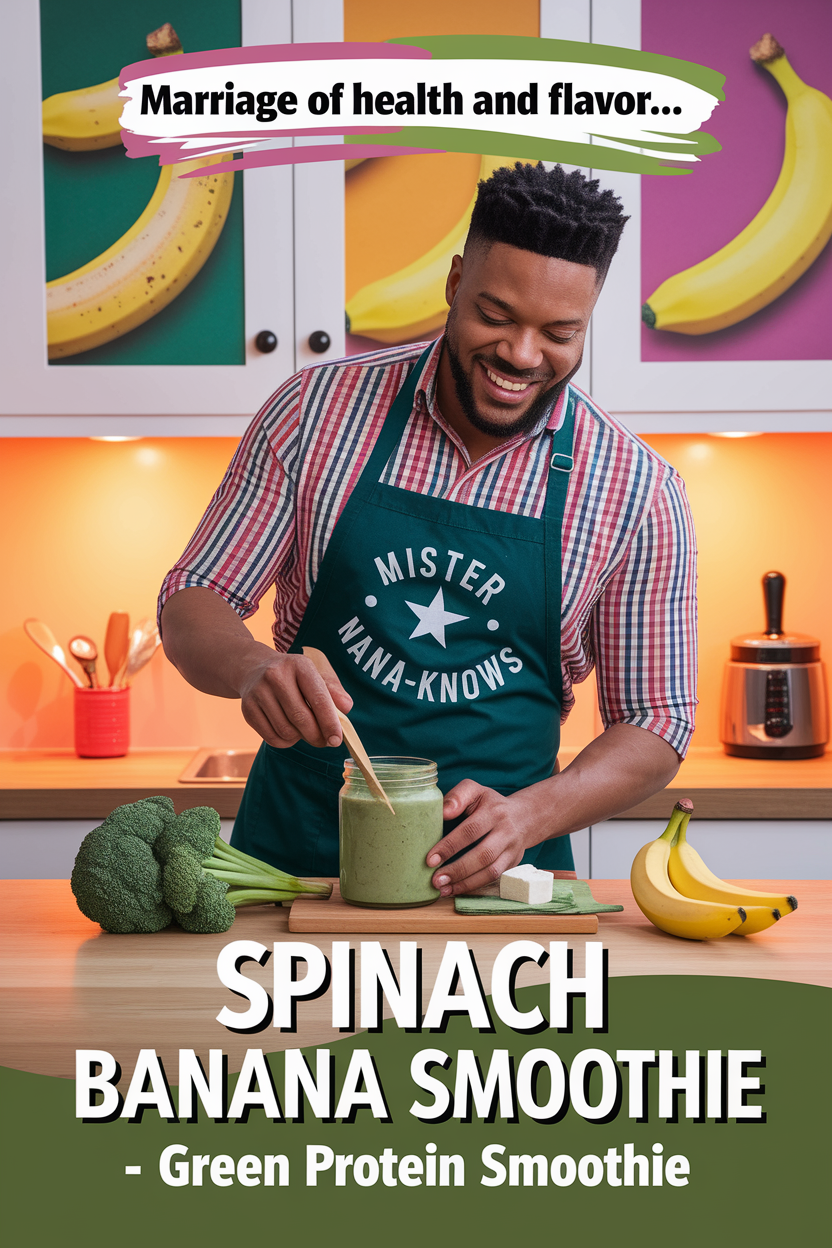
Brief Overview: Don’t let the green color fool you – this smoothie tastes like a fruity, creamy treat! It’s made with banana, fresh spinach, Greek yogurt, and milk, plus a touch of honey and vanilla.
The ripe banana’s sweetness dominates, so you barely taste the mild spinach. Blended together, it becomes a vibrant green shake that’s silky smooth.
Each serving provides an impressive ~20g of protein mindovermunch.com thanks to Greek yogurt (and you can boost it further with soy milk or protein powder), all while sneaking in a serving of greens.
It’s a 5-minute recipe: just toss all ingredients in a blender until completely pureed. The result is a refreshing smoothie that’s lightly sweet, banana-forward with a hint of vanilla, and has no “green” taste – only green goodness!
Nutritional Profile: (per 1 smoothie)
| Calories | Protein | Fat | Carbs |
|---|---|---|---|
| 252 kcal | 20 g | 4.5 g | 35 g |
Why It’s Great: This green smoothie is the perfect marriage of health and flavor. You get fiber, vitamins, and antioxidants from spinach and banana, and creamy protein from yogurt – truly a well-rounded snack or breakfast.
It’s naturally sweet and satisfying, yet has no added sugar if you omit the optional honey. Many people love that it’s an easy way to eat more greens: even spinach skeptics enjoy it because the banana completely masks the vegetable taste.
The texture is rich and creamy (not watery like some smoothies), which makes it feel like a treat. It’s also extremely adaptable – you can customize it to your dietary needs or flavor preferences with simple tweaks.
This smoothie has converted a lot of folks into green-smoothie fans, and it’s an excellent daily habit for more energy and nutrition.
Who Benefits: Busy individuals who need a quick, nourishing meal on the go – just blend and sip. It’s fantastic for post-workout recovery due to the high protein content and potassium from banana (great for muscle function).
If you’re trying to increase your veggie intake or looking for a kid-friendly green drink, this one’s a winner (kids love the bright color and sweet taste).
Those on a weight-loss journey can use it as a low-calorie, high-protein meal that keeps you full. And if you’re vegetarian, it provides a good dose of protein without any meat.
Possible Variations: Feel free to add other fruits – a handful of frozen mango or pineapple can give it a tropical twist (and still keep the green color). Swap spinach for kale if you like (you might need to blend a bit longer for kale’s texture).
For a vegan version, use a plant-based yogurt or a scoop of plant protein powder, and almond milk; the banana will still make it creamy.
You can also toss in extras like flax or chia seeds for omega-3s, or a spoon of peanut butter for a banana-PB spin (it will turn the smoothie a bit less green, but extra delicious).
If you want it colder and thicker, use a frozen banana or add a few ice cubes when blending.
Cooking Tips: Blend the liquid and spinach together first for an ultra-smooth texture, then add the banana and yogurt – this ensures no leafy bits remain.
Use a ripe banana (freckled yellow peel) for maximum sweetness; that way you might not need any honey at all.
If the smoothie is too thick for your liking, add a splash more milk; if it’s too thin, add more frozen banana or a couple more yogurt spoonfuls.
Smoothies are best enjoyed fresh, but you can blend the night before and keep it in the fridge – just give it a stir or re-blend (adding a couple ice cubes) before drinking. Cheers to your health!
Link to Source: Read the full recipe here: https://mindovermunch.com/recipes/spinach-banana-smoothie/
8. Baked Banana Chips – Healthy Snack
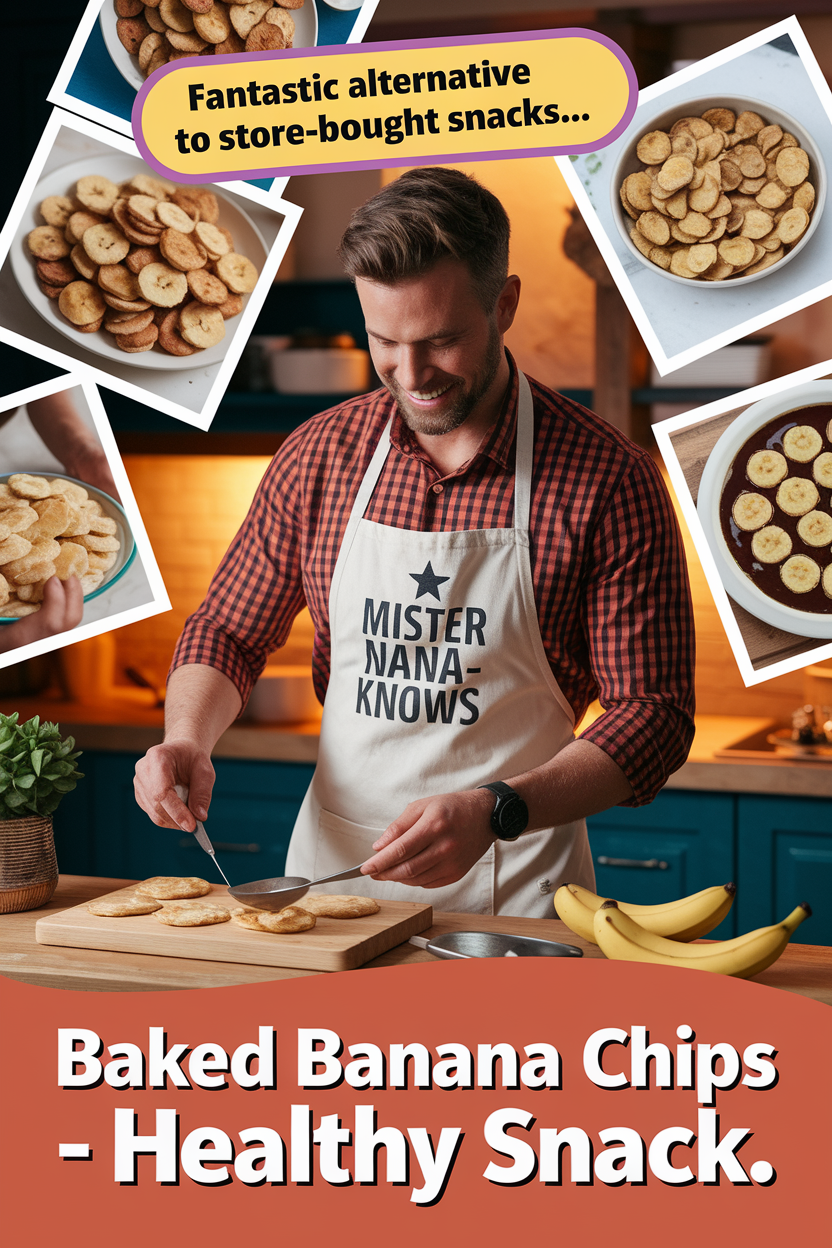
Brief Overview: Craving a crunchy snack? These homemade banana chips are the answer – and you only need two ingredients: bananas and lemon juice. The bananas are thinly sliced and tossed with a bit of lemon (this keeps them from browning and adds a light tang).
They are then slowly baked in the oven at a low temperature until they become golden, crispy chips. There’s no added sugar or oil in this particular recipe, so the chips are naturally sweet and guilt-free.
The process takes a little time (a couple of hours to dehydrate in the oven), but it’s mostly hands-off. The end result: a bowl of lightly sweet, crunchy banana chips that are perfect for snacking or topping yogurt and cereal.
Nutritional Profile: (per 1 cup of banana chips)
| Calories | Protein | Fat | Carbs |
|---|---|---|---|
| 120 kcal | 1 g | 0 g | 31 g |
Why It’s Great: These banana chips are a fantastic alternative to store-bought snacks which are often fried or sugar-coated. By baking them, you greatly reduce the fat content – they have zero added fat aspicyperspective.com.
Yet they still pack all the fiber and nutrients of bananas. The flavor is concentrated and sweet, almost like banana candy but without any sugar added. They’re also very portable and have a good shelf life when stored properly, so you can make a batch for the week.
Many folks love that they can control the ingredients (just fruit and a bit of lemon) – it’s as pure as it gets. Plus, making these is incredibly easy, though it requires patience for the low-and-slow bake.
The outcome is worth the wait for a crunchy, addictive snack that’s actually good for you.
Who Benefits: If you’re a mindful eater or have kids, these will become a staple snack – they satisfy the need to crunch on something without resorting to chips or sugary snacks.
Hikers or outdoor enthusiasts benefit too, since banana chips provide quick energy and potassium in a lightweight, non-perishable form. They’re naturally vegan and paleo, fitting into many diet plans.
Also, anyone trying to reduce food waste might use this recipe to preserve bananas that are about to overripen (slightly underripe bananas work best for chips, but ripe ones can be used if you don’t mind a chewier texture).
Possible Variations: While this recipe keeps it super simple, you can get creative by sprinkling a little cinnamon on the banana slices before baking for a warm flavor. A pinch of salt can create a sweet-salty dynamic (especially if you plan to use the chips in trail mix).
If you’d like a bit of caramelization, you could very lightly brush the slices with a sugar-water syrup or honey – but note that will increase the sugars.
For extra crunch, some people finish the chips in a dehydrator or air fryer. And if you prefer soft, chewy dried bananas instead of chips, slice them a bit thicker and bake for less time.
Cooking Tips: Try to slice the bananas as evenly thin as possible – about 1/8 inch thick. A mandoline slicer helps get uniform chips. Use bananas that are yellow (no green) but not overly spotty; very ripe bananas might turn out too soft or sticky.
Bake at a low temperature (around 200°F / 95°C) and flip the slices halfway through to ensure even drying. Keep an eye on them towards the end so they don’t over-brown; oven temps can vary, and thinner slices cook faster.
After baking, let the chips cool in the turned-off oven with the door propped open – this helps them crisp up fully. Store them in an airtight container to keep that crunch. If they soften over time, you can re-crisp them in the oven for a few minutes.
Link to Source: Read the full recipe here: https://www.aspicyperspective.com/healthy-baked-banana-chips/
9. Banana Curry – South Indian Plantain Curry
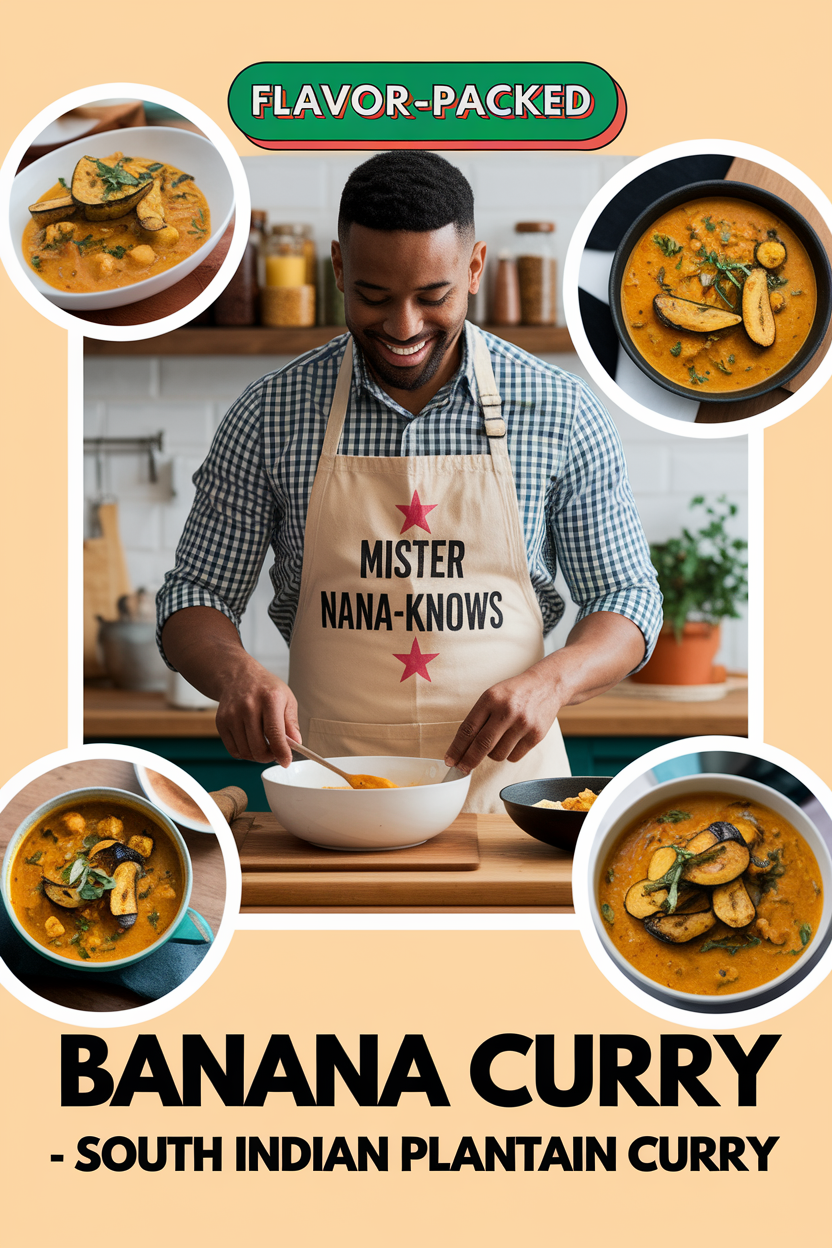
Brief Overview: This is a savory banana dish featuring green plantains (raw “cooking” bananas) simmered in a spiced curry.
A staple in South Indian cuisine, it starts with peeled plantains chopped and briefly sautéed with mustard seeds, curry leaves, and aromatics like onion, garlic, and tomato.
Warm spices such as turmeric, cumin, and curry powder create a fragrant sauce together with a bit of water or broth. The plantains cook until tender, absorbing the spices and becoming almost potato-like in texture.
The curry can be made dry (stir-fried until water evaporates) or with a bit of gravy. It’s typically finished with fresh cilantro. The result is a hearty, spicy, and utterly unique dish where banana (plantain) shines in a savory form.
Nutritional Profile: (per serving)
| Calories | Protein | Fat | Carbs |
|---|---|---|---|
| 210 kcal | 2 g | 7 g | 36 g |
Why It’s Great: This curry showcases bananas in a totally different light. Green plantains are starchy and not sweet, so they work wonderfully as a veggie in curries – similar to a potato but with more fiber and vitamins.
The dish is flavor-packed: it’s spicy, a little tangy if tomatoes are used, and very satisfying. It’s also vegan and gluten-free by nature. People love how comforting and filling it is, especially served with rice or flatbread.
If you’re looking to explore banana beyond the usual sweet recipes, this curry is eye-opening and delicious.
It’s a traditional recipe that has been passed down through generations, and now it’s gaining popularity worldwide for its healthiness and taste. In fact, this particular recipe is one of the most popular on its website, with lots of 5-star ratings from readers who appreciate its authenticity sugarfreelondoner.com, indianhealthyrecipes.com.
Who Benefits: Adventurous eaters and home cooks wanting to try global cuisines will love this. It’s perfect for those on a vegan or vegetarian diet seeking a new source of nutrients – plantains are rich in fiber, and the curry provides a variety of antioxidants from spices.
If you have green bananas or plantains and aren’t sure what to do with them, this recipe is your answer.
Additionally, anyone who enjoys curries or one-pot savory dishes (like busy weeknight cooks) would appreciate how simple and wholesome this is. It’s also fairly budget-friendly, using inexpensive produce and pantry spices.
Possible Variations: You can adjust the spice level easily: include a chopped chili or some chili powder for more heat, or omit for a milder curry.
For a saucier curry, add 1/2 cup coconut milk toward the end – this gives it a lovely richness and slight sweetness. Some versions include a bit of tamarind or lemon juice for tang; others add a few peanuts or cashews for crunch.
If plantains are hard to find, you can substitute green (unripe) regular bananas or even potatoes (though potatoes cook faster).
Throw in a handful of spinach or kale at the end for extra greens. Serve it traditionally with basmati rice, or even as a taco filling for a fun fusion twist!
Cooking Tips: When peeling green plantains, it can be sticky – slice off the ends, cut a slit down the side of the skin, and run it under water while prying the skin off; this helps.
Once peeled, keep the pieces in water or toss with a little turmeric to prevent darkening. Sauté your whole spices (like mustard seeds) in oil first until they pop – this step, called tempering, releases maximum flavor.
Cook the plantain pieces until they’re fork-tender; they’ll go from firm to a soft, dense texture. Stir gently so they don’t break apart. If making a drier curry, cook off most of the water; for a wet curry, add more water or coconut milk and simmer.
Like many curries, this tastes even better after sitting, as the flavors meld – so feel free to make it ahead. Garnish with fresh cilantro and serve warm.
Link to Source: Read the full recipe here: https://www.indianhealthyrecipes.com/aratikaya-masala-kura-raw-banana-masala/
10. Vegan Banana French Toast
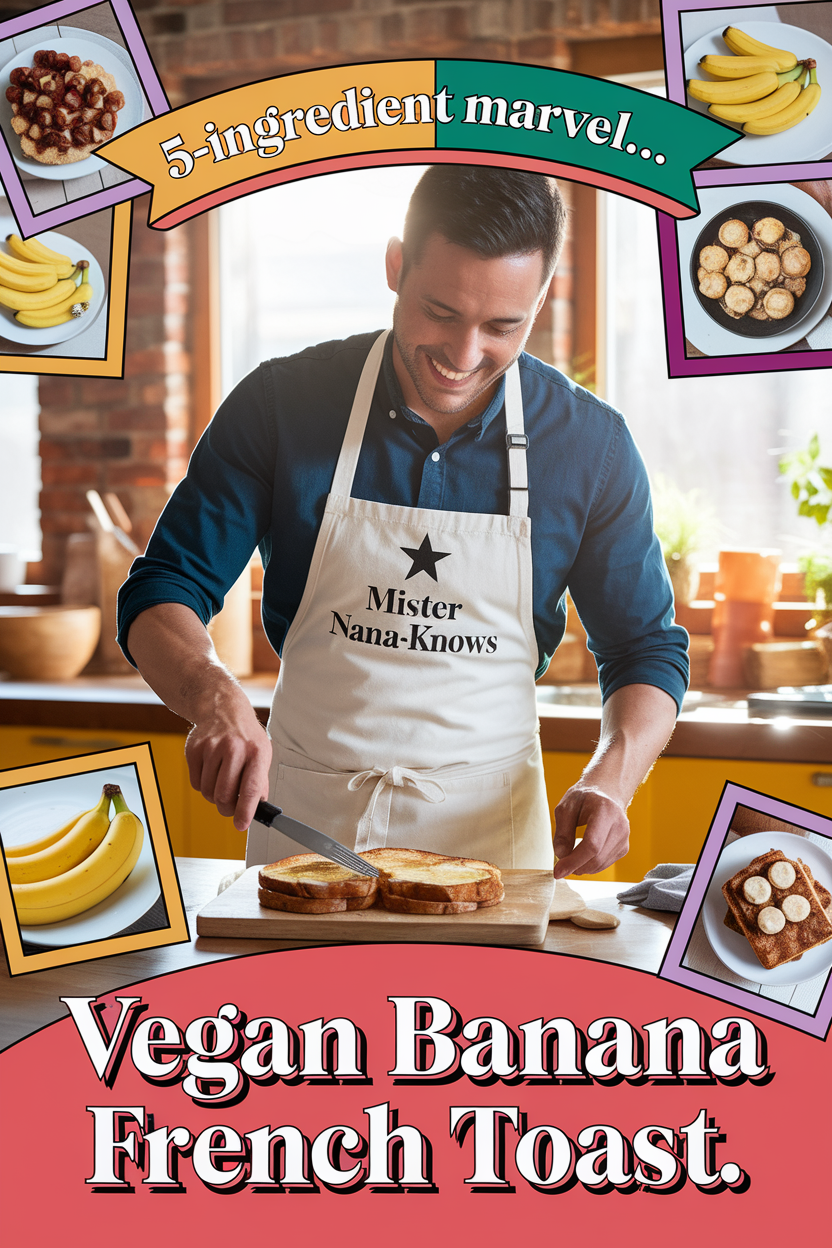
Brief Overview: In this plant-based twist on French toast, mashed banana replaces the egg in the custard batter, yielding golden-brown slices with a hint of banana flavor. The simple batter is made from ripe banana, a bit of non-dairy milk (like almond milk), ground flaxseed (for binding and extra nutrition), vanilla, and cinnamon.
Slices of bread (day-old or slightly stale works best) are dipped in the banana batter and then cooked on a griddle or pan until each side is crisp and browned.
The result is French toast that’s slightly softer than the egg-based version, but absolutely delicious – it has a sweet, fruity undertone and a lovely caramelized exterior.
Serve it hot off the pan with maple syrup, extra banana slices, and maybe a dollop of peanut butter for a heavenly vegan breakfast.
Nutritional Profile: (per slice, without toppings)
| Calories | Protein | Fat | Carbs |
|---|---|---|---|
| ~87 kcal | 3.6 g | 1.6 g | 15 g |
Why It’s Great: This recipe is a 5-ingredient marvel that allows vegans (or those with egg allergies) to enjoy classic French toast minimalistbaker.com. Bananas not only provide flavor but also act as an egg substitute, bringing moisture and helping the batter cling to the bread.
The French toast cooks up slightly custardy in the middle and wonderfully crisp at the edges minimalistbaker.com. It’s also a lighter take on French toast – no heavy cream or eggs – yet it feels indulgent. The flavor is amazing: think banana bread meets French toast.
Plus, it’s a great way to use up ripe bananas and day-old bread. Many who try this recipe are surprised that something so easy (and vegan) can taste “like the real thing” – you won’t miss the eggs at all.
In fact, this recipe has converted a lot of people to banana-based French toast because it’s fun and flavorful (and often a hit at brunch parties for its uniqueness).
Who Benefits: Vegans, vegetarians, and those with egg or dairy allergies will especially benefit – finally, a French toast for them! But even omnivores who want a healthier breakfast will enjoy this lighter rendition.
Kids tend to adore the banana flavor (it’s like having a breakfast that tastes a bit like bananas and cinnamon). If you’re someone who hates wasting food, this uses up both overripe bananas and stale bread efficiently.
Fitness folks might like it too, as it’s lower in cholesterol and can be made with whole-grain bread for a fiber-rich, energizing meal.
Possible Variations: You can flavor the batter in various ways – a pinch of nutmeg or cardamom for warmth, or even a spoon of cocoa powder for a chocolate banana French toast.
If you want extra protein, use a high-protein plant milk or serve with a side of coconut yogurt. For added crunch, you could crust the soaked bread in crushed nuts or granola before frying (almost like banana French toast sticks).
Some recipes stuff the French toast – e.g., spread peanut butter or vegan chocolate spread between two banana-battered bread slices for an ultra-decadent treat.
Choice of bread can also vary: white sandwich bread works, but thick slices of sourdough or French bread give a nice texture contrast (you may need more batter if using hearty breads).
Cooking Tips: Use slightly stale bread if possible – it soaks up the banana mixture without disintegrating. If your bread is too soft or fresh, consider toasting it lightly first. Make sure the banana is thoroughly mashed (or even blended) to avoid any lumps in the batter; a smooth batter coats more evenly.
When cooking, use medium heat – too high and the sugars in the banana can burn before the toast cooks through. Cook slowly until one side is nicely browned and releases easily, then flip.
Due to the natural sugars, this French toast can brown quicker than the egg version, so watch carefully. If making a big batch, keep finished pieces warm in a low oven while you cook the rest.
Top with extra banana slices for presentation and, of course, lots of maple syrup for that classic French toast experience!
Link to Source: Read the full recipe here: https://minimalistbaker.com/5-ingredient-vegan-banana-french-toast/
11. Maple-Sweetened Banana Muffins Whole Grain
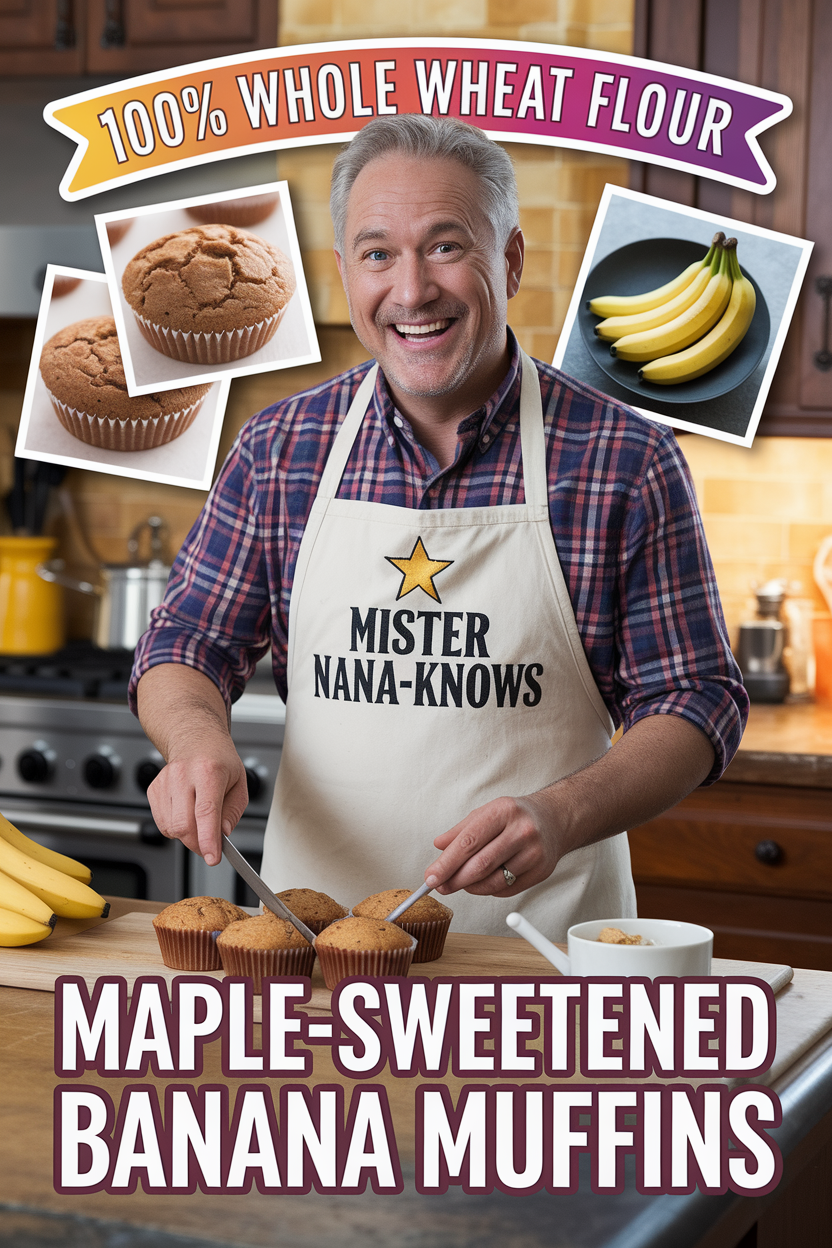
Brief Overview: These fluffy banana muffins are made with 100% whole wheat flour and naturally sweetened with ripe bananas and pure maple syrup (no refined sugar!). They also incorporate protein-rich Greek yogurt and are moistened with olive oil, making them a healthier take on classic banana muffins.
The batter stirs together in one bowl: mashed bananas, eggs (you can use flax eggs for vegan), yogurt, oil, maple syrup, and vanilla, plus whole wheat flour, baking soda, salt, and a touch of cinnamon.
Fold in optional add-ins like chopped walnuts or chocolate chips. After baking, you get tender, golden muffins that are just sweet enough, with a slight nutty flavor from the whole wheat. They taste like a treat, but each muffin is packed with fiber and lower in sugar – truly the best of both worlds.
Nutritional Profile: (per muffin)
| Calories | Protein | Fat | Carbs |
|---|---|---|---|
| ~180 kcal | 4 g | 7 g | 27 g |
Why It’s Great: These muffins have over 1,700 five-star reviews for a reason cookieandkate.com! They’re unbelievably moist and flavorful, yet much healthier than your average bakery muffin.
The use of maple syrup yields a gentle sweetness and lovely aroma without being overpowering. Whole wheat flour adds a hearty texture but the muffins still come out light and fluffy (many commenters note you’d never guess they’re whole grain).
The recipe is very forgiving and easy – great for beginner bakers or baking with kids. And it’s versatile: you can make them as banana bread or mini-muffins too.
Each bite has that comforting banana and cinnamon taste, often described as “the perfect breakfast muffin.” Knowing they’re lower in sugar and higher in nutrients makes enjoying them even sweeter.
Who Benefits: These muffins are perfect for health-conscious bakers who still want a cozy baked good. If you’re trying to cut down on refined sugar or sneak more whole grains into your diet (or your family’s diet), this recipe is your friend.
Kids love these muffins, and parents love that they’re getting fruits and whole grains in a tasty package. They’re also a great option for meal preppers – make a batch on Sunday and you have breakfast or snacks ready for the week.
They freeze well too, which benefits anyone who wants homemade goodness on demand. With easy ingredient swaps, they can accommodate gluten-free or dairy-free needs as well.
Possible Variations: Stir in 1/2 cup of dark chocolate chips to turn them into a healthier dessert muffin. Or mix in blueberries or chopped dates for a twist. If you prefer honey over maple, that can be used equally (just note the flavor change).
You can also use melted coconut oil or avocado oil instead of olive oil. For a nutty crunch, top each muffin with a sprinkle of oats or chopped pecans before baking.
To make them vegan, use flax eggs (1 tablespoon ground flax + 3 tablespoons water per egg) and a non-dairy yogurt – many readers have successfully done this. You can also bake this batter in a loaf pan for about 50-60 minutes to make a wholesome banana bread.
Cooking Tips: Do not overmix once you add the flour – mix just until the ingredients are combined. This keeps the muffins tender. Use really ripe bananas (the more brown spots the better) for maximum natural sweetness and banana flavor.
If your bananas aren’t very ripe, you can add an extra tablespoon of maple syrup. Let the muffins cool for a few minutes in the tin, then transfer to a rack – this prevents soggy bottoms.
Because these muffins are lower in fat than typical, they may stick – using paper liners or greasing the tin well helps. Also, whole wheat baked goods can stale faster, so store these in an airtight container.
But frankly, they disappear so fast (some people report the whole batch gone in a day!) that long storage isn’t usually an issue.
Link to Source: Read the full recipe here: https://cookieandkate.com/healthy-banana-muffins-recipe/
12. Bananas Foster – Classic New Orleans Dessert

Brief Overview: Bananas Foster is a show-stopping dessert where bananas are caramelized in a buttery brown sugar sauce, then flambéed with rum and served over ice cream. In this recipe, firm ripe bananas are sliced lengthwise and briefly sautéed in a bubbling mixture of butter, brown sugar, and a touch of cinnamon.
As the sugar melts, it creates a luscious caramel that coats the bananas. The pan is then removed from heat and dark rum (and sometimes banana liqueur) is added – then, with a dramatic flourish, ignited to burn off the alcohol, leaving behind a deep rum flavor.
The flame subsides in seconds, and the golden bananas and thick sauce are immediately poured over bowls of cold vanilla ice cream. The hot-cold contrast, the boozy caramel, and the soft bananas make each bite pure heaven.
Nutritional Profile: (per serving, without ice cream)
| Calories | Protein | Fat | Carbs |
|---|---|---|---|
| ~394 kcal | 1 g | 18 g | 52 g |
Why It’s Great: This dessert is a classic for a reason – it’s relatively simple to make but delivers restaurant-quality flair and flavor. The combination of warm caramelized banana and cold ice cream is an experience in itself.
The rum adds a smoky, rich note (and the excitement of lighting it afire – safely! – which can be the highlight of a dinner party). It’s an easy way to impress guests or indulge on a special night.
Even if you don’t flambé, the sauce will still taste fantastic. Bananas Foster has an old-school charm (originating in the 1950s in New Orleans) yet never goes out of style. It’s very sweet and indulgent, so a little goes a long way – but those who try it often rave that it’s one of the best banana desserts they’ve ever had.
Think of it as the ultimate upgrade to topping ice cream with bananas and caramel. If you have a sweet tooth, this will hit all the right notes: buttery, sugary, fruity, with a hint of spice.
Who Benefits: Dessert lovers and home chefs looking to try something dramatic and fun. If you’ve only had bananas in bread or smoothies, this is a must-try to expand your banana repertoire.
It’s great for entertaining – your family or guests will be wowed by the flambé (just use caution and perhaps practice once beforehand). Those who enjoy cocktails or nightcaps will love the rum-infused sauce.
And honestly, anyone with a skillet and a few bananas can make this – it’s a beginner-friendly flambé dessert. Do note, it’s not for young kids if you include the alcohol (the flame and residual rum flavor make it more of an adult treat, though the alcohol mostly burns off).
You can, however, make a non-flambé version by simply simmering the bananas in the sauce and adding a little rum extract for flavor.
Possible Variations: For a tropical twist, add some pineapple chunks to the pan and flambé those along with the bananas. You can also substitute spiced rum for dark rum to add vanilla and spice undertones.
A dash of banana liqueur is traditional in some recipes – it boosts the banana aroma. If you prefer a sauce with less alcohol, you can reduce the rum in the pan without igniting – just simmer a bit longer to cook it down.
Serving variations: Instead of vanilla ice cream, try it over pound cake or waffles for an decadent brunch dish. A dollop of whipped cream on top of the ice cream is never a bad idea either.
And if you like nuts, sprinkling some toasted pecans or walnuts on top adds a nice crunch to contrast the soft bananas.
Cooking Tips: Use bananas that are just ripe – yellow with maybe a few spots – so they hold their shape when cooking (overripe bananas may turn to mush).
Have everything prepped before you start, especially if flambéing: keep the rum measured and nearby, and turn off your stove’s fan before lighting to avoid drawing flames.
When you add the rum, you can light it with a long stick lighter – stand back as it may flare up. If you’re nervous about flambé, you can simply let the rum warm in the pan and ignite from the heat of the stove (or skip the flame and let it cook a minute to evaporate alcohol).
Always be cautious: have a lid nearby to smother the flame if needed. Once the flame dies, stir the sauce – it should be smooth and amber.
Serve immediately, as the contrast of hot sauce and cold ice cream is key. And importantly, enjoy the drama and deliciousness of this iconic banana dish!
Link to Source: Read the full recipe here: https://www.bonappetit.com/recipe/classic-bananas-foster
13. Dirty Banana Cocktail – Frozen Banana Rum Drink

Brief Overview: The Dirty Banana is a creamy, frozen cocktail that essentially tastes like a banana-chocolate milkshake with a kick of coffee and rum. The recipe blends together a ripe banana, dark rum, coffee liqueur (like Kahlúa), a splash of milk or cream, and ice – plus a drizzle of chocolate syrup if you’re feeling indulgent.
Everything whirls in the blender until smooth and frosty. Pour it into a tall glass and you have a dessert-worthy drink: thick, sweet, and loaded with banana, cocoa, and coffee flavors.
It’s often garnished with a chocolate syrup swirl or whipped cream, and a banana slice on the rim. One glass hides about 3 ounces of alcohol, so beware – it’s deliciously deceptive!
Nutritional Profile: (per cocktail)
| Calories | Protein | Fat | Carbs |
|---|---|---|---|
| ~590 kcal | 2 g | 22 g | 52 g |
Why It’s Great: For those who love tropical drinks or milkshakes, the Dirty Banana is the best of both worlds. It’s decadent and boozy, making it a fantastic summer treat or vacation-inspired beverage.
The banana gives it natural thickness and sweetness, the rum adds warmth, and the coffee liqueur adds depth (imagine a hint of mocha flavor in the background). Chocolate syrup ties it all together.
This cocktail is popular at beach resorts and cruises – one source notes it was a hit on a cruise ship and “almost everyone had one in hand by week’s end” sugarandsoul.co.
It’s essentially a fun party in a glass, great for sipping by the pool or as an after-dinner drink. If you have a sweet spot for mudslides or piña coladas, you’ll find the Dirty Banana dangerously easy to drink (perhaps too easy!).
Who Benefits: Anyone looking for a festive adult treat will enjoy this. It’s perfect for summer gatherings, girl’s nights, or as a special dessert cocktail. Banana lovers get a new way to enjoy their fruit (albeit with rum!).
It’s also a great use for an extra ripe banana when you’d rather drink your dessert. This cocktail can appeal to those who don’t even like the taste of alcohol, since the spirits here blend into the creamy sweetness – hence it’s a hit among casual cocktail drinkers.
If you have a home bar and want to break out of the usual margarita or daiquiri routine, the Dirty Banana is a crowd-pleaser with a bit of whimsy.
Possible Variations: To lighten it up a bit, you can use milk (or almond milk) instead of heavy cream – it will be slightly less rich but still creamy. Add a scoop of vanilla ice cream, and you’ve basically got a spiked banana milkshake.
You can also include a tablespoon of peanut butter for a “Chunky Monkey” style twist. Another idea: use spiced rum for an extra layer of flavor, or even a banana-flavored rum or liqueur to amp the banana taste.
If you want it less sweet, reduce the chocolate syrup or use unsweetened cocoa powder. For a fun garnish, coat the rim of your glass with crushed cookies or coffee beans.
And if you prefer it non-frozen, you can shake the ingredients with ice and strain into a glass for a neat (unblended) version – but the blended frozen style is the iconic one.
Cooking Tips: Use a frozen banana (peel and freeze it ahead of time) to get that thick, slushy consistency without needing too much ice, which can dilute flavor. If using fresh banana, you’ll want to add a bit more ice.
Blend the liquids and banana first, then add ice gradually to reach your desired thickness. Because it contains alcohol, it might not freeze as solid as a smoothie, so don’t overblend or it can get too liquidy – just blend until the ice is crushed.
Taste and adjust: if you want it stronger, a splash more rum; sweeter or more chocolaty, add more syrup; thicker, add ice or a bit of ice cream.
Serve in a chilled glass to keep it frozen longer, and drink with a straw (you’ll want every last drop). Enjoy immediately – the texture is best right from the blender. Cheers!
Link to Source: Read the full recipe here: https://www.sugarandsoul.co/dirty-banana/
14. Fried Sweet Plantains – Plátanos Maduros

Brief Overview: A beloved side dish in Caribbean and Latin American cuisine, fried sweet plantains (maduros) are ripe plantains sliced and pan-fried until caramelized and tender.
The plantains used are very ripe (skin almost black) which ensures maximum sweetness. To prepare, you peel the plantains, slice them on a diagonal, and fry the pieces in a bit of oil over medium heat.
As they cook, the natural sugars in the plantains caramelize, creating a gorgeous golden-brown outside. They’re done when the edges are lightly crisp and the inside is soft and yellow.
A tiny pinch of salt can be added after frying to enhance the sweetness (some also sprinkle a little sugar or cinnamon). These morsels come out slightly crisp, mostly soft, and deeply sweet, almost like candy. They’re typically served as a side to savory dishes or as a standalone snack.
Nutritional Profile: (per 1 medium plantain fried in 1/2 tbsp oil)
| Calories | Protein | Fat | Carbs |
|---|---|---|---|
| ~170 kcal | 1 g | 7 g | 29 g |
Why It’s Great: Fried sweet plantains are the ultimate comfort food side – think of the satisfaction of french fries, but with a sweet twist and some vitamins to boot. They require only two ingredients and about 10–15 minutes to make.
The flavor is phenomenal: if you like bananas, imagine a more complex banana flavor with caramel notes. The texture contrast (crispy edges, meltingly soft centers) is delightful.
These plantains often steal the show even next to main courses. They’re also crowd-pleasing; it’s hard to find someone who won’t enjoy a sweet fried plantain.
In Latin cultures, they’re commonly served alongside rice and beans, grilled meats, or eggs – but they can just as easily be a dessert with a drizzle of honey.
Homemade ones are healthier than store-bought or restaurant versions, which might be deep-fried – here, they’re pan-fried in minimal oil. Reviewers often note how easy and tasty this recipe is, giving it an average 4.9/5 rating asassyspoon.com.
Who Benefits: Anyone exploring global cuisines or looking for a new way to use bananas/plantains will benefit. If you find plantains at your market, this is the simplest introduction to cooking them.
Vegetarians and vegans can enjoy plantains as a starchy side dish alternative to potatoes. It’s naturally gluten-free too. They’re fantastic for family meals – kids often love the sweetness (you might even convert a picky eater to eating “banana fries”!).
Also, athletes or those needing quick carbs could enjoy these for energy (plantains are a good source of potassium and vitamin A).
And if you’re just craving something sweet but slightly healthier than cake, a few fried plantains might hit the spot with their natural sugars.
Possible Variations: Some people fry the plantains in coconut oil or butter for extra flavor. You can also try air-frying or baking them for a lighter version: brush with oil and bake at 400°F until golden (they won’t get as caramelized, but still good).
For a savory-sweet twist, sprinkle on a little chili powder or cayenne along with salt. In some regions, they drizzle sweetened condensed milk or a squeeze of lime on fried plantains as a dessert – feel free to experiment.
If your plantains aren’t as ripe (yellow with spots, but not black), you can still fry them; they’ll be just a bit less sweet and more firm (you could dust those with a touch of brown sugar to help caramelize).
Cooking Tips: Use very ripe plantains – the peel should look ugly (mostly black) and feel soft when pressed. If the plantain is yellow, you can still use it but consider covering the pan to help it cook through, since less-ripe plantains are firmer.
Slice on a bias (diagonal) about 1/2-inch thick; this exposes more surface area for caramelization and makes a nice oval shape. Don’t overcrowd the pan; fry in batches if necessary so each piece has contact with the pan.
Fry over medium or medium-low heat – too hot and they’ll burn outside while the inside is underdone. You’ll notice them turn a beautiful golden brown; that’s when to flip (roughly 2-3 minutes per side).
Use tongs to gently flip as they can be delicate. Drain on paper towels to remove excess oil. While they’re best fresh (the edges are crispiest then), you can keep them warm in a 200°F oven for a short time if needed.
Whether you serve them with a sprinkle of salt or a drizzle of honey, serve them warm and enjoy the applause from your taste buds!
Link to Source: Read the full recipe here: https://asassyspoon.com/sweet-plantains-platanos-maduros/
15. Vegan Banana Pudding Dairy-Free & No-Bake
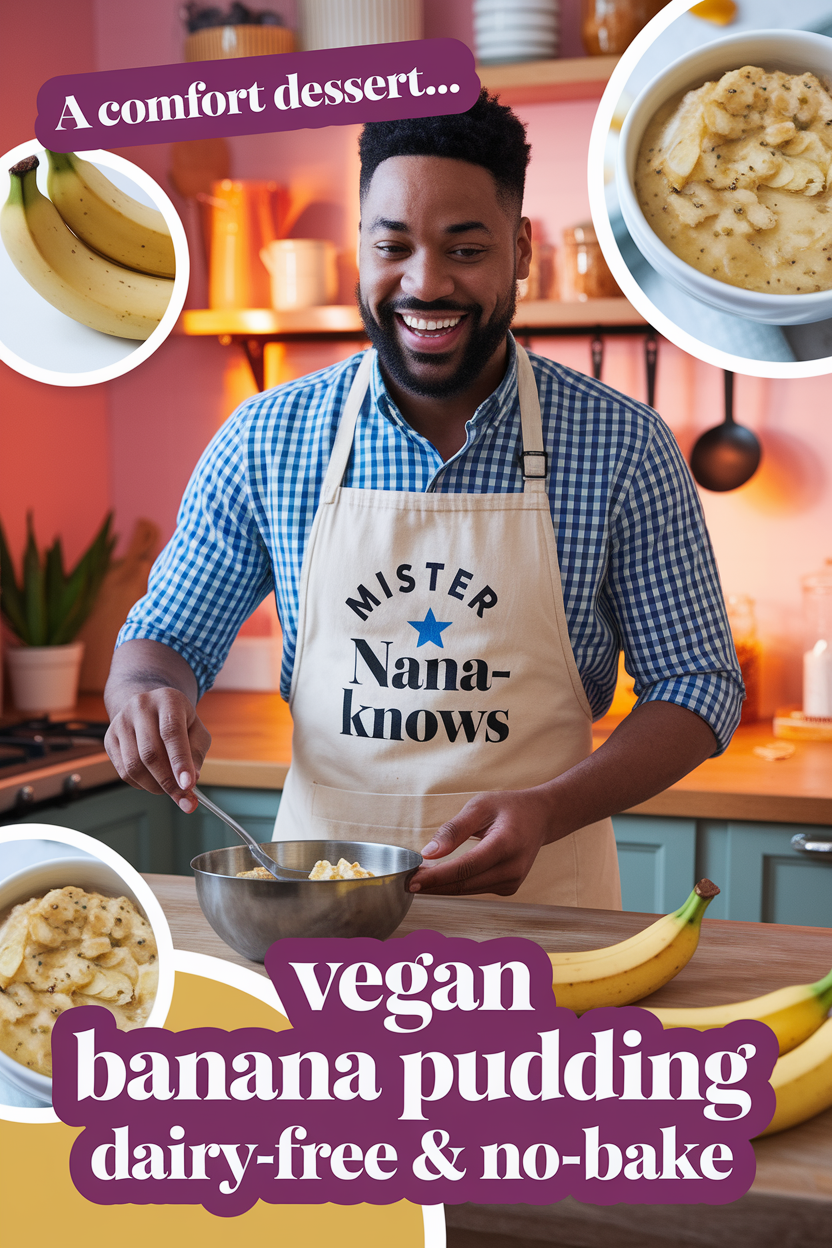
Brief Overview: This vegan banana pudding is a layered, trifle-style dessert that’s creamy, dreamy, and completely egg- and dairy-free.
It features layers of vanilla pudding, fresh banana slices, and vanilla wafer cookies, just like the classic Southern banana pudding – but the pudding is made vegan.
The recipe uses a combination of sugar, cornstarch, and a dairy-free milk (such as soy or almond) plus a bit of turmeric for color to create a thick vegan vanilla custard noracooks.com, noracooks.com.
The pudding is cooked on the stovetop until thick, then layered in a dish with vegan-friendly vanilla wafers and sliced ripe bananas. Top it off with dollops of coconut whipped cream.
After a few hours chilling, the cookies soften slightly (“like a tiramisu vibe”), the flavors meld, and you scoop out a banana pudding that’s rich and luscious. It’s served chilled, often in glass cups or a big bowl to show off the layers.
Nutritional Profile: (per serving, 1/10 of recipe)
| Calories | Protein | Fat | Carbs |
|---|---|---|---|
| 264 kcal | 4 g | 7 g | 48 g |
Why It’s Great: Banana pudding is a comfort dessert, and this version allows those who are vegan or dairy-intolerant to indulge in it fully. It has everything you love: the creamy custard, the sweet banana flavor, the soft cookie texture, and whipped topping.
Many tasters can’t even tell it’s vegan – it’s that good. It’s also a no-bake assemble dessert (aside from cooking the pudding), so it’s great for warm days or when you need to make dessert ahead of time.
This recipe in particular has been praised for being “just as delicious as the original,” with layers of flavor and a gorgeous presentation noracooks.com, noracooks.com.
Plus, it’s customizable; you can use store-bought vegan pudding mix to save time, or make the custard from scratch as instructed for a homemade touch.
It’s also lighter in that it avoids heavy cream and condensed milk found in some traditional recipes. All in all, it’s a must-try for banana dessert fans looking for a plant-based twist.
Who Benefits: Vegans and those with dairy or egg allergies, obviously – they get to enjoy a classic treat. But also anyone looking for a lighter version of banana pudding (less cholesterol, etc.) without compromising on taste.
It’s a fantastic potluck or party dessert because you can scale it up and it transports well (keep it cool). Kids who can’t have dairy will be thrilled to have this at the table. Even traditional eaters benefit because it’s simply a tasty dessert!
Also, if you’re a meal-prepper or like desserts you can make in advance, banana pudding is great since it needs a few hours (or overnight) to set, so you have dessert ready when you need it.
Possible Variations: If you can’t find vegan vanilla wafers, you can use another cookie like graham crackers (some are vegan) or speculoos biscuits – it’ll have a slightly different flavor but still delicious.
For a quick cheat, use a boxed vanilla pudding mix that’s vegan (check ingredients) and plant-based milk to prepare it. You can also make this into individual parfait cups or mason jars for cute single servings.
If you want to add a twist, consider a layer of peanut butter (melt a bit and drizzle between layers for a “Elvis” spin) or use chocolate wafers for a chocolate-banana combo.
Some recipes fold a bit of dairy-free whipped topping into the pudding to lighten it; you could do that for a mousse-like texture. Lastly, for extra banana flavor, you can blend one banana into the custard while cooking (just strain it if it gets lumpy).
Cooking Tips: When making the vegan pudding from scratch, stir constantly and cook on medium heat to prevent lumps or scorching.
Cornstarch is the thickener, and it activates as it heats – the mixture will suddenly thicken; keep stirring for a minute after it starts to bubble to cook out any starchy taste. If it seems lumpy, you can pass it through a sieve.
Let the pudding cool a bit before layering (but not too long or it will set in the pot; place plastic wrap on the surface to prevent a skin).
For assembly, start with a little pudding at the bottom (helps the cookies stick), then a layer of cookies, bananas, more pudding, and repeat. End with pudding on top so the bananas on top don’t brown (or add the top banana slices right before serving).
Also, fully cool and chill the assembled pudding for at least 4–6 hours; this softens the cookies to that cake-like consistency that makes banana pudding so special.
When serving, dollop on plenty of whipped coconut cream (or a store-bought dairy-free whipped topping) and maybe crumble a few extra cookies on top for presentation. Enjoy every creamy, banana-filled bite!
Link to Source: Read the full recipe here: https://www.noracooks.com/vegan-banana-pudding/
16. Chocolate Covered Banana Pops
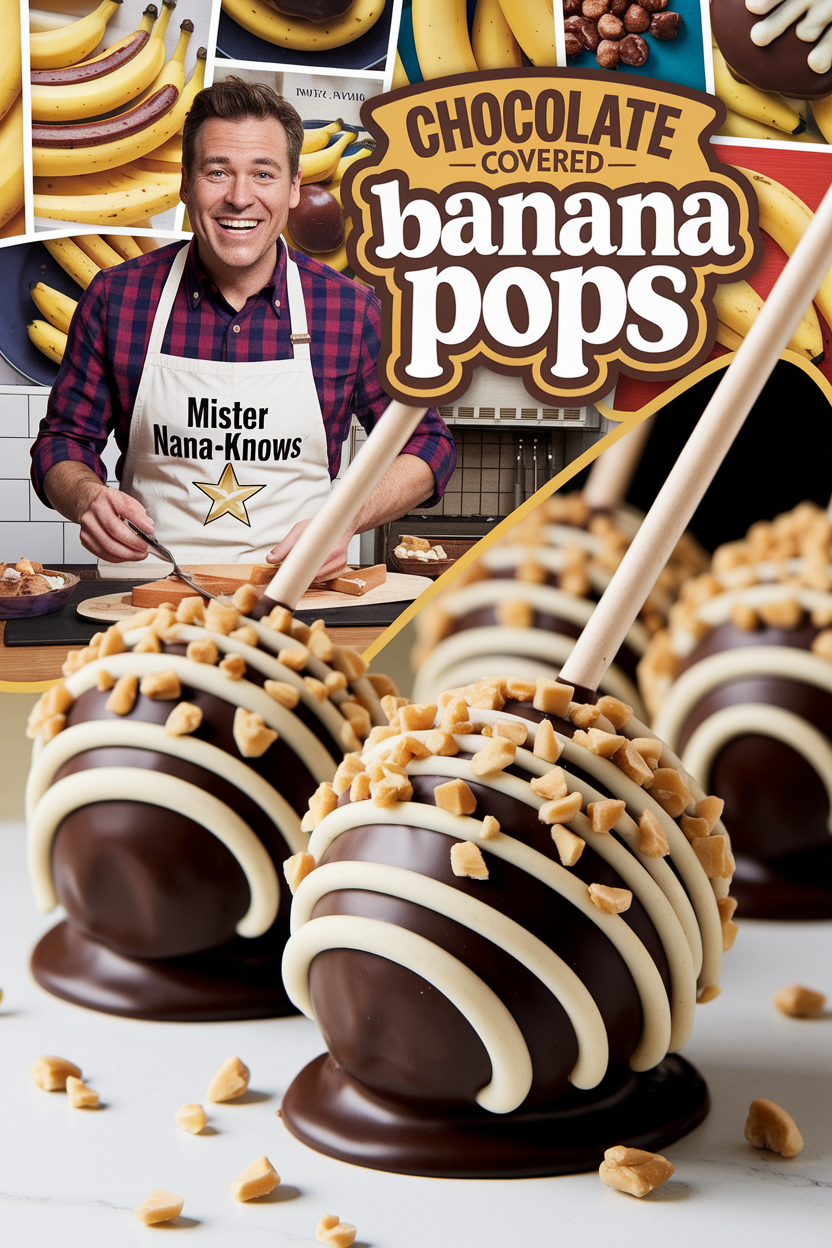
Brief Overview: These frozen banana pops are a fun, wholesome treat made by skewering halved bananas on sticks, freezing them, then dipping in chocolate.
In this version, before dipping, the bananas are smeared with a bit of peanut butter and rolled in crushed peanuts for extra flavor and crunch rachlmansfield.com, rachlmansfield.com.
Once frozen solid, each banana pop is coated in a shell of melted semi-sweet chocolate. You can then quickly add toppings like more nuts or sprinkles before the chocolate sets.
After a final freeze to harden everything, you have a handheld frozen banana that’s sweet, creamy, and crunchy all at once.
They’re like a healthier popsicle – mostly fruit with some heart-healthy fats and just a thin layer of chocolate. The recipe uses only four ingredients (banana, peanut butter, peanuts, chocolate), making it super simple.
Nutritional Profile: (per banana pop)
| Calories | Protein | Fat | Carbs |
|---|---|---|---|
| ~122 kcal | 3 g | 5 g | 18 g |
Why It’s Great: This treat hits the spot for those ice cream bar cravings but is much lighter. Bananas, when frozen, take on an ice cream-like consistency – they become creamy, not icy.
The chocolate shell gives that satisfying snap when you bite in, and the peanut butter plus peanuts elevate the flavor to a banana-peanut-chocolate bliss.
These pops are also naturally portion-controlled and contain far less sugar than a typical dessert (only the chocolate has added sugar). They’re quick to make and store well in the freezer, so you can always have a sweet treat on hand.
Kids love making and eating them (who doesn’t love food on a stick?), and adults find them nostalgic (like those theme park frozen bananas) yet more wholesome.
This recipe went viral on TikTok for its simplicity and deliciousness rachlmansfield.com, and many note they keep a stash in the freezer for whenever a chocolate craving strikes.
Who Benefits: Families looking for a healthier dessert option will adore this – it’s fruit-based and can even be dairy-free if you use dark chocolate. Those with dietary restrictions benefit too: it’s vegetarian, can be made vegan (with dairy-free chocolate), and is gluten-free.
If you’re a meal prep or snack prep person, you’ll like that you can make a bunch and they last weeks in the freezer. Also, anyone trying to cut down on ice cream or processed sweets can substitute these; they’re satisfying and naturally nutritious.
Athletes might even use them as a quick recovery snack (banana for carbs and potassium, peanut butter for protein). And of course, peanut butter-banana-chocolate fans (Elvis would approve!) will be in heaven.
Possible Variations: The beauty is you can customize the coatings endlessly. Not a peanut butter fan? Use almond or cashew butter, or skip it.
Roll in coconut flakes, mini chocolate chips, crushed pretzels, or granola instead of peanuts. Drizzle white chocolate over the dark for a fancy look.
You can also make “banana sushi” slices similarly: cut bananas into thick coins, freeze, dip one side in chocolate and add toppings – these are bite-sized versions.
For a lighter coating, skip the nut butter and just do chocolate shell; or for a thicker indulgence, double-dip in chocolate after the first layer hardens.
If you need to avoid chocolate, you could even do yogurt-dipped frozen bananas (though they’d need to be eaten straight from freezer as yogurt doesn’t form a hard shell). But classic chocolate is hard to beat!
Cooking Tips: Choose ripe but firm bananas – overly ripe ones may be too soft to skewer. Insert popsicle sticks (or even disposable chopsticks) into banana halves before freezing; make sure it’s at least halfway in so it holds well.
Freeze the bananas solid (at least 2 hours) before dipping; otherwise, they might slip off or the chocolate won’t set as quickly. When melting chocolate, add a teaspoon of coconut oil – this thins it out and helps it form a nice crisp shell.
Dip quickly and let excess drip off; the cold banana will make the chocolate harden fast, so have your toppings ready to sprinkle immediately after dipping each one. If the chocolate in your bowl starts to thicken from the cold bananas, you can re-warm it gently.
Work in batches (take a couple bananas out of the freezer at a time) so others stay frozen. Once dipped and set, store the banana pops in an airtight container or bag in the freezer to prevent freezer burn.
When you want to eat one, you can enjoy it straight away or let it sit 1-2 minutes for the banana to soften slightly. It’s the perfect guilt-free frozen dessert – enjoy!
Link to Source: Read the full recipe here: https://rachlmansfield.com/frozen-chocolate-covered-banana-pops/
17. Overnight Banana Oats – Vegan & Gluten-Free
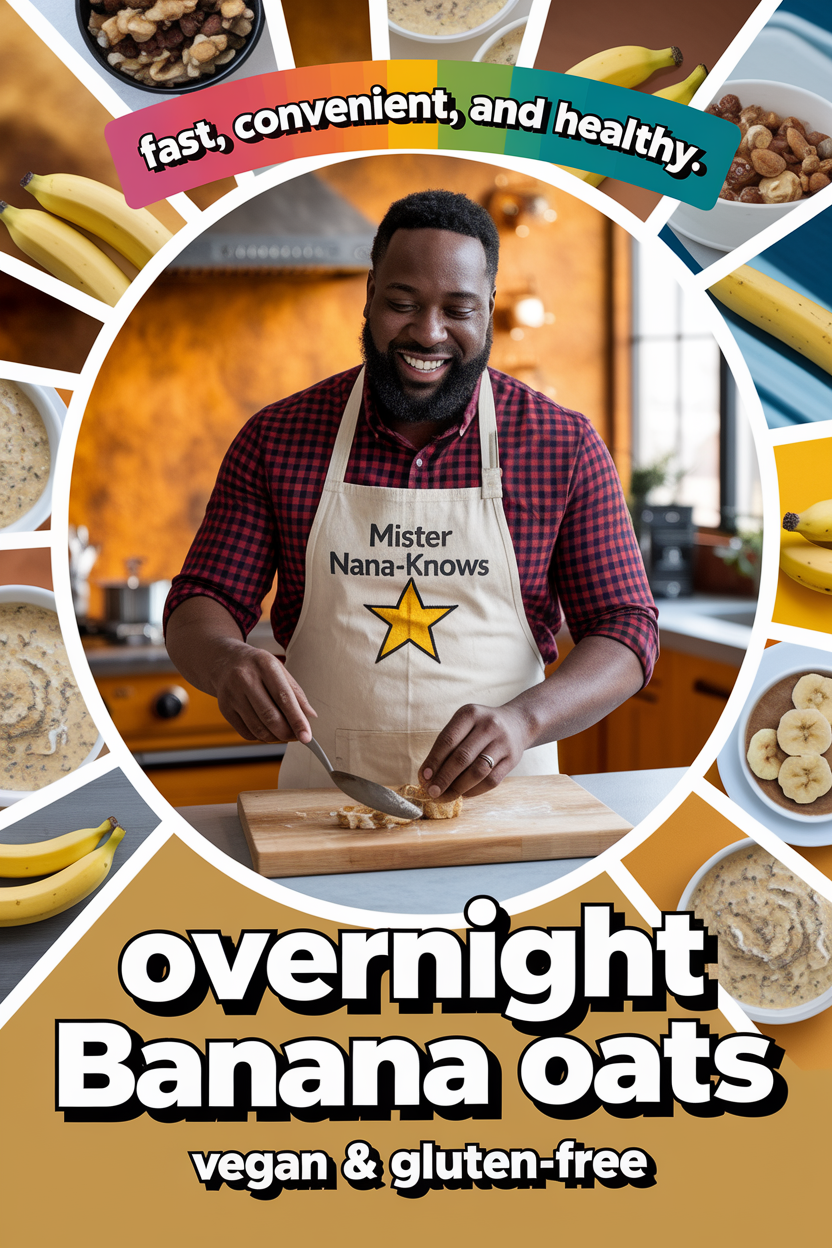
Brief Overview: Overnight oats are a no-cook, make-ahead breakfast, and this version features banana and chia seeds to create a thick, pudding-like oatmeal.
You simply stir together rolled oats, a mashed ripe banana, chia seeds, a dash of cinnamon, and your milk of choice (e.g., almond milk) in a jar. Add a splash of vanilla for extra flavor.
The mixture sits in the fridge overnight (or at least 2 hours), during which the oats soften and the chia seeds swell to thicken the mixture. By morning, you have creamy banana-infused oats ready to eat.
It tastes like banana bread batter – lightly sweet from the banana and hearty from the oats. Serve cold, or warm it up if you prefer. Top with extra banana slices, nuts, or a drizzle of honey/nut butter for added texture and flavor.
Nutritional Profile: (per one serving jar)
| Calories | Protein | Fat | Carbs |
|---|---|---|---|
| ~364 kcal | 10.6 g | 10.8 g | 66.3 g |
Why It’s Great: This breakfast is fast, convenient, and healthy. You assemble it in 5 minutes the night before, and breakfast is waiting for you – great for busy mornings.
It’s packed with fiber (from oats, chia, banana) which is super filling, and also has a good amount of protein especially if made with soy milk or with a spoon of yogurt stirred in ohsheglows.com, ohsheglows.com.
The banana overnight oats are naturally sweet without needing added sugar, which is a big plus. Many people love how customizable overnight oats are – you can add mix-ins as you like – and that you can meal-prep multiple jars for several days.
Also, eating oats and chia is great for digestion and sustained energy. This particular combo (banana-cinnamon-vanilla) is a fan-favorite; it’s simple but tastes really delicious – almost like you’re eating dessert for breakfast, yet it’s nutritionally balanced.
With a 5-star rating on the source site ohsheglows.com, it’s clear this recipe is a reliable go-to.
Who Benefits: Everyone who claims “no time for breakfast” – this is the solution. Also, if you’re not a morning cook, you can still have a wholesome breakfast ready.
It’s excellent for fitness enthusiasts: oats fuel your workout, and chia plus banana aid recovery (potassium, omega-3s, etc.). If you’re watching your cholesterol or blood sugar, this has soluble fiber that helps with both.
Families can benefit too – even kids can assemble their own jar with mix-ins (and they’ll likely enjoy the sweet banana flavor).
Vegans and those on dairy-free diets benefit since this is entirely plant-based (just use plant milk and perhaps a coconut yogurt if you want it extra creamy).
And it’s naturally gluten-free if you use certified GF oats. Basically, anyone wanting a nutritious, easy, grab-and-go breakfast will love overnight banana oats.
Possible Variations: There are endless overnight oat variations. You can stir in a spoonful of peanut butter or almond butter with the banana for a PB-Banana twist. Add cocoa powder for chocolate banana oats.
Throw in a handful of blueberries or strawberries for extra fruit tang. If you like it richer, use a mix of coconut milk (the creamy kind) with almond milk.
Or for extra protein, use Greek yogurt in place of some milk (if not vegan) or a plant-based protein powder; just add a bit more liquid if using powder.
Some enjoy adding a little maple syrup or honey if their banana isn’t super ripe and sweet. Toppings are fun too: walnuts or pecans give crunch (and make it taste like banana bread), shredded coconut, or even a sprinkle of granola on top.
You can also blend the banana with the milk before mixing for an ultra-smooth consistency.
Cooking Tips: Use old-fashioned rolled oats for best texture – quick oats can get too mushy and steel-cut won’t soften enough.
The chia seeds are optional but highly recommended because they thicken the mixture nicely and add nutrients; if you skip chia, reduce the milk amount by about 1/4 since there’s nothing absorbing that liquid.
Make sure to use a very ripe banana (the mash mixes better and sweetens more). When mixing, ensure all oats are submerged in liquid so they soften evenly.
If you find the mixture too thick in the morning (depending on your oats/chia ratio), simply stir in a splash more milk. Conversely, if it’s too thin, add a spoonful of yogurt or more chia and let it sit a bit longer.
Overnight oats are meant to be eaten cold like pudding, but you can microwave it for 1-2 minutes if you prefer warm – just be aware the banana flavor might be more pronounced when warm.
Lastly, these keep well up to 3 days in the fridge, but the banana may brown slightly – a squeeze of lemon juice in the mix can prevent that if it bothers you (though once mixed in, it’s usually fine). Enjoy your effortless, tasty breakfast!
Link to Source: Read the full recipe here: https://ohsheglows.com/vegan-overnight-oats/
18. Banoffee Pie, Banana-Toffee Pie

Brief Overview: Banoffee pie is a British classic combining bananas, toffee (dulce de leche), and whipped cream in a cookie crust. The base is typically a crushed biscuit or graham cracker crust, pressed into a pie dish and briefly baked or chilled to set.
Then comes a layer of gooey toffee – often made by boiling sweetened condensed milk into a thick caramel (or using pre-made dulce de leche). Sliced ripe bananas are laid over the toffee. On top of that, a mountain of lightly sweetened whipped cream is spread.
Finally, it’s garnished with chocolate shavings or a sprinkle of instant coffee powder for contrast. The pie slices reveal the delicious layers: buttery crust, fudgy toffee, soft bananas, and airy cream. Every bite is an indulgent mix of caramel sweetness, fresh banana, and cloud-like cream.
Nutritional Profile: (per slice, 1/8 pie)
| Calories | Protein | Fat | Carbs |
|---|---|---|---|
| ~596 kcal | 3 g | 44 g | 50 g |
Why It’s Great: If you love caramel and bananas, this might be your dream dessert. It’s decadent and sweet, yet the bananas add a nice light fruitiness and the whipped cream balances the richness.
The texture combination is fantastic: crumbly crust, silky dulce de leche, tender banana, and creamy topping. Banoffee pie is also a no-bake (or minimal bake) pie, which is convenient.
It’s surprisingly easy to make with simple ingredients, yet it tastes like something from a fancy bakery. This pie tends to impress at gatherings – many people haven’t heard of it, but once they try it, they’re hooked (some literally can’t stop at one slice bonappetit.com).
It’s the kind of dessert that often wins “best dish” at potlucks. Also, it has a bit of retro charm (being a popular recipe from the 1970s) that makes it fun. In short, banoffee pie is a crowd-pleaser – indulgent comfort food at its best.
Who Benefits: Anyone with a sweet tooth! It’s perfect for entertaining; it feeds a crowd and has that wow factor in flavor. Banana lovers, of course, get one of the best banana desserts out there (it’s even said to be one of the first things that disappear on a dessert table).
It’s a nice make-ahead dessert since it needs chilling – you can assemble it a few hours before an event.
Busy bakers benefit because using pre-made dulce de leche and store-bought crust can cut down time (though homemade elements make it extra special). If you find fruit pies too labor-intensive, this is a great alternative that still uses fruit.
It’s not exactly a “healthy” dessert, but hey, there’s potassium from bananas – we’ll take it! In essence, those who benefit are the ones eating it, because it’s pure delight.
Possible Variations: There are many riffs on banoffee. If you want to skip making toffee, you can use a thick caramel sauce, or boil a can of condensed milk ahead of time (just be careful and follow proper instructions) sugarfreelondoner.com.
Some like to add a layer of chocolate ganache or Nutella under the caramel for a chocolate-banoffee twist.
You can also incorporate coffee: for instance, fold a bit of espresso powder into the whipped cream for a subtle coffee flavor (bananas + coffee + toffee is amazing). If you need a shortcut, use a ready-made graham cracker crust.
For presentation, individual banoffee parfaits in glasses are cute – simply layer crumbs, caramel, banana, cream in each cup.
Another idea: add peanut butter to the toffee layer for a peanut-butter-banoffee pie. Or make it tropical by adding a few slices of fresh mango or pineapple with the banana. But the classic needs little tweaking – it’s already wonderful.
Cooking Tips: For the crust, pack the crumbs tightly and chill or prebake so it holds together well.
Use firm-ripe bananas – overly ripe ones can get mushy in the pie. Dip banana slices in lemon juice briefly to slow browning if not serving the same day. Spread the dulce de leche carefully (if it’s too stiff, gently warm it to a spreadable consistency).
When whipping cream, add a touch of sugar and vanilla, but don’t over-sweeten – the toffee is sweet enough. Whip to soft peaks if you want a billowy, soft texture; to stiff peaks if you need it to hold shape longer (like for piping).
As you assemble, ensure bananas are fully covered by cream to minimize browning exposure.
Chill the pie for at least 2 hours so everything sets; but serve within a day for best banana freshness (the crust can get soggy after a day or two from moisture).
Use a sharp knife to cut through the banana and crust layers cleanly when serving. And perhaps most important: expect it to disappear fast (you might even want to make two!).
Link to Source: Read the full recipe here: https://preppykitchen.com/banoffee-pie/
19. Grilled Peanut Butter Banana Sandwich
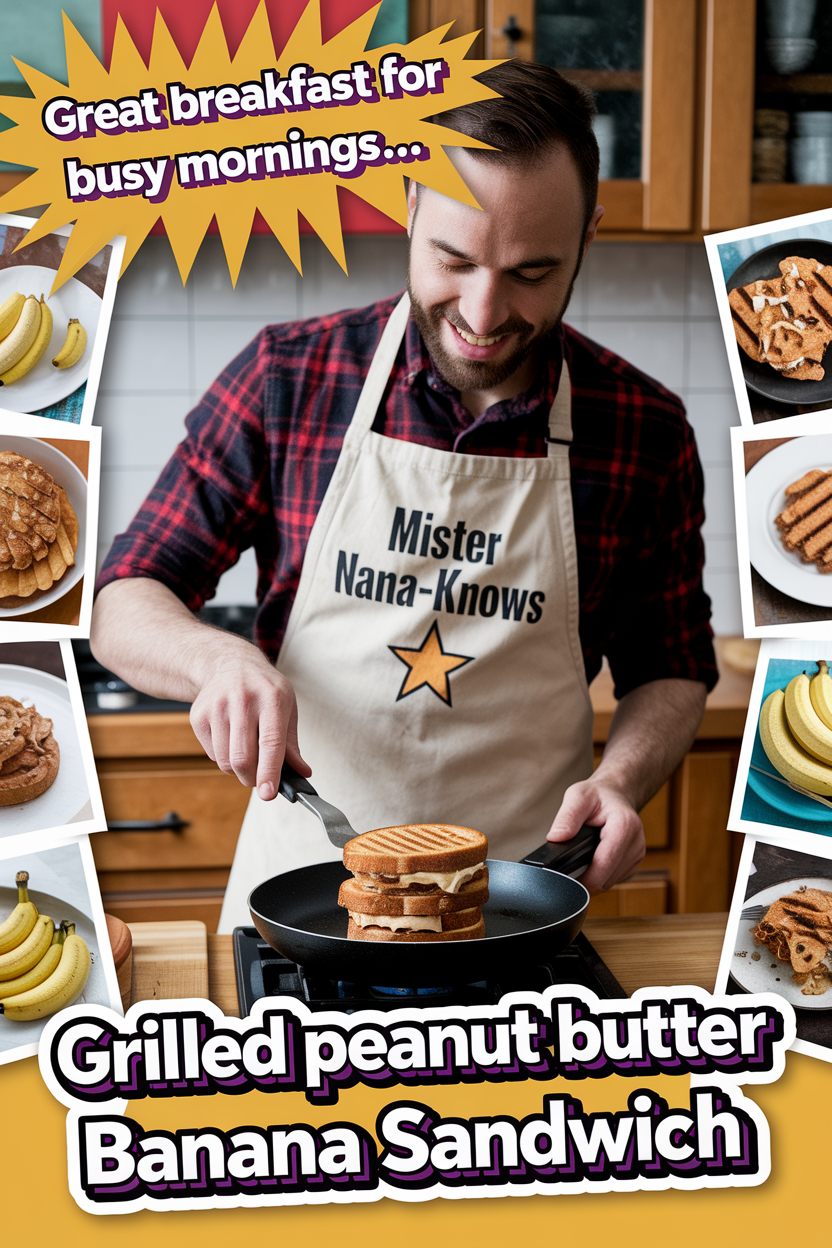
Brief Overview: This is a warm, gooey sandwich featuring peanut butter, sliced banana, and honey grilled between bread – famously known as Elvis Presley’s favorite.
It’s basically a sweet spin on a grilled cheese. To make it, you spread one slice of bread with peanut butter (smooth or crunchy) and the other with a bit of softened butter (or more peanut butter).
Layer banana slices on the peanut butter, drizzle with a little honey or maple syrup, and sprinkle of cinnamon (and even chopped nuts for crunch).
Close the sandwich and grill it in a pan (some use a touch of butter or even mayo on the outside for a crisp golden crust) until the bread is toasty and the filling is warmed through.
The result: a sandwich that’s oozy in the middle with melted peanut butter and soft banana and crispy on the outside. It’s sweet, salty, and absolutely satisfying.
Nutritional Profile: (per sandwich)
| Calories | Protein | Fat | Carbs |
|---|---|---|---|
| ~419 kcal | 16.9 g | 18.9 g | 51.1 g |
Why It’s Great: This sandwich is the ultimate comfort snack or breakfast. It takes simple ingredients most people have and turns them into something greater than the sum of its parts.
The combination of peanut butter and banana is a classic – full of protein, healthy fats, and fiber – so it’s actually quite filling and energizing.
Grilling it takes it up a notch: the bread gets buttery and crisp (almost like French toast vibes if you use cinnamon), and the warmth intensifies the flavors. Many find this a nostalgic treat, reminiscent of childhood or the famous rock ‘n’ roll legend’s notorious craving.
It’s also versatile: you can customize it with additions like bacon (that’s the true Elvis style!), but even the vegetarian version is indulgent. On top of all that, it’s quick – you can whip it up in minutes – and it hits the spot whether you need a hearty breakfast on the go or a late-night sweet tooth fix.
Who Benefits: Anyone who loves peanut butter (or nut butters in general) will love this. It’s a great breakfast for busy mornings since you can eat it with one hand if needed and it’s packed with enough nutrition to keep you going.
Runners or athletes may use it as a pre-workout meal (banana and peanut butter are both popular fuel foods). Kids often enjoy this sandwich too – it’s a fun change from the usual PB&J and can be sliced into sticks or triangles for small hands.
Vegetarians looking for a substantial sandwich beyond veggies and cheese will appreciate this protein-rich option.
Also, if you’re bored of plain toast or oatmeal, this gives you those same breakfast staples (bread, banana, nut butter) in a more exciting form. Basically, peanut butter-banana fans and comfort food seekers benefit the most!
Possible Variations: As mentioned, the full “Elvis” includes some crispy bacon inside – if you eat meat, you could try that for a salty crunch (it’s strangely delicious).
For a healthier twist, use whole grain bread and add chia seeds or flax on the peanut butter. You can swap peanut butter with almond butter or sunflower seed butter if you have allergies.
Add thinly sliced strawberries for a PB-banana-jelly vibe, or even a smear of Nutella for a chocolatey version.
Some recipes add marshmallow fluff for a fluffernutter style. For extra spice, a dash of nutmeg or allspice along with cinnamon can be nice. If you have a panini press, you can press the sandwich instead of frying in a skillet.
To reduce calories, one trick is to spray the bread with a bit of cooking spray instead of buttering the outside, or use a nonstick pan and forego butter on the outside altogether (the bread won’t brown as deeply, but it will toast). However, a little butter on the outside really makes it more decadent and crispy.
Cooking Tips: Use bread that’s not too flimsy; a sturdy sandwich bread or sliced brioche works well. If your peanut butter is very thick, you might microwave it 10 seconds to spread easier so it doesn’t tear the bread.
Layer bananas evenly but not too thick, so the sandwich isn’t overly bulky (about 1/4-inch slices). Cooking on medium-low heat is key – you want the peanut butter to warm and banana to soften by the time the bread is browned, without burning the bread. Press gently with a spatula as it grills to help it all heat through.
Usually 2-3 minutes per side does it, but peek to ensure it’s not burning. If adding honey, don’t overdo it or it can gush out (you can always drizzle more on the finished sandwich instead).
Let it cool just a minute before biting in – hot peanut butter can burn! For serving, it’s rich on its own but you could dust with a bit of powdered sugar or serve with a cold glass of milk.
And if you somehow have leftovers (unlikely!), reheat them briefly in a pan or toaster oven to enjoy warm again. This simple sandwich, loved by a king of rock, just might rock your world too.
Link to Source: Read the full recipe here: https://pickyeaterblog.com/banana-peanut-butter-sandwich-recipe/
Conclusion
Bananas prove to be one of the most versatile ingredients in the culinary world. As we’ve seen, they can sweeten baked goods naturally, stand in for eggs and dairy in vegan recipes, add creaminess to smoothies and “nice cream,” and even shine in savory dishes like curries.
It’s no wonder banana recipes are trending across different diets – they offer indulgence without the guilt, and adaptability for various dietary needs.
Whether you’re enjoying a vegan banana bread for breakfast, a keto-friendly banana bread as a low-carb treat, or a banana cocktail by the pool, there’s a banana-based recipe for every occasion and craving.
Banana Storage & Ripening Tips: To get the most flavor, use bananas at the right ripeness. For baking (breads, muffins, pancakes), very ripe bananas with brown spots are ideal – they mash easily and bring lots of sweetness.
If your bananas aren’t ripe yet, you can speed it up by placing them in a paper bag with an apple or by baking unpeeled bananas in a low oven (300°F) for ~15-20 minutes until the skins blacken (let them cool before use).
Conversely, to slow ripening, separate bananas from the bunch and store in a cool spot; you can also refrigerate ripe bananas (the skin will turn brown but the flesh stays good).
Frozen bananas are fantastic to have on hand: peel and store them in an airtight bag in the freezer – these are perfect for smoothies, nice cream, or thawing for baking.
Enhancing Banana Flavor Naturally: Bananas pair wonderfully with ingredients like cinnamon, nutmeg, and vanilla – these amplify the banana’s sweetness without extra sugar.
A pinch of salt in banana recipes can also heighten flavor (for example, a tiny salt on banana chips or in a smoothie balances sweetness). Roasting or sautéing bananas (as seen in Bananas Foster or grilled sandwich) brings out their sugars and adds caramel notes.
Using brown butter or coconut oil in banana recipes can impart a deeper aromatic quality that complements banana’s mellow taste. And don’t forget acid: a squeeze of lemon or a dash of yogurt can brighten banana’s flavor in an otherwise rich dish.
Bananas as Substitutes: In healthy baking and cooking, bananas are a secret weapon. Their moisture and binding ability allow them to replace less wholesome ingredients.
For instance, mashed banana can substitute for some or all of the butter or oil in muffins and quick breads – yielding a tender product with less fat. (Usually 1/2 cup mashed banana can replace 1/2 cup butter, though results may be a bit denser and you’ll have banana flavor.)
Likewise, one mashed ripe banana can act as an egg substitute in pancakes, waffles, or brownies – it binds and adds richness (though it does lend flavor, so use in recipes where banana taste is welcome).
In smoothies, using frozen banana chunks instead of ice cream or yogurt gives a thick, creamy texture with no dairy at all. And as we saw in the French toast recipe, blended banana can even replace eggs in a custard base.
These tricks allow you to lighten up recipes or make them vegan, all while adding nutrients and sweetness naturally.
Incorporating bananas into your diet is not only delicious but also smart – they’re budget-friendly, available year-round, and packed with potassium, vitamin B6, and fiber.
So whether you’re meal-prepping overnight oats for busy mornings, treating yourself to a decadent banoffee pie, or blending a post-workout shake, bananas have got you covered.
Their versatility bridges cuisines and meal types, proving that a simple fruit can elevate any dish.
Feel free to experiment with the recipes above and make them your own. With bananas in your kitchen, you’re always just a recipe away from something comforting, wholesome, and irresistibly good. Happy cooking and bon appétit!